Making dry-cured sausage at home recipes. Homemade dry-cured sausage: recipe. How to properly stuff a gut with minced meat
The taste is significantly superior to more commonly purchased sausages. However, they are equally superior in prices. Therefore, lovers of delicious food sadly pass by tempting shop windows, allowing themselves this luxury only on major holidays. But gourmets needlessly limit themselves to their favorite dish, since making dry-cured meat at home is not so difficult. Of course, you will have to wait - the process is quite long. However, you can adjust the subtleties of taste by adding spices that you like and removing those that you don’t like. Moreover, made at home and made with love, it will definitely be from high-quality sources and will not expire.
Only someone who has special equipment can simply dry-dry raw beef, poultry or pork. The rest must first marinate the meat.
"Wet" drying
Homemade dry-cured meat preparation begins with salting it. Let's first consider the traditional method using brine. For every half kilo of meat you will need about a liter. Water is boiled, salt is dissolved in it (two heaped spoons per liter), a little sugar is added, a full tablespoon of red and black pepper, peppercorns and bay leaves are added - just like for pickled cucumbers. Leave for three minutes - turn off and cool. The bay leaf should be discarded - it will add bitterness and a not very pleasant smell. The meat is cut medium, dipped in brine and left in it for five hours right in the kitchen. Then it is placed in a cool place for three days. Then the liquid is decanted, and the meat is placed under a press until moisture stops appearing, after which a mixture of red and black pepper is rubbed into it (other spices can be added). The slices are wrapped in clean gauze, placed in a sealed container and placed in the refrigerator for a week. During this time they will marinate well. The meat is again rubbed with spices, wrapped in a clean cut and hung in a dry place where it will not be disturbed. A week later, the dry-cured meat (which has reached the desired condition at home) is served on the table. It will not spoil in the refrigerator for three months.

"Dry" method
This option on how to make dried meat at home is usually chosen by those who believe that beef (pork/poultry) is too saturated with unnecessary moisture in the brine. Take a whole piece and rub it very carefully with a spice mixture of two spoons of salt, one of sugar, half of coarsely ground black pepper, the same amount of mashed juniper berries and crushed seven bay leaves (all calculated for a kilo of raw materials). The future dry-cured meat is tightly wrapped in cling film, a heavy load is placed on it, and the entire structure is put into the refrigerator for at least a week. You will have to drain the meat juice regularly, otherwise the product may spoil. Then the slice is dried, rubbed with the same seasoning mixture, laid out on a wire rack and hidden back for two weeks. Turn over at least once every two days! The finished dry-cured meat is wrapped in paper or put into a paper bag. Please note: if prepared using this method, it will “live” in the refrigerator for no longer than a month.
Spicy Beef Jerky
So far we've covered the basics, so to speak. You can use them to prepare any dry-cured meat at home. However, there are many refinements, using which you can get a more delicious delicacy. For example, you can do it differently with beef - the result will be much more flavorful and “ripe” faster. A large piece of meat is taken, cleaned of excess veins and cut along the entire slice into thin strips - 5 centimeters each, no thicker. Place 10 washed large blackcurrant leaves, two horseradish burdocks, a couple of cinnamon sticks, a full spoon of chopped ginger, 400 grams of salt, bay leaf and peppercorns into boiling water (2 liters). This amount of brine is enough for as much as 10 kilos of beef. The trick is that pieces of meat are dipped in brine for three minutes, then cooled, strained and hung in gauze bags for 10 days in a dry and dark place. Temperature is not as important as good ventilation and lack of light.

Quick drying
You can also get dry-cured meat using the oven. The recipe involves cutting the beef into very small pieces (about 5 x 5 cm). Moreover, before the main processing, the washed and dried meat is put into the freezer to make it easier and smoother to cut. A sprinkling of salt (60 g), ground black pepper (10 g) and hot red pepper (5 g) is made. Beef cubes are rolled in it, left for 10 minutes to soak in spices and laid out on a wire rack so that they do not touch. The oven is heated to 40 degrees, a wire rack is placed in it and left to dry for half a day.
Grilled
For this method, the beef will have to be cut even thinner - two centimeters wide, and into shorter strips along the length of the grill grate. Spices (cinnamon, black pepper, red pepper, salt) are mixed in a ratio of 2:5:5:60. Rub all the pieces with the mixture, place them on a wire rack at intervals and dry for about seven hours. The disadvantage of such dry-cured meat is its short shelf life. Two weeks, no more. However, it is eaten much faster. You can dry pork in the same way, only instead of red pepper you use cumin and the meat is leaner.

Dried pork
Most people are sure that it is contraindicated to dry pork: they say it is a little fatty, is not completely soaked and quickly disappears. You just don’t know how to cook it! In our opinion, the only drawback that home-cooked pork (dry meat) has is that it cannot be made into a large piece. But if you cut it into small slices, it will be delicious! The pieces should be no larger than 4 centimeters. Each is rolled in a mixture of coriander, a set of Italian or other spicy herbs, white and black pepper (their quantity is left to your discretion), a tablespoon of coarse salt and a teaspoon of sugar. All this is enough for half a kilogram of pork. The pieces are placed in a tray, moderately sprinkled with vodka (half a shot glass is enough) and left on the bottom shelf of the refrigerator for 14 hours. The juice must be drained! Then the excess liquid is removed, and the marinated meat in a gauze bag is hung on a ledge in the kitchen for one and a half to two weeks. Enjoy your health!

Dried chicken
You can also make dried meat from poultry. The recipe, again, should not cause any particular difficulties. The simplest possible option: take a carcass of any size, carefully rub it with salt inside and out, wrap it in parchment (if you don’t have it, you can wrap it in cellophane, but you’ll have to ventilate it), tie it tightly with twine and hang it in the pantry (or in the garage, if it doesn’t stink). gasoline (actually, anywhere, as long as it’s dark and cool). After a couple of months you can eat. And it can be stored for up to three years.

Dried with garlic
It is clear that the method described above is, rather, a method of preparing, rather than preparing, a delicacy. If you want something tasty, you will have to try, since you can prepare dry-cured chicken meat only separately from its bones. That is, the carcass will have to be thoroughly washed and all the meaty parts separated from the bony ones. The pulp is cut into thin strips, the garlic is finely chopped and ground in a mortar with salt at the rate of half a glass of the latter per head of garlic. Rub the strips with this mixture, put them in bags (our people recommend old, but clean nylon socks) and hang them in a warm place, but in a draft for 10 days.
Juniper chicken legs
Many in childhood dreamed that scientists would breed chickens with ten legs - then children would get more tasty body parts. For those who have remained faithful to their childhood ideas and have not exchanged them for the rules of dietary nutrition, here is our recipe.

Take the legs, wash them and rub them generously with salt (for 10 kilograms of legs - 300 g of salt), mixed with cinnamon (a teaspoon) and sugar (5 tablespoons). All the wealth is laid out in a voluminous vessel, sprinkled with juniper berries (1/5 kilogram). Another 300 g of salt is dissolved in hot water (10 l) and boiled with cloves and peppercorns. The legs are filled with the strained solution, and a heavy press is placed on them for 3 hours. At the end of the salting, the legs are strained, blotted and dried for a month in a fairly cool (about 10 degrees) room. That's when happiness comes!
This is not some kind of surrogate from a store that has been mixed with who knows what
It's fast, easy, cheap and damn tasty.
Preparing this type of sausage is not at all difficult, no more difficult than making homemade dumplings.
The main intrigue in sausage is always the intestines. There is a lot of fuss with them; because of the intestines, the sausage takes a long time to dry, which at home requires great heroic conditions.
In addition to achieving excellent culinary results with little effort, in this recipe we can do without any guts.
Preparation
The essence of the recipe:
We take marinated meat, pass it through a meat grinder, add chopped salted lard, shape and dry the sausage.
The result is always wonderful.
Of course, there are many other recipes for homemade dry-cured sausage, but they are more complicated.
So a sausage recipe based on marinated meat is what the home cook needs.
PICKING MIXTURE
To salt meat, prepare a salting mixture per 1 kilogram of meat:
. 1 heaped tablespoon of salt + level tablespoon of salt, total approximately 45-50 grams (many recipes recommend less salt - 1 heaped spoon, 30 grams).
The salt is by no means iodized - you need coarsely ground rock salt. If the salt is iodized, the biltong will have a strong iodine flavor!
. 1 level tablespoon of ground coriander. You can do more - it depends on the taste. Coriander is the main spice in biltong.
. 1 heaped teaspoon sugar (for complete aesthetics, brown cane sugar is recommended, but regular sugar will do)
. 1 teaspoon black pepper (you can add 1.5-2 teaspoons to taste). You can add red pepper to suit your taste.
. 2 g baking soda
In industrial production, saltpeter (1 g) is added to give the meat a beautiful color, but we don’t need extra nitrates.
The coriander is pre-roasted (do not burn it!) and ground in a coffee grinder.
Or spices to grind them are crushed through the film with a rolling pin.
All spices are mixed.
Here is another version of the mixture - the classic Namibian composition of the salting mixture from Okahandi for 1.5 kg of meat:
. salt - 60 g,
. pepper - 2 g,
. sugar - 15 g,
. soda - 3 g,
. coriander - 15 g.
You can make very different pickling mixtures. The main thing in them is to accurately observe the prescribed amount of salt and coriander.
Everyone who tries it reports the same impression:
- Tasty! And very similar to smoked...
We marinate the beef as for biltong, and the same 12 hours
After marinating, the meat is ready to prepare the sausage.
We cut it into pieces and pass it through a meat grinder.

Take salted bacon. We cut it into thin slices and put it in the freezer. When it freezes, cut it into thin strips and cut the straws into cubes.
You should try to cut the cubes smaller - 2x2x2 mm, but not larger than 3x3x3 mm.

Another option is possible - take a cold cube of lard and cut one of its sides crosswise into small squares, and then cut off the cubes in bulk.
The lard must be cut with a knife, and not passed through a meat grinder. Because after the meat grinder, a lot of fatty “ointment” remains in the lard from crushed pieces of lard, which will prevent the minced meat from sticking together.
NOTE. For a similar reason, onions for lula kebab must be chopped by hand and in no case passed through a meat grinder - otherwise, due to the abundance of onion juice, the minced meat will spread and fall off the skewers.

Mix the minced meat with lard: approximately 1 part lard to 5 parts meat.

Now the main culinary secret is how to do without intestines. To form the sausages, we will use a makisu mat, which is used in Japanese cuisine for making maki rolls.
If you are not a fan of sushi and don’t have makisa at home, any small mat will do.
We wrap the makis in several layers of cling film so that it does not get dirty, and form sausages.

Sausages can be made either round or rectangular.
Make sausages of different thicknesses - thin ones dry faster, thicker ones are easier to cut into sandwiches.

The photo shows how many molded sausages were made from 300 g of beef and 60 g of lard.
We place them on a stainless steel mesh (frying pan mesh to protect against splashes or similar), and on the windowsill, where the air flow is stronger.
After a day or two, the sausages become crusty, become tougher, and can be hung up to dry further, like biltong.

Another 2-4 days of hanging drying (time depending on thickness), and the sausage is ready.
Now you need to cool it a little in the refrigerator and you can serve it.
Storing this sausage is like storing biltong
Sausage variation with paprika and fennel

Sausage with paprika and fennel is very good.
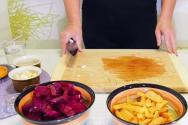
We take the freshest beef, cut it into small pieces, dry salt it:
Take for 1 kilogram of meat:
2 heaped tablespoons salt
1 heaped tablespoon of sugar
1 heaped teaspoon black pepper
Wash and dry the dishes thoroughly.
Rub the meat with the mixture and place it so that the released juice escapes. There are various tricks for this. As one option, you can use two plates - one large one, place a smaller plate in it upside down, and put the meat on it (as shown in the photo). Then the juice goes under a small plate and the meat remains dry.
Sprinkle generously with paprika and fennel, add black pepper.
Let it sit for three to four days in the refrigerator.

Then we pass it through a meat grinder.
Mix with salted lard, as described above in this sausage recipe, form into a mat-makisa and dry according to the sausage drying scheme already outlined in this recipe.
By preparing biltong, basturma and dry-cured sausage with minimal effort, as described above, you will not only delight your family and guests with real, wholesome food, but will also gain fame as a great home cook. And few people receive such fame.
Biltong is just an African dish, a kind of dried meat with spices.
How to cook biltong? Very simple! Since biltong is simply dried and marinated meat, there are plenty of recipes and variations, just like kebabs. To prepare biltong you need:
meat (elephant, ostrich, buffalo, beef and so on; not pork, since according to this recipe the pork will not have time to salt) - 1 kg
1 heaped tablespoon of salt + level tablespoon of salt, total approximately 45-50 grams. Many recipes recommend less, 1 heaped spoon, 30 grams.
1 level tablespoon of ground coriander (coriander is the main seasoning in biltong).
1 heaped teaspoon of sugar
1 teaspoon black pepper to your taste.
salt is by no means iodized - you need normal coarsely ground rock salt - to taste
maybe soda
6% wine vinegar. How to cook biltong
THE PROCEDURE FOR PREPARING BILTONG IS ALSO VERY SIMPLE.
The meat is cut into strips 1 cm thick (or thinner), along the grain. You can also beat the strips of meat to make them thinner - then the biltong will cook faster. It is important that the meat must be beaten before it is treated with seasonings and vinegar - otherwise it will break into fibers when beaten.
Sprinkle the meat with 6% wine vinegar, sprinkle the mixture evenly on both sides, rub in, knead and mix thoroughly. Place tightly in a stainless steel container and place it under pressure in the refrigerator for 12 hours.
Under pressure, juice is released from the meat. There is no need to drain it - this is not dry pickling. After half the time (that is, after 6 hours), we turn the meat over, tamp it again and again press it under pressure. In total, the entire marinating process takes only 12 hours. This is unusually little for salting meat - but here it’s a matter of vinegar and thin slices. You can, of course, marinate for 24 hours - however, an extra 12 hours will not change the weather.
Next, dilute 6% wine vinegar with water 1:6. Dip the meat into it for 5 minutes, rinse and squeeze thoroughly. We hang it in a well-ventilated place so that there are no flies.
After a couple of days, the biltong is ready. If the slices were thin, it would be ready within a day. Don't let it become brittle. Again, it varies according to taste - some people like it drier, others think that the meat should still be quite soft in the middle.
To prepare dry-cured meat at home, you don’t need any unusual ingredients or expensive components. You will need a minimum of products, spices and seasonings, and they will probably be found in every home. You only need to go to the store for a good quality piece of meat. And if you have your own household, then going to the store can be crossed off your to-do list.
How to choose meat
How to prepare dry-cured meat at home and what type of meat to choose? Experts say that for this cooking method you can use pork, chicken, and beef. It is important that both frozen meat from the store and fresh meat from your own backyard are suitable.
Considering the fact that pork is more tender, juicy and soft, it is recommended to give preference to it. Dried pork at home will cook much faster than dry beef or delicacy chicken, which you have to tinker with.
Of course, the main selection criterion that any housewife should follow is the freshness of the products. We purchase meat only from trusted producers or at the local market, from a familiar butcher. It is better to choose pieces that have small streaks of fat.

Cooking options
There are two methods of preparing such a dish. Dried meat at home can be made by pouring a piece of meat into a fragrant brine with numerous spices. The second option is hanging and drying the meat. Let's look at the nuances.
Option one
Before you start cooking, it is recommended to rinse the meat thoroughly under running water and dry it with a paper towel. All unnecessary veins and films should be removed immediately.
Ingredients
- One kilogram of low-fat pork.
- Half a kilo of coarse salt (250 grams will be used for salting meat, and the second half of the salt will be needed for preparing the brine).
- Five to six cloves of garlic.
What spices we need
- Peppercorns.
- Red or black pepper (to taste).
- Coriander ground or seeds.
- Sweet paprika.
- Hot pepper.
- Sage.
- Rosemary.
- Bay leaf.
In total, you should have about 50-70 grams of spices and seasonings.

Cooking process
The first step if you prepare homemade dry-cured meat at home is always salting. 250 grams of salt, which we measured specifically for this case, need to be poured into a large container. Let's put a piece of meat there and roll it thoroughly in salt. It is important that the meat is well covered and soaked in it. Without removing the layer of salt, place the piece of meat in the refrigerator. He must spend three days there.
Many people ask: how to make dry-cured meat at home so that it is well salted? We advise you not to leave it unattended and drain the resulting liquid every day. Salt is added only if it has quickly and completely dissolved. If it is visible on the surface, then there is no need to add it. Many housewives simply drain the liquid, not paying attention to the condition of the salt. And this is very important, and it is not recommended to lose sight of this point.
Preparing the brine
Here the situation is even simpler than with salting. Pour one liter of water into the pan and add there the entire list of seasonings and spices that were listed above. Bring to a boil, turn off and wait for it to cool. Dip the meat into cold brine and put it back in the refrigerator. The pork remains in the brine for another three days.
Then we take out the meat, place it on a cutting board and place a weight on top. There we will get rid of excess liquid. Pork is kept under pressure for three to five hours. During this time, you can easily prepare a breading mixture consisting of a well-known set of spices.
When you take the meat out from under pressure, do not skimp and carefully coat the piece with spices. They will not only give the pork a unique aroma and taste, but will also help keep it fresh for a long time. Many of the listed seasonings have aseptic and preservative properties.
Place a piece of pork on a linen towel and refrigerate for another 24 hours. Checking the breading. If it is quickly absorbed, then add more. We do exactly the same as we did with salt. We wait another day. Ready. This is how dry-cured meat is prepared at home (the recipe with brine is presented to your attention).

Option two
Now we will tell you how to make dry-cured meat at home without brine. To do this you will need:
- One kilogram of pork balyk or pork neck.
- 150 grams of salt.
- 100 grams of vodka.
- Two or three bay leaves.
- Black peppercorns.
- Ground black pepper.
- Coriander.
- Paprika is hot.
- Chili pepper (optional).
- 20 grams of garlic.
How to cook
As we have already said, any preparation of dry-cured meat at home will begin with salting. But if in the recipe with brine we simply put the pork in the refrigerator to salt, then in this case we need to put it under pressure first. The meat will be salted with it for 24 hours.
Then the pressure will need to be removed and the meat left in the refrigerator for another four days. The liquid that will form during the process does not need to be drained. Add one hundred grams of vodka there and simply turn the meat several times a day. This is how dry-cured meat is salted at home (a recipe without brine is an alternative preparation).

Let's get the meat. We don’t wash it, but simply wipe it away from salt and liquid. Rub with a mixture of herbs and spices. Wrap the piece in a towel, wrap it tightly with twine and hang it in a cool place. You can hang it right in the kitchen, but it is better to do it in a cool, dark pantry or on the balcony. Some housewives advise alternating places.
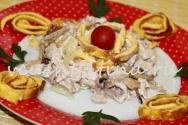
The meat is dried for five days. We take it out, cut it into thin slices and serve it to the table. This dish is great for slicing for a holiday table or for making sandwiches. Agree, this homemade delicacy, prepared with your own hands, will be much healthier than sausage or ham from the store.

There is an opinion that sausage producers produce, to put it mildly, not very high-quality products. And few people can refuse sausages. What is the way out? The answer is simple - make the sausage yourself. In this case, you will be one hundred percent sure of the quality of the product. In this article I will share two recipes for dry-cured sausage. We will need minced chicken and pork. You can buy it ready-made or make it at home. You decide.
Homemade dry-cured chicken sausage
Kitchen appliances: stove, saucepan, sausage stuffer, bowl, sausage casing, grater, garlic grater, sausage twine.
Ingredients
How to cook delicious dry-cured sausage at home - step-by-step recipe
Video recipe
From the video you will learn a lot of interesting things about this recipe.
https://youtu.be/D3tzICql2sw
Homemade dry-cured pork sausage
Cooking time: 3-4 weeks.
Number of servings: 5 loaves.
Calorie content per 100 g: 228 kcal.
Kitchen appliances: stove, saucepan, sausage stuffer, bowl, sausage casing. grater, garlic grater, sausage twine.
Ingredients
How to make dry-cured sausage at home - simple step-by-step recipe

Video recipe for homemade dry-cured sausage
Watch a video about the process of making this sausage.
Hello everyone, today we will prepare a delicacy.
Homemade dry-cured sausage.
There are a lot of prejudices and rumors on this topic. Of course, the correct way is to strictly adhere to the temperature and humidity conditions. But despite the strict requirements, you can prepare excellent dry-cured sausage at home - in your apartment.
So, we need beef and pork, approximately in half. If your pig meat is fatty, you can do without lard, just take 1.5 kg of pork.
Be sure to take frozen raw materials, never warm!
I chop all the raw materials for this sausage with a knife. You can also use a meat grinder, but you must have very sharp knives and a large grate.
The fact is that the meat needs to be cut into pieces, and in no case mash or crush.

If you use beef casing, like I do, you need to soak it in water for 5-10 hours. It has a specific smell, but it will not be in the finished product.

Mix all our ingredients.
I use rare smoked paprika. Can be replaced with a simple spicy one.

As for nitrite salt. Here it is MANDATORY! and this is not a joke. If you don't have nitrite salt, forget about this recipe completely. The fact is that this sausage will not be subjected to heat treatment. There will be a long fermentation process of the meat. And in cases of using simple salt, there is a huge risk of the emergence of very dangerous bacteria, deadly bacteria. That's it. Nitrite salt is taken at the rate of 2.3% of the weight of the raw material.

Then mix our minced meat with spices thoroughly and for a long time.


Now, looking back, I would have cut the lard even smaller, as finely as possible.

Stuff all the minced meat into the casing.
Any casing with a diameter of 25-35 millimeters can be used.
Salting will take place in the shell; there are options for salting in minced meat, but this is how I do it.
Now a very important point. It is necessary to weigh each bundle of sausage and write on the tag the date and exact weight, down to grams.
The fact is that the sausage will be ready, with a weight loss of about 30-40 percent.

Now the most painful moment begins. Expectation.
The first stage is the ambassador. We put our sausage in the refrigerator on the top shelf, temperature 2-5 degrees and wait a week, exactly seven days. Turn the sausage occasionally.

Unfortunately, a couple of my loaves were torn and I had to bandage them. I’m not used to working with beef casings yet, well, I’m learning too.
After seven days, the second stage begins.
It is necessary to periodically remove our sausage from the refrigerator and hang it in the air. Ideally - a balcony. Here are a few conditions:
No draft
- lack of direct sunlight.
I did this: a day or half a day in the air, a day in the refrigerator. This way the sausage loses moisture.
There is another tricky nuance here. There is such a thing as hardening, this is when the outer layer of the sausage has dried out and a dense, hard and dry crust has formed, but inside the sausage is still soft - this is a defect. When seasoning, the sausage will not reach the desired condition. The outside will be dry, but the inside will still be wet.
There is a way to deal with this. You can determine the temper by touch; you can easily feel it with your hands by kneading the sausage. When we detect hardening, we do the following. Wrap the entire sausage in a damp towel and place it in the refrigerator for a day or more. By doing this we equalize the humidity in the sausage and the hardening goes down.
I repeat once again, the sausage should dry out evenly throughout the entire volume.

I did this procedure twice in a month.

When you lose weight in the right amount, the most difficult stage begins. The sausage is ready, you can eat it, but don’t rush. The longer you keep it (now just in a bag or in a vacuum), the much tastier it will become.
This is the most difficult thing. Of course, I can’t get past this stage, I’m starting to eat little by little. Oh, where is my willpower?

The tempering is clearly visible in this photo. Dark rim on the outside of the cut.

But after another week, with proper actions, there is practically no hardening. Oh yes, after a couple of weeks you can also flatten the sausage with your palm, so it will dry better - ferment.
A very popular question: I have mold, what should I do?
The answer is if you have mold, that's good, you're doing everything right. Of course, you don’t need to hang the sausage on the balcony and go to the sea for two weeks, then it will become covered with black mold, then of course you should throw it away. A light coating of white mold is normal (why did I say this to myself in Malysheva’s voice?). You just need to remove the mold with a cloth soaked in vinegar or oil and wait further.
Well, that seems to be all. I still have some of the sausage lying around, waiting for better times, almost a month has passed, that’s good, endure the same amount more, then it will be absolutely gorgeous!

Wow, this is a long story, it takes even longer to prepare, but it’s worth it, I assure you.
Bye everyone and see you again!
Cooking time: P01DT09H20M 1 day 9 hours 20 minutes