How to make wine from white grapes at home. Wine from grapes at home How much homemade wine from grapes is prepared
3291 09/18/2019 7 min.In most cases, grapes are bred specifically to produce natural wine. To enjoy the taste of a high-quality homemade drink, you must strictly follow the preparation technology. Of course, each winemaker has his own unique recipe and many little secrets, but the general procedure is always the same. If you miss at least one of the important stages of grape wine production, then all the work on growing the crop will be in vain. In this article we will tell you in detail how to properly prepare Home wine, both red and white.
Raw materials: quality, calorie content of grapes
The higher the quality of the grapes used to make the wine, the better the finished product will be. The main thing in preparing raw materials is proper harvesting. Harvesting must be done within the time required by a particular variety. It is important to choose the right day, the weather should be dry and warm, preferably no precipitation during the last 3 days. Freshly picked berries are not stored for long; it is best to immediately send them to.
It is better to harvest grapes in dry weather. Then you need to sort through, discarding small, dry or green berries, as well as discarding dry leaves and other natural debris.
When it comes to choosing a variety for making grape wine, you need to pay attention to the chemical composition of the berries. Winemakers believe that the higher the sugar content of the fruit, the higher the content and better taste ready drink. Ideal indicators for wine are 22-24% sugar and up to 10 grams of acids per liter of product. Of course, it’s a rare harvest that reaches such marks, but it’s worth focusing on them.
Find out about growing Elan onions from seeds.
Inventory and storage containers
Raw material processing
The harvested crop does not require any special pre-treatment. On the contrary, the less time and transformations the grapes undergo from the moment of harvest, the better. The most important thing is to clear the berry mass from leaves, spoiled or moldy fruits, and sort out unsuitable grapes (dry, small, unripe). It is under no circumstances recommended to wash the berries, since water will worsen the quality of the future wine, and the so-called “wild” yeast, which is important for proper fermentation, will be washed off the surface of the fruit.
You can learn how to properly store grapes.
Extracting juice: using a press machine or using the “garage” method
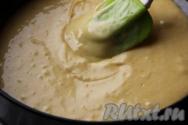
Preparing a homemade wine drink begins with processing the berries. Fill the selected container from a suitable material 3/4 full with berries. You can crush grapes using a special store-bought machine, but you can also do it manually, in the reliable old “garage” way: with your hands or feet, with a wooden pestle. Ground berries, juice with pulp, are left in containers for primary fermentation and the beginning of fermentation. In mass production, at this stage, sulfur (sulfur dioxide, no more than 20-25 mg per liter) is added to the berries for longer preservation and to prevent the development of fungi or harmful bacteria.
Mechanically pressed juice is considered not the best material for wine. Experts say that the drink is more saturated if the juice was obtained by gravity, squeezed out by its own mass of overripe grapes.
The crushed berries are covered with gauze and set aside in a dark place for 3-4 days. Sometimes the fermentation time is increased to 1-2 weeks, resulting in a darker, stronger product. During this stage, it is important to remove the pulp that accumulates on the surface several times a day. This is followed by another significant stage - the separation of pure juice. To do this, remove all the pulp with a spoon, and pass the remaining liquid through cheesecloth several times.
Fermentation of a healthy drink
This is the longest and most significant stage of wine production. The previously obtained pure juice should be poured into a glass or food-grade plastic container. The container should have a long, elongated neck. Then a water seal is installed on the neck - a device that limits the contact of the liquid with air. The following can be used as a water seal:
- special factory device;
- a plastic tube, one end of which is fixed to a bottle of wine, and the other is lowered into a jar of water;
- medical rubber glove with one punctured finger.

The container should be removed (let stand) in a dark, warm place. The fermentation temperature of red wine varies between 21-28 degrees. White wine requires a temperature of 18-23 degrees. Remember that temperature changes deteriorate the quality of the product, and an excessive decrease in temperature will stop the fermentation process.
By the way, the pressed pulp can later be used to produce homemade chacha.
Adding sugar: how much, strength
Every 2% sugar added to the wort increases its strength by 1 degree. It is believed that the optimal strength of wine for benefit is 14 degrees. Without the use of sugar, this indicator will remain equal to 9-11, you need to fix it yourself. Sugar is added after 2-3 days of fermentation of the drink. This is how it is done and how much sugar is needed:
- Pour 1 liter of wine from a common container and add 50 grams of sugar.
- Give it a try. If the liquid remains as sour, add another 25-30 grams.
- Pour the liter back into the container and leave for further fermentation.
- Repeat the procedure every 2-4 days throughout the fermentation until the sugar is converted into alcohol.
Removing the sediment: strain according to your mind
The full fermentation period is approximately 50-60 days. The readiness of the drink is indicated by a deflated glove, the cessation of gurgling of water in the jar (when using a water seal with a tube), and a clear boundary between the sediment and clear wine. If these signs are observed, then you need to immediately remove the drink from the sediment (strain), otherwise it will acquire an undesirable taste and an unpleasant smell of fermenting yeast. It goes like this:
- Place the container with wine on a hill.
- Wait until the sediment settles in an even layer again.
- Take a clean thin hose and lower its end into a container 2-3 cm above the sediment level.
- Place the milking container for further fermentation below the first container and lower the other end of the hose into it.
- Wait until all the clear part of the liquid has drained. Make sure that sediment does not fall into the second container.
If necessary, the drink removed from the sediment is left in a dark place to allow it to ferment.
Sugar control, why it is important
After the fermentation process is completed, sugar is no longer processed into alcohol and is added solely to change the taste. Pour a liter of liquid from a common container and add sugar until the taste of the drink satisfies you. It is recommended not to add more than 250 grams of sugar for each liter of wine, because it may start to taste bitter and the strength and calorie content will increase significantly. To determine the strength and sugar content of a drink, specialized instruments (vinomer-sugar meter) are used. 
The strength of a wine can be determined by its sugar content. To do this, the readings of the sugar meter are compared with data from tables based on the ratio of brie (a unit of measurement of sugar content) and degrees. It should be remembered that to sell wine you must obtain a license.
Lightening
Clarification of wine is the process of cleaning it from parts of the must and yeast. There are many ways to lighten a drink (correct the color according to your mind), here are the most popular ones:
- milk. A teaspoon of full-fat milk is added to a container of wine and after a week it becomes noticeably lighter;
- gelatin. Gelatin diluted in warm water at the rate of 20 g per 100 liters is added to containers with wine. After 1-2 weeks, all yeast residues will stick to the gelatin, remove them with a spoon and get a clean sparkling liquid;
- heat treatment;
- Take the drink out into the cold for a while, at least -5 degrees. In such conditions, all impurities will precipitate, immediately filter the liquid and the wine is ready.
Homemade recipes from black and white: secrets of how to do it right
Every winemaker knows his secrets of making the Solar drink. Also, for red and white wines, production technologies have their own characteristics. There are many recipes for making homemade wine, but we will tell you about the most popular and simple ones.
Red homemade
To make red wine, dark (black, blue) or red varieties of berries are used. The most popular recipe, “Favorite Muscat,” is based on the characteristics of the red and. To prepare this wine you will need: 10 kg of grapes of the specified variety, 2 kg of sugar and 4-5 liters of water. Water is used to reduce acidity and strength and is added at the stage of pouring the drink into a container for active fermentation. Sugar is poured out gradually, the first half during fermentation and the rest in the finished drink, skimmed from the sediment.
White
White wine cannot be diluted with water. To prepare, you will need 10 kg of white grapes and 3 kg of sugar. The entire production technology is described above and is no different from the standards. The only thing worth paying attention to is removing the sediment.
This material.
Video
In this video, a winemaker shares his experience of making homemade wine from grapes.
conclusions
- Most winegrowers are engaged in breeding this crop in order to obtain wine in at home(make/do at home). There is a special technology for producing a homemade solar drink.
- Preparation homemade wine(fortified and sparkling, semi-sweet and dry) consists of several stages, each of which is important in its own way. Most of the time is spent fermenting and maturing the drink.
- Each winemaker has his own unique recipe for a healthy homemade grape drink, but they all consist of 3 main components: grapes, sugar and water.
Read about the process of drying grapes to obtain raisins.
How to make wine from grapes at home, which is not inferior in taste to expensive analogues sold in stores, you will find out in our article.
To the surprise of many, the best homemade grape wine obtained when using himself simple recipe . This is due to the fact that the use of a simple preparation process allows you to avoid many mistakes, because even minor mistakes can lead to a significant deterioration in the result.
Grape varieties suitable for wine
Prepare Home wine Can be used using any variety grapes Also, when preparing a solar drink, different plant varieties are often combined. It is possible to use a mixture of white and blue varieties, due to which the taste of the drink does not deteriorate, and often becomes even richer.
The most popular varieties grapes for cooking guilt:
- Friendship;
- Crystal;
- Dewdrop;
- Saperavi;
- Stepnyak;
- Platovsky;
- Festival.
The listed varieties contain large quantities of sugar, which is why the drink acquires a special taste.
From amateurs home winemaking you can often hear that for cooking grape It is best to use the “Lydia” or “Isabella” varieties of the drink. But, recognizing the great taste of such guilt, it should be noted that it requires the addition of more granulated sugar.
Also to the common "wine" varieties grapes include:
- Aligote;
- Cabernet;
- Merlot;
- Pinot Blanc;
- Pinot Noir;
- Sauvignon;
- Chardonnay.
Have a special taste grape wines, for the preparation of which pink varieties are used. This drink has a rich consistency and unique taste. However, even the most common wild blue grape can be used to produce tasty guilt.
The most juicy varieties grapes, used to create the drink are:
- Amursky;
- Kesha;
- Monarch;
- Jupiter.
Preparation
Before starting the process, you should prepare all the necessary containers and equipment. In order to prevent mold and contamination of juice with harmful microbes, it is important to use absolutely clean and dry containers. To disinfect containers, they can be smoked using sulfur; this method is also used in industrial production. More simple The method is to wash the bottles or barrels using boiled water, after which they are wiped dry with a clean cloth.
For cooking guilt The following proportions of ingredients are used:
- 10 kg berries grapes;
- 50-200 g of sugar per 1 liter of juice;
- up to 500 ml of water per 1 liter of juice (rarely added).
Adding water is justified solely for sour juice, which cramps the cheekbones and tingles the tongue. But it should be remembered that the presence of granulated sugar in the composition also leads to a decrease in acidity. It is not recommended to add water, as this always leads to a deterioration in taste.
Most the right time to collect raw materials used to create grape wine, is September, for the southern regions – October. The harvest should be done on days when the weather is clear and sunny. It is preferable that before collection grapes there was no precipitation for 2-3 days. The resulting raw materials are sorted, removing unripe and dry berries, excess branches and leaves. The berries are then left in the sun for several hours. This procedure allows grapes acquire a rich smell. Finished raw materials are stored for no more than 48 hours.
Important! To avoid the grapes losing pure yeast culture, they should not be washed. Each berry contains a certain number of natural microorganisms involved in the fermentation process, and washing the bunches leads to a deterioration in the quality of the finished drink.
Grape processing process
 Vinogradnoe the raw materials are carefully sorted, twigs and leaves, unripe, rotten berries with traces of mold are removed. Further grape press over an enamel pan or plastic basin. Juice and pulp fill three quarters of the container volume. It is preferable to squeeze the raw materials by hand, this prevents damage to the seeds containing components that give guilt bitter taste. For large quantities grapes it is crushed using a rolling pin (wooden pestle).
Important! When processing berries, you should not use metal containers. When grape juice reacts, it can oxidize containers, which leads to the appearance of an unpleasant metallic taste in the wine.
 To protect the pulp from insects, cover the container with a clean cloth and leave it in a warm, dark place for 3-4 days. The recommended room temperature should be between 18 and 27 °C. Juice fermentation begins after 8-20 hours, at which time the skin grapes rises to the surface. It is beaten 1-2 times a day, which prevents the wort from souring. In this case, a wooden stick or hand is used to mix the pulp.
Getting Pure Juice
After 3-4 days, you can feel the appearance of a sour smell, hear hissing and notice that the color of the pulp has become lighter. These are signs of the beginning of successful fermentation. At this stage, the juice should be extracted.
It is necessary to collect the peel from above and place it in a separate bowl, squeezing it using a press or hands. Then all the juice remaining after pressing is filtered. The liquid is filtered 2-3 times using gauze. During movement from container to container, the juice is saturated with oxygen, which makes wine yeast works effectively early in the cooking process guilt.
After this, the taste of the juice and the degree of its acidity are checked. Add water to juice that is too acidic (up to half a liter per 1 liter of juice). However, it is necessary to dilute the juice only in rare cases, also taking into account that the subsequent addition of sugar will further reduce the acidity.
Pure juice is poured into a container where fermentation will occur, filling no more than 70% of the container volume. For this, it is most preferable to use glass bottles; for small volumes of product, the use of cans is acceptable.
Installing a water seal
 To prevent souring homemade grape wine, you should limit its exposure to oxygen and remove carbon dioxide, a byproduct formed during fermentation.
You can use a homemade water seal, but it is safer to purchase one in a store. As a rule, the device consists of a tube attached to the lid at one end, and the other is placed in water poured into a jar.
Instead of a water seal, sometimes an ordinary medical rubber glove is used, which is placed on top of the fermentation tank. To remove carbon dioxide, one of the gloved fingers is pierced with a needle.
Active fermentation
Having installed a water seal, the container containing the juice is placed in a room with suitable temperature conditions. Red grape wine ferments at temperatures from 22 to 28°C, white - from 16 to 22°C. It is unacceptable to lower the temperature to less than 15°C, since this stops the work of yeast, and hence the formation of alcohol from sugar.
Watch the video! Homemade wine, fermentation, adding sugar
Rules for adding sugar
When cooking guilt 2% sugar in the wort gives 1% alcohol in the finished product guilt. Most often Russian grape from various regions has a sugar content of no more than 20%. Therefore, without adding sugar, you can get a maximum of 10% ABV guilt and zero sweetness. At the same time, the strength indicator guilt never exceeds 13-14% (usually 12%), a higher alcohol concentration stops the work of wine yeast.
Adding sugar to the container wine produced after the raw material has been actively fermenting for 2-3 days. In this case, first drain 1 liter of juice from the bottle with wine and add sugar in an amount of 50 mg. Then mix and taste. If the juice still tastes sour, add an additional 20 to 30 g of granulated sugar. After this, the solution is poured into the rest of the liquid.
The procedure is repeated once every 5-7 days, adding sugar until the sugar content of the product decreases. Since this is an indicator that the process of alcohol production continues. The average duration of the fermentation cycle can be 50-60 days. It is influenced by ambient temperature and variety grapes, used to prepare a solar drink.
Separation of wine from sediment
If for 1-2 days there are no bubbles coming out of the water seal (or the glove is blown off), the color of the wort becomes lighter, and loose sediment accumulates below, the drink is poured from the previous container into a new one, since a cluster of dead fungi forms below. When they are young for a long time grape wine, the smell of the drink deteriorates and the taste becomes bitter.
Before you shoot wine from sediment, the bottle is placed for 1-2 days at a height of 50 to 60 cm from the floor. You can use a bench, chair or something else for this. After the sediment falls to the bottom, the drink is poured into a new container (it must be dry and clean). This is done using a siphon, a transparent soft hose (tube), the diameter of which is from 7 to 10 mm, and the length is from 1 to 1.5 m. The end of the tube should be no closer than 2-3 cm from the sediment level. Transparency of the merged homemade grape wine will not be absolute. But this should not be a cause for concern, since the formation of the appearance of the wine is not yet completed.
Sugar control
At this time, fermentation is complete guilt has already happened. And adding sugar no longer causes the formation of alcohol.
Advice! For 1 liter of wine add no more than 250 g of granulated sugar.
When controlling sweetness, you should rely on your own feelings. To do this, you can pour about a liter guilt from a common container, and gradually adding granulated sugar, determine the required amount according to taste. And then bring the entire available drink to this level.
Wine maturation
At this stage, the final formation of taste occurs guilt. Its duration is 40-380 days. Exceed the specified holding period homemade grape wine It is not recommended, since this does not improve its properties.
To avoid exposure to oxygen, the container is completely filled with the drink and closed with a tight lid or water seal if wine sweetened. The product is stored in a dark cellar or basement with an air temperature of 5 to 16 °C. When this is not possible, for ripening, storage is provided at a temperature of 18 to 22 ° C; this value cannot be exceeded.
To avoid deterioration in the taste of the drink, it is necessary to exclude differences in night and day temperatures. White wine kept for at least 40 days, red - from 60 to 90. When a sediment of 2 to 5 cm thick is formed, it must be separated by pouring the drink into another container using a straw, according to the method described above. Thereby wine will become lighter.
Methods for purifying wine from impurities
Home wine lighten:
- Using gelatin. For cleaning 100 l guilt take 10-15 g of gelatin, which is placed to soak in cold water. During this time, the water is changed three times. To further dissolve the gelatin, use warm water and then add it to wine. Within 2-3 weeks, a sediment forms, which is removed, after which the color of the drink becomes lighter;
- Using heat treatment. Wine, poured into glass bottles, placed in metal containers into which water is poured. The water should completely cover the bottles. Then the filled containers are heated over a fire to 50-60 ° C, tightly sealing the bottles, which prevents the evaporation of alcohol from guilt. This process is repeated twice or thrice. Over the course of several days wine Precipitation occurs, which is removed according to the previously described rules;
- Using activated carbon. This method is used extremely rarely. It is effective when the drink develops an unpleasant odor. Cleaning is carried out using powdered charcoal (not pharmaceutical) which is placed in wine in the amount of 4-5 g per 10 liters of drink. The product should be shaken periodically for 3-4 days. On the 5th day, the wine is purified using a special filter (filter paper, etc.);
- Lightening with cold. Wine it is clarified by keeping it at a temperature of -5°C, due to which the sediment, consisting of natural yeast and wort particles, is separated. Then the drink is filtered, after which it is stored in a warm place;
- Using milk. The use of this method is widespread and universal. It uses low-fat milk, 1 teaspoon of which is added per 1 liter. guilt. The drink is stored for 3-4 days in a room with a temperature of 18 to 22°C, after which it noticeably brightens.
To remove natural yeast and wort particles from a drink, various methods are used. We have listed the most common ones.
Reference! Heat treatment is especially popular among experienced winemakers when purifying the product.
Bottling
 If desired, store for a long time wine it must be poured into absolutely clean and disinfected containers. Bottles are completely filled wine, the free space at the cork should not exceed 1-2 cm. To prevent the appearance of an unpleasant taste and odor, the drink is sealed using new and clean corks. If long-term storage of the drink is not planned, ordinary beer caps can be used.
Important! Sometimes, for long-term storage, wine is buried in the ground, straw is poured onto the surface of the hole, and sand is poured on top of the bottles.
A special cap is used to hermetically seal bottles. The corks are steamed using hot water. When they swell, they are driven into containers with vitriol, the necks are wiped well and filled with wax or sealing wax. This procedure helps guilt remain strong and aromatic for a long time.
Storage
Bottles with homemade grape wine should be stored horizontally, this allows the drink to maintain the swollen state of the corks. Vertical storage of bottles causes the corks to dry out and the bottles to lose their seal.
The storage temperature of the drink should be:
- 8-10°C for fortified wines;
- 4-6 °C for light table varieties grape wine;
- 5-8 °C for the rest.
About how to make wine from grapes at home will tell video.
Wine from grapes, cooked in at home, has high quality, is a decoration festive table and promotes a good mood regardless of the circumstances.
Watch the video! Homemade wine from grape harvest to tasting
Wine made from grapes is considered to be one of the most ancient drinks. The first people who replaced all drinking with wine and invented it from grapes were the Egyptians. Wines from white grapes It is not only a light drink with a pleasant taste and smell. It is used as a medicine for anemia, unstable blood pressure, and people with lack of appetite.
Wine made from grapes is considered to be one of the most ancient drinks. The first people who replaced all drinking with wine and invented it from grapes were the Egyptians.
Wines made from white grapes are not only a light drink with a pleasant taste and aroma. It is used as a medicine for anemia, unstable blood pressure, and people with lack of appetite. Nuclear plant workers are given wine made from white grapes to remove harmful radionuclides from the body. But this does not mean that these people should get drunk with wine; they take it in moderate doses.
Which grape varieties are best to make white wine from?
Grape wine can be made from almost all grape varieties. The main difference is the taste aspects, aromas, and colors.
The highest quality grape varieties for white wine:
- Aligote. This is the most popular and high-quality grape variety, which is used not only for winemaking, but also for making juices, champagne, blends and cognac. Wine products made from these grapes are best consumed young. For long storage it doesn't fit. The pulp of the Aligote grape is sweet, so it is better to make table wines from it.
- Riesling. This grape originates from Nemetchina. It tolerates frost and heat well, so it can be grown in different climatic conditions. Riesling berries are round in shape, slightly tart and sour in taste, so it is best used for making dry wines.
- Chardonnay. These grapes are classified as technical grapes, as they contain more juice than pulp. Winemakers unanimously claim that it is impossible to make bad wine from it. The aroma of white wine can be very different, it all depends on the production technology.
- White nutmeg. It has a very rich muscat aroma, which gives the wine piquancy and attractiveness. The grapes are quite sweet, so it will make a noble sweet wine. Grapes are very afraid of frost, so they need to be grown in special climatic conditions.
- Rkatsiteli. Georgia is the birthplace of cultivation and use of this variety. Most often used for making fortified and dry wines.
Preparation of raw materials at home
 White varieties should only be harvested after the red grapes have ripened.
 Grapes are a genus of plants of the Vinogradaceae family, the berries of which have a pleasant sweet taste.
To make wine from white grapes at home, you need to pay special attention to the berries. Of course, you can buy them in the store, because today they are a very common berry. But many people also grow it themselves.
White grape varieties should be harvested only after the red grapes have ripened. It is known that red grapes ripen faster. To obtain a soft, aromatic and strong wine, the berries must be slightly overripe. Overripe does not mean that the berries should dry out and crumble. No, it’s just that ripe grapes will give off their taste and aroma better.
Why you shouldn’t take overripe or rotten grapes:
- The drink will not be clear.
- Poorly amenable to clarification and filtration.
- It will taste moldy.
From the moment of harvesting, or purchasing it in a store, until the start of the pressing process, the time should not pass for two days. Then the grapes will wither and lose their taste and aroma. The best option would be to start making homemade white wine immediately after picking the berries.
Inventory preparation
 Do not use plastic or metal containers
 To prepare high-quality, tasty, aromatic homemade wine, it is necessary that the container in which the grape juice will ferment is not plastic or metal. Why? During the fermentation process, grape juice produces alcohol, because the juice contains acids. As a result of contact of alcohol with plastic or metal utensils, toxic substances will be produced, which will then end up in the wine.
- Glass.
- Ceramics.
- Enamel.
- Tree.
All containers must be well washed. If it is a wooden vessel, it can be fumigated with sulfur.
The container can be metal, but made of stainless steel.
Making dry white grape wine at home

To make homemade dry wine from white grapes, you only need juice from grape berries. Particular attention should be paid to what grape variety the wine is made from. Unlike red and pink grape varieties, white ones require more time to prepare. In some varieties, the berries have a slightly tart and sour taste. These include varieties Aligote, Chardonnay, Riesling. They are unlikely to make a sweet, delicate wine.
- Extracting juice from grapes. This process is of particular importance in the production of dry wines. Today there are many devices with which you can get juice. These are food processors, presses, juicers. These devices are certainly good helpers in squeezing juice. The only drawback of their work is the crushing of the seed, which is located inside the grape berry, and adds unnecessary astringency. Therefore, to make the wine soft and refined, you need to squeeze out the juice with your hands.
Important! Grape berries should not be washed or collected immediately after rain! They lose their ability to ferment.
The juice must be extracted very quickly so that there is as little contact between the pulp and the liquid as possible. It’s okay if the pulp, peel, and ridges remain in the juice. You can get rid of them later.
- Advocacy. In order for white wine to remain aromatic at home, it is necessary to use freshly squeezed, pure juice without additives. But no matter how carefully the process of squeezing the juice from the berries is carried out, the peel and pulp still get into it, and it becomes cloudy in color. Since pure juice is necessary for making wine, it must be allowed to settle. Settling time can take from six to twelve hours. After the time has passed, you need to strain the clear juice from the grounds.
Grape juice may begin to ferment prematurely, even before it has settled. This cannot be allowed. One way to stop the fermentation of wort is to fumigate the container with wicks. The amount of wick required depends on the air temperature in the room where the wort settles. One gram of wick is enough at temperatures above twenty degrees.
You need to take a container, light the wick, and stick it into the middle of it, but do not leave it there, but simply fumigate it around. If the container is glass, you must do this carefully, as the glass may burst upon contact with fire. After fumigation, pour a third of the wort into a container and shake. Gradually add the rest and shake until the container is full. Then close tightly and let sit.

- Fermentation. At this stage, air temperature is very important. The optimal fermentation temperature ranges from eighteen to twenty-four degrees above zero. If the temperature is lower or higher, the yeast will stop working. In cases where such a nuisance does occur, it is necessary to make a new starter and add it to the one that has stopped fermenting. Thus, the fermentation process is activated and the juice will be suitable for further use.
There are two stages of fermentation: active and quiet. The first lasts from five to eight days, and the second about a month. After the first stage of fermentation, you can taste the wine.
Important! Do not close the vessel tightly during fermentation. The container may burst or the lid may explode.
The fermentation process ends when bubbles stop floating and sediment is clearly visible at the bottom of the container.
- Lightening. The wine clarification process is carried out so that the sediment that remains at the bottom of the container after fermentation does not spoil the taste of the wine.
How to do this? It is necessary to place a vessel with wine on a stool, and an empty one on the floor. Connect them with a tube. Take one end of the tube from the empty container and pull it towards you. Thus, the wine will begin to flow from one container to another. Drain off the clean liquid and leave the grounds. After straining, pour the wine into bottles, close with corks, and store in a supine position at a temperature no higher than fifteen degrees.
Ready homemade white wine should be consumed several months after straining.
Other recipes
Recipe for making white wine with granulated sugar

Required ingredients:
- White grapes 10 kilograms.
- Granulated sugar 3 kilograms.
White wine making process
- Place the separated grapes in a saucepan and crush by hand.
- Cover the pan with gauze and leave in a warm place for five days. Stirring every day.
- Strain the grape mass into another vessel to settle.
- Pour granulated sugar into the resulting juice and mix thoroughly until completely dissolved.
- Cover the container with juice. If it is a glass vessel with a narrow neck, then you can put a rubber glove on it and pierce one finger with a needle.
- Leave to ferment for three weeks. Then strain into glass bottles and leave for another two months.
- After two months, strain again and leave for eight months.
White Grape Ice Wine Recipe

Today, ice wine has become a very popular drink. Of course, many people buy it in stores, not even realizing that ice wine can be made on their own.
Required ingredients:
- White grapes 5 kilograms.
- Granulated sugar 1.5 kilograms.
Cooking method. You need to take semi-ripe grapes. The main trick to ice wine is freezing the grapes before squeezing the juice. By freezing the grapes, the wine acquires different taste and aroma qualities. The process for making white wine is then similar to the previous recipes. The technology is similar. But sugar must be introduced after it has gone through the very last procedure of straining the finished wine.
Sometimes you can find the addition of water in wine recipes. This is done in order to reduce the acidity of the juice. Often, grape juice is diluted with water, which does not meet preparation standards. Wort diluted with water loses its taste and aroma. Therefore, to obtain a tasty, rich, aromatic white wine, you must use only the best varieties grapes
Winemaking is an art whose secrets take years to learn, but anyone can make homemade grape wine. It is clear that this will not be a masterpiece worthy of world exhibitions, but if you follow the instructions, the taste of the homemade drink will be better than many store-bought ones. I bring to your attention a detailed technology for preparing wines (red and white) at home. The recipe uses only grapes and sugar, in rare cases additional water is required.
The best grape varieties for home winemaking are Stepnyak, Platovsky, Rosinka, Druzhba, Regent, Saperavi, Crystal, Festivalny, which do not require special care and have a fairly high sugar content. But this does not mean that you cannot make wine from other varieties, for example, Isabella or Lydia, you just have to add more sugar.
Before starting cooking, take care of all containers and utensils used. To avoid contaminating the juice with pathogenic microorganisms, such as mold, the containers must be perfectly clean and dry. Barrels, bottles, and buckets can be smoked with sulfur, as is done in industry, or washed with boiled water, then wiped with a dry cloth. I strongly recommend avoiding containers in which milk was previously stored, since even thorough cleaning does not always help.
Ingredients:
- grapes - 10 kg;
- sugar - 50-200 grams per liter of juice;
- water – up to 500 ml per liter of juice (in rare cases).
It is advisable to add water only if the juice is very sour - the taste stings the tongue and makes the cheekbones cramp. However, remember that adding sugar itself reduces acidity. In all other cases, diluting with water worsens the taste and is therefore not recommended.
Grape wine recipe
1. Harvesting and processing. To ensure that the wild yeast necessary for fermentation remains on the grapes, it is advisable to pick the berries in dry, sunny weather. There should be no rain for at least 2-3 days before.
Only ripe fruits are suitable for winemaking. There is too much acid in unripe grapes, and in overripe berries, acetic fermentation begins, which can subsequently spoil the entire must (squeezed juice). I also do not recommend taking carrion, which gives grape wine an unpleasant earthy taste. Picked berries need to be processed within two days.
Carefully sort the harvested grapes, removing twigs and leaves, unripe, rotten and moldy fruits. Then crush the berries, place the pulp along with the juice in enamel pan or a plastic bowl, filling the container to a maximum of ¾ of the volume. It is better to crush the grapes with your hands so as not to damage the seeds, which contain substances that make the wine bitter. If there are a lot of berries, you can carefully crush them with a wooden rolling pin (pestle).

 Wooden fixtures only
 Avoid contact of juice with metal (except stainless steel), as this causes oxidation, which impairs the taste. That is why the berries are kneaded with hands or wooden tools, and the pulp (crushed grapes) is placed in an enamel container with a wide neck - a bucket or pan. You can also use food-grade plastic containers or a wooden barrel.
Cover the container with the pulp with a clean cloth to protect it from flies, and place it in a dark, warm (18-27°C) place for 3-4 days. After 8-20 hours, the juice will begin to ferment, a “cap” of skin appears on the surface, which should be knocked off 1-2 times a day, stirring the pulp with a wooden stick or hand. If this is not done, the wort may turn sour.

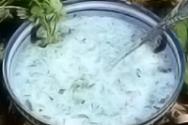
 Violent fermentation of pulp
 2. Obtaining pure juice. After 3-4 days, the pulp will lighten, a sour smell will appear and hissing will be heard. This means that fermentation has begun successfully, it’s time to squeeze out the juice.
Collect the top layer of peel in a separate container, squeeze it out with a press or by hand. Filter all the juice (drained from the sediment and squeezed out of the pulp) through gauze, pouring from one container to another 2-3 times. Transfusion not only removes small particles, but also saturates the juice with oxygen, which contributes to the normal functioning of wine yeast at the initial stage.
When working with unripe grapes or grapes grown in northern latitudes, in rare cases it may be necessary to add water. If the juice turns out to be very sour (it makes your cheekbones ache and your tongue tingles), add water - a maximum of 500 ml per 1 liter. The more water, the worse the quality of the wine. It is better to leave the acidity slightly higher, since the concentration of acids decreases slightly during fermentation.
Fill the containers (maximum 70% of the volume) intended for fermentation with pure juice. Ideally, these are large glass bottles; in extreme cases, if the volume of wine is small, jars are also suitable.
3.Installing a water seal. To prevent homemade grape wine from turning sour, it must be protected from contact with oxygen, while simultaneously ensuring the release of the by-product of fermentation - carbon dioxide. This is done by installing one of the water seal designs on the container with juice. The most common option is the classic water seal made of a lid, tube and jar (pictured).

 Diagram of a classic water seal
  Wine fermentation with a glove
 The design of the water seal is not of fundamental importance, but in terms of convenience, it is better to put a classic water seal on large bottles, and a glove or a lid-shaped seal (sold in stores) on jars.
 Lid with water seal
 4. Initial (active) fermentation. After installing the water seal of the container with fermented juice, it is necessary to ensure suitable temperature conditions. The optimal fermentation temperature for red homemade wine is 22-28°C, white – 16-22°C. The temperature must not be allowed to drop below 15°C, otherwise the yeast will stop before it can process all the sugar into alcohol.
5. Adding sugar. Approximately 2% sugar in the must yields 1% alcohol in the finished wine. In most regions of Russia, the sugar content of grapes rarely exceeds 20%. This means that without added sugar, at best the wine will be 10% ABV and zero sweetness. On the other hand, the maximum possible strength is 13-14% (usually 12); at a higher alcohol concentration, wine yeast stops working.
The problem is that it is impossible to determine the initial sugar content of grapes at home without a special device (hydrometer). Focusing on average values for varieties is also useless, since this requires data on the sugar content of the selected variety in a specific climatic zone. In non-wine-growing areas no one makes such calculations. Therefore, you have to focus on the taste of the juice - it should be sweet, but not cloying.
To maintain normal fermentation, the sugar content of the wort should not be more than 15-20%. To ensure this condition, sugar is added in parts (fractionally). 2-3 days after the start of fermentation, taste the juice. When it becomes sour (the sugar has been processed), you should add 50 grams of sugar for each liter of juice. To do this, pour 1-2 liters of wort into a separate container, dilute sugar in it, then pour the resulting wine syrup back into the bottle.
The procedure is repeated several times (usually 3-4) during the first 14-25 days of fermentation. At a certain point, the sugar content of the wort will decrease very slowly, which means that there is enough sugar.
Depending on the temperature, sugar content and yeast activity, the fermentation period for homemade grape wine is 30-60 days. If fermentation has not stopped 50 days after installing the water seal, in order to avoid the appearance of bitterness, the wine should be poured into another container without sediment and placed under the water seal to ferment under the same temperature conditions.
6. Removing wine from sediment. When the water seal does not release bubbles for 1-2 days (the glove is deflated), the wort has cleared, forming a layer of loose sediment at the bottom, it’s time to pour the young grape wine into another container. The fact is that dead fungi collect at the bottom; staying in the wine for a long time, they cause bitterness and an unpleasant odor.
1-2 days before removing the wine from the sediment, place the fermentation container at a height above the floor (50-60 cm). This could be a bench, chair or any other device. When the sediment is again at the bottom, pour the wine into another container (clean and dry) through a siphon - a transparent soft hose (tube) with a diameter of 0.7-1 cm and a length of 1-1.5 m. The end of the tube should not be brought closer to the sediment; than 2-3 centimeters.
Drained homemade wine will not be completely clear. This is not scary, the appearance of the drink has not yet formed.
 Sludge removal process
 7.Control of sugar content. It's time to decide on the sweetness of the wine. Since active fermentation has already ended, all the sugar added at this stage will not be converted into alcohol.
Add sugar based on taste preferences, but not more than 250 grams per liter. The application technology is described at the 5th stage. If you are satisfied with the sweetness, there is no need to sweeten it additionally. Lovers of strong alcohol can make fortified grape wine by adding vodka (alcohol) at a rate of 2-15% of the volume. Fixing helps preserve the wine, but makes the taste harsher and the aroma less intense; alcohol notes appear.
8. Quiet fermentation (ripening). The stage during which the final taste is formed. Lasts from 40 to 380 days. Longer aging of homemade grape wines is not advisable, since it does not improve the properties of the drink.
Place the bottle of wine (preferably filled to the top to avoid contact with oxygen) under the water seal (recommended if sweetening was done) or close it tightly with a lid. Store the container in a dark cellar or basement at a temperature of 5-16°C. If this is not possible, the young wine needs to be provided with a maturation temperature of 18-22°C, but not higher. It is important to avoid sudden temperature changes, for example, day and night, otherwise the taste will deteriorate. The minimum aging period for white wine is 40 days, for red wine – 60-90 days.
When sediment appears at the bottom in a layer of 2-5 cm, pour the wine from one container to another through a straw, leaving the sediment at the bottom, as described in the 6th stage. As a result, the drink will gradually lighten.
9. Artificial lightening (pasting). Even after several months in the cellar, homemade grape wine may remain cloudy. The problem is solved by removing impurities. The most common methods are pasting with gelatin or egg white.
Lightening only improves the appearance, but does not affect the taste in any way, so I recommend cleaning only as a last resort.
10. Spilling and storage. At the last stage (when sediment no longer appears), the wine can be bottled and tightly capped.
Shelf life at a temperature of 5-12°C is up to 5 years. Strength – 11-13% (without fixing with vodka or alcohol).

The video shows the technology for making wine from sour grapes, in which the squeezed juice is diluted by half with water. Relevant only for northern regions with very sour berries, since adding water worsens the taste.
Wine is healthy drink, which has many cooking methods. Homemade wine does not contain dyes or preservatives, and additional harmless ingredients are chosen by the owner independently. The sacred drink of the gods was used in ancient times as a cure for many ailments. Today, wine also has many admirers, but not everyone is familiar with the technology for producing this sparkling aromatic liquid.
Calorie content and benefits of homemade wine
When studying chemical composition drink, it turns out that homemade grape wine contains water, organic acids, ethyl alcohol and minerals. His energy value is great - every 100 ml of drink contains 80 kcal. Beneficial features wine made at home with your own hands are as follows:
- restoration of immunity;
- disinfection of the body;
- strengthening the heart and blood vessels;
- acceleration of metabolic reactions;
- enrichment of blood with valuable substances.
To prevent homemade wine from losing its quality, it must be stored correctly. It is best to place the barrel in the cellar, since the underground room has optimal temperature conditions. If at the time of preparing the drink the berries were not sweet, you can correct the situation with the help of sugar, adding it at the initial stage at the rate of 50 - 100 g of sand to 1 liter of juice. Sugar neutralizes the effects of alcohol and prolongs the life of the drink.
Preparing to make wine at home
Delicious grape wine at home is not obtained from just any variety of berries. Table varieties do not leave the desired aftertaste; it is recommended to replace them with Chardonnay, Isabella, Pinot Noir, Cabernet Sauvignon, Riesling, Merlot, Pinot Blanc and Sauvignon Blanc. To make sweet wine, you need to stock up on nutmeg berries.
 The technology for preparing the drink requires dry bunches, so the harvest should be harvested in sunny weather. You can cut the tassels from the end of September until the arrival of frost. Rotten and frozen product is not suitable for winemaking.
Table wine is made from slightly unripe berries, since the strength of the drink depends on the length of time the bunch remains on the vine. If you want to get a dessert type of drink, it is better not to pick the fruits until they begin to fade.
High-quality homemade grape wine can only be obtained from ideal berries. Rotten, dry and disease-damaged fruits are thrown away. The twigs that give the drink astringency and bitterness are also removed. The unpleasant aftertaste is due to the tannin content.
Sorting grapes sometimes takes a lot of time, but the work will pay off in that the drink will leave a more pleasant aftertaste. There is no need to wash off the whitish coating from the berries - it is natural yeast involved in fermentation. The container in which the fermentation process will take place is smoked with sulfur on the eve of the spill. The substance will prevent the formation of mold inside the bottle.
Basics of making grape wine
To avoid premature fermentation, experts advise not to delay processing of sorted berries. To crush thoroughly, you need to get a special crusher or use a wooden rolling pin. If you want to make white homemade wine from grapes, the juice is separated from the pulp immediately. During the production of the red drink, these products are left in the same container.

 Enamel dishes with crushed grapes are covered with a cloth and put away for 3 days in a room with a temperature of 20 - 22 degrees. Visit the container three times a day and stir its contents. During this time, the berries turn into wort, and the pulp floats up. On the 4th day the juice is filtered. To obtain a tart drink, the wort is kept unstrained until the 6th day.
For lovers of sweet wines, experts suggest improving the recipe - during the first 10 days of fermentation, you need to add a small amount of sugar to the mass. As soon as the drink tastes like sweet tea or compote, stop adding sugar. Once the fermentation process is complete, there is no point in sweetening the wine.
Do not rush to throw away the grape pulp (pulp), it can still be used for...
After filtering the grape juice, it is poured into glass bottles and sealed with a nylon cap. Some craftsmen prefer to cover the dishes with a rubber glove. To allow air to escape, it is pierced in several places, and to prevent the glove from falling off, it is tightly fixed.
Finally, the dishes are put away in a cool place, the temperature of which does not fall below +10°C. Violation of this condition prolongs the fermentation period. While the juice is bubbling, it is filtered weekly, not allowing sediment to spoil the taste. After about 2 - 3 months, gas formation should stop, and now you can make the first tasting. A strong, sweet liquid in which the presence of sugar is not felt indicates readiness for consumption.
Classic grape wine: recipe
This clean drink recipe requires just two ingredients:
- grapes of any variety – 10 kg;
- granulated sugar – 3 kg.
 The berries are crushed in a wide bowl in small portions, then covered with gauze and placed in warm conditions for 5 days of fermentation. Stir the mixture twice a day with a wooden spatula. Fermented fruits are discarded in a colander and squeezed through cheesecloth to drain the juice.
The juice is poured into clean bottles, sweetened with sugar and mixed. The containers are sealed with a pierced glove and its behavior is observed. As soon as it is noticed that the glove has stopped inflating, the drink is carefully filtered and poured into bottles. The containers are closed with stoppers. A month later, the wine is filtered again and put into the cold again to infuse.
Berry and grape wine
While studying simple ways to make homemade wines, we find a recipe with raspberries and currants. Let's look at it step by step:

After 3 days, grape wine is continued to be prepared at home by removing the floating berries and squeezing them. In the next step, 1 kg of sugar is dissolved in 10 liters of boiled water. This syrup along with grape juice poured into a bottle. The dishes are sealed with a glove and left for a week. On the 8th day, 700 g of sugar is poured into the mixture and the wine from berries and grapes is kept cool for 2 months.
How to make wine with water
 To turn this recipe into a sparkling drink, you will need the following components:
- water – 7.5 l;
- grapes – 5 kg;
- granulated sugar – 3.5 kg.
The process of creating a drink is simple. First, the berries removed from the branches are kneaded, filled with water and sprinkled with sugar. The mixture is then allowed to ferment for a week, but to avoid mold formation the wort is stirred three times a day. After 7 days, the liquid is separated from the sediment and poured into a bottle, which is covered with a glove. Next, the container is placed in a cool room for a week, and on the 8th day the drink is filtered and tasted. A month's aging gives the wine richness.
Expanding the range of homemade drinks
Wine "Isabella"
All wine recipes are approximately the same, but in the process of obtaining a drink from the Isabella variety, it is recommended to dilute it with 12 liters of water. The volume is given for the ratio of 5 kg of grapes to 3 kg of sugar. Water reduces the astringency of the drink and does not spoil its aroma.
"Moldova"
 Healthy red wine made from grapes at home is produced by juicy berries of the Moldova variety. But they are difficult to process. For beginners in the field of independent winemaking, masters recommend removing the skins before primary fermentation. If left, the thick skins will create bulky pulp, which will erase the true flavor of the wine and make it tart.
The following recipes make wine unusual. If you want to make clove wine, throw a “cushion” of crushed cloves into the barrel. Once the juice has fermented, pour it into another container.
Mosel aromatic wine is prepared in a barrel with a hot decoction of mint and elderberry evaporated. The liquid is not poured out until the container is saturated with the smell of herbs. The barrel is then filled with grape juice and elderflowers and mint leaves are placed on top.
Found a mistake? Select it and click Shift + Enter or