Experiments for children with iodine. Open Library - open library of educational information Experiments with starch and iodine
We continue to conduct experiments for children. Last time we talked about, and today we present to your attention experiments for children with iodine.
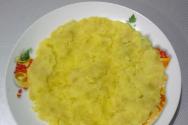
Surely you remember from your school biology course how potatoes turned blue when a diluted iodine solution was dripped onto them. We will do something similar, but in a more entertaining form, today. So, in today's article, experiments for children:
- in search of starch,
- intense coloring,
- covering our tracks,
- drawing on milk.
Experience for children “In search of starch”
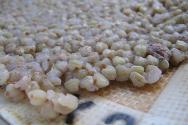
In the first photo you can see what we will need for today's experiments:
- 5% iodine
- Pipette
- Starch
- Disposable cups
- 10% ascorbic acid solution
But for the first experiment we still need a plate of food. I did not include it in the general list, since the products in which you and your baby will look for starch can be very diverse. We took flour, wheat grits, oatmeal, a piece of bread, fresh cucumber, lemon, and radish.
Now let's prepare an iodine solution. To do this, pour water into a glass and drop a few drops of iodine with a pipette, stir well. You can completely trust your baby to work with the pipette. So your experiments will develop not only the baby’s curiosity to understand the world around him, but also.
Why make a solution if you can drip ready-made alcoholic iodine? When using ready-made iodine, the starch will turn black due to the high concentration of iodine. Accordingly, clarity will be lost: distinguishing between rich brown and black colors can be problematic. With a low concentration of iodine in the solution, the iodine drops will appear slightly yellowish, and the areas with starch will appear blue-violet.
So, put our products on a plate and drop iodine solution onto them using a pipette. We observe and discuss what turns blue. Bread, flour, wheat and oatmeal are colored, but not. We conclude that these vegetables and fruits do not contain starch.
Do you want to play with your child easily and with pleasure?
Experience for children “Intensive coloring”
For this experiment we will need to cook starch paste. The paste is needed to show the baby how the color of starch depends on heat treatment. Take a teaspoon of starch and a glass of water and cook over heat for several minutes until thickened. Pour half of the paste into a glass. Pour 0.5 teaspoon of starch into a second glass of water.
At this moment, my daughter suggested putting in another glass of milk, because all the solutions were white. They put the milk on and began to drip the iodine solution into each glass. After thorough stirring, the cups were compared according to the intensity of coloring: the milk remained white, the starch solution became light blue, and the paste turned deep blue. We made the following conclusions:
- there is no starch in milk,
- Heat-treated starch produces a more intense color because the starch molecules become more accessible to iodine.

A similar difference in color intensity should be obtained in the variant: raw – boiled potatoes. If you decide to try, write in the comments what you did!
Experience for children “Covering our tracks”
Open five ampoules of 10% ascorbic acid and pour it into a glass, add water. Now we mix the iodine solution and the ascorbic acid solution in one glass, it instantly becomes discolored. We still decided to add a little more concentrated iodine. Try it too - it turns out very beautifully: drops of iodine, reacting with ascorbic acid, create a pattern of “sparklers” on the surface, as my daughter called it. Ascorbic acid even discolored colored starch and colored paste.

This experience caused great surprise to my daughter. She loves mixing colors, mixing different colored solutions, and of course expected the solution to become a little lighter, but not completely discolored. I said that before we mixed paints with each other and with water, but now we mix different chemical compounds, they react with each other, and new compounds are obtained, which may differ in color from the original ones. Here we remembered the chemical one, when a lot of foam was released. My daughter understood the analogy.
Experience for children “Drawing with milk”
And finally, we carried out a creative experiment with drawing on the remaining milk, because the child was indignant that the mother had discolored all the colored solutions, and she had nothing to create with. A few drops of gouache were dropped onto the milk. We decided to draw with a cotton swab and dipped it in dishwashing liquid. It was very interesting to watch how the paint ran away from us and formed bizarre patterns.

The daughter could not stand it and asked: “What have you done? I want to draw, but the paint runs away from me!” I figuratively talked about how dishwashing detergent repels fat, and as the fat molecules scatter, they take the paint with them. Having understood the essence, my daughter agreed to “draw” some more.
This is all our experience for today. If you have questions, ask in the comments. I will also be glad to read your ideas for experiments with iodine for children!
Did you like the selection of experiments? Save it to your wall by clicking on the social media buttons!
The kitchen is the center of our family's life. Here they drink tea, discuss the latest news and, of course, drink chemicals.
Vladik and I do chemistry, having read a lot of books, and Makarka does chemistry according to his own program - he either pours salt into the tea, or tastes the dish soap. It's fun in our kitchen.
Continuing the topic indicators in the kitchen I’ll write about one wonderful substance that is great to conduct experiments with with your child. This is regular potato starch. You can also conduct fantastic experiments with corn, but that’s not what we’re talking about today.
Experiments with starch and iodine
Using iodine you can make potatoes turn blue.
Iodine turns starch blue - this is a substance that is very abundant in potatoes. Therefore, experiments with blue potatoes are often carried out. We decided to go ahead and check the foods we found in the refrigerator for the presence of starch. We dripped iodine onto lemon, daikon, apple, raw potatoes, boiled potatoes, boiled carrots, garlic, sausage, lard, bread, oatmeal.
Bread and potatoes are brightly colored, while boiled potatoes, oatmeal, and carrots reacted more actively. We can conclude that these products contain starch, while the rest either do not have it or the amount is insignificant.
Please note that boiled potatoes are brighter in color than raw ones. In one book I found such an explanation for children. Starch is found in raw vegetables as if in boxes, and when cooked, the boxes are destroyed, and it is easier for iodine to get to the starch and react with it.
Another experiment was conducted on this topic.
We made a paste from starch. Take one tablespoon of starch per mug of water. So, in cups (from left to right):
- paste + 2 drops of iodine,
- starch in water + 2 drops of iodine,
- just water with iodine.
By the way, iodine dissolves better in oil than in water (in case it comes in handy for someone).

It turned out beautifully! And it is very clearly visible that iodine reacted more actively with starch in the paste.
Let's keep experimenting!
Let's try to discolor starch - iodine violet!


It turned out black! Separately, a solution was prepared from 60 ml of water and 1000 mg of ascorbic acid. We bought ascorbic acid tablets (50 mg each) at the pharmacy and crushed 20 pieces. Only at the beginning my mathematics gave a huge glitch, and I crushed not 20 pieces, but 200 pieces
The ascorbic solution begins to fight iodine and defeats it! The solution is almost discolored.
Many people have probably forgotten about the simple recipe for starch paste. If yes, then we are glad to be of assistance. Friends, we are trying to show you that science is fun. And if you have interesting questions that you want to get expert answers to, write to us. We will answer them in the upcoming issues of the “PocheMuk” section. Let's do Fun Science together. +100500 to karma for those who share articles from our website on social networks and tell their friends about us. See you soon, friends.
Happy experimenting! Science is fun!
Your Galina Kuzmina
Laboratory work for 6th grade students using student-oriented technology
Laboratory work No. 1.
Determination of wheat seed composition
Target: get acquainted with the composition of seeds using the example of wheat and sunflower seeds.
Equipment: sunflower and wheat seeds, a glass of water, an alcohol solution of iodine, a sheet of white paper, a test tube, N.I.’s textbook. Sonina.
Instruction card
1. Watch the teacher conduct the experiment (Fig. 1). He puts dry wheat seeds in a test tube and starts heating them. The seeds become charred and a burnt smell appears. What appears on the walls of the test tube? How to explain the burnt smell? What's left in the test tube? Draw a conclusion: the presence of what substances in seeds can be detected in this experiment?
Rice. 1. Heating the seeds on the flame of an alcohol lamp
2. Take some wheat flour, add water to it and make a small ball of dough.
Wrap it in gauze and rinse thoroughly in a glass of water (Fig. 2). How did the water in the glass change?
Place 1-2 drops of iodine solution into a glass of water. How did the color of the contents in the glass change? How can this be explained?
Unwrap the cheesecloth containing the dough. You will see a viscous sticky mass on the gauze - gluten, or vegetable protein.
3. Take a sunflower seed and wrap it in a sheet of white paper. Press down on it with the blunt end of a pencil. Unfold a sheet of paper and see what the paper is saturated with (Fig. 3).

Rice. 3. Crushed sunflower seeds leave a greasy stain on paper.
Draw a conclusion about the presence of different organic substances in the seeds. Draw a diagram in your notebook and fill it out.

4. Complete the work. Draw a table and enter the required data.
Draw a conclusion about the composition of the seeds.
Table. Determination of seed composition
5. Select the question you would like to answer:
– what three groups of substances are included in the composition of seeds?
– what organic substances are in the seeds?
– the seeds of which plants contain a lot of starch?
– Which plant seeds contain a lot of protein?
– why are sunflower, flax, and hemp classified as oilseeds?
Test tasks
Exercise 1. Fill in the missing words.
The seeds contain... and... substances.
The organic substances of the seed include ..., ..., ....
The inorganic substances of the seed are... and....
In the presence of iodine, starch...
There is a lot of starch in the seeds of plants such as....
There is a lot of protein in the seeds of plants such as....
Oilseeds are...
Task 2. Choose the correct answer.
1. If we hold a test tube with seeds over a fire, we will soon notice on the walls of the cold part of the test tube:
a) gluten;
b) drops of water;
c) protein.
2. When the seeds are completely burned, only a little remains of them:
a) ash;
b) oils;
c) gluten.
3. Ash is:
a) organic substances;
b) minerals.
4. Gluten is:
a) vegetable protein;
b) fat;
c) carbohydrates.
5. When adding iodine to a starch solution, the solution:
a) turns red;
b) does not change color;
c) turns blue.
6. Oilseed crops include:
a) potatoes;
b) wheat;
c) sunflower.
7. Flax, sunflower, rapeseed, olive seeds are rich in:
a) fat;
b) protein;
c) minerals.
Task 3. Restore the logical circuit:

To be continued
Lesson objectives: To study the chemical composition of plants based on studying the composition of seeds; develop practical skills in detecting nutrients in seeds.
Equipment: glasses with water, test tubes, gauze wipes, iodine, dry fuel, seeds of wheat or other plants, bean and wheat sprouts, sunflower seeds, white paper, table “Structure of seeds”.
During the classes:
1. Studying new material.
We know that all living organisms have similar chemical compositions.
Write in a notebook. Topic: Chemical composition of plants
The purpose of our lesson is to find out what substances plants are made of and what groups they are divided into.
Pay close attention to what I will do and say, and as the story progresses you will need to fill out the table.
Demonstration of 1 experience:
Of course, you know what kind of seeds I have.
Question: What substances do these seeds consist of? What do they contain?
The seeds are placed at the bottom of the test tube and heated.
Question: What do you see? (water appeared on the walls of the test tube)
Question: Correct. Where did she come from? (She was in the seeds)
Conclusion: The substance found in seeds is water.
Question: What substances besides water are found in seeds?
Demonstration of 2 experiences:
Experiment: Place 10-15 wheat seeds in a small crucible and heat it. When brown fumes begin to be released during heating, light the seeds. When the flame goes out, show the students the charred seeds.
Conclusion: Seeds contain substances that can burn. These substances char and burn. Such substances are called minerals.
After the combustion of minerals, ash remains. The ash doesn't burn. Ash is a mineral substance.
Demonstration of 3 experiences:
Show flour.
Question: What is this? (flour)
What is flour made from? (from wheat grains)
How is flour made? (Wheat seeds are ground in a mill.
Conclusion: This means that everything that is in the seeds is in the flour.
Experience. Take wheat flour and knead the dough. Then rinse the dough in water. After rinsing, immerse in clean water and rinse until the water becomes cloudy.
Question: What's left in the rag?
This substance is whitish, viscous (stretch) and sticky (touch). This substance is a vegetable protein, which is contained in gluten.
Conclusion: Plants contain protein.
Experience. In addition to protein, plants contain one more substance. If we drop iodine into a glass of cloudy water, the water will turn blue, because... Plants contain starch, which turns blue when exposed to iodine.
Conclusion: Iodine is an indicator for starch. Therefore, plants contain starch and protein - these are organic substances.
Plants also contain other substances.
Demonstration of 4 experiences:
Crush the sunflower seeds.
Question: What did you find? (If anyone says it’s water, you can check by drying it). Oil is extracted from the seeds of these plants.
Question: What plants are these? (sunflower, flax, hemp)
Conclusion: Another substance was found in the seeds - fat. Fat is an organic substance. Thus, plants contain organic substances (proteins, fats, carbohydrates), minerals and water.
Question: Do all plant organs contain the same amount of water?
Plant organs contain unequal amounts of water, organic and mineral substances. Cabbage leaves contain 90% water, cucumber fruits contain 96% water. Young plants contain up to 95-98% water, and in lignified ones up to 50%.
Question: Why? (water is necessary for all life processes occurring in the plant body).
Working with the textbook.
Question: What substances are most abundant in plant seeds? You will get the answer to this question from the textbook, pp. 143 (5th paragraph) -144.
Write it down in your notebook.
Proteins – peas, beans, beans, soybeans, lentils
Fats – sunflower, cotton, flax, hemp, peanuts, soy.
Carbohydrates – wheat, rye, barley, corn, rice.