Cookie recipe according to Soviet GOST. Recipes for Soviet baking according to GOST. Recipes according to GOST. How to prepare tin bread according to GOST photo recipe
Glazed Russian gingerbread. GOST
Gingerbread is one of the oldest Russian delicacies. Once upon a time they were prepared only with honey and molasses, since sugar was brought from distant countries and was very expensive. Gingerbread products include gingerbread and gingerbread. The word “gingerbread” comes from the word *spices*, the presence of which in these products is a characteristic feature .
Gingerbread dough can be prepared in two ways: raw and choux. Gingerbread from raw dough quickly dries and becomes hard. Gingerbread from choux pastry remains fresh and fragrant for a long time.
Today I decided to bake GOST gingerbreads, according to a recipe from a book from 1959. The results were delicious, tender gingerbreads.
So the recipe:
3 tbsp flour,
1 tbsp sugar
2 tbsp caramel molasses
1/4 cup honey
100g butter
1 pc. egg (added 4 more yolks)
1 tsp baking powder,
1 tsp perfume for gingerbread cookies,
1/4 cup water
.
Put honey, sugar, molasses in a saucepan, add water and boil the syrup to 107 degrees or test on a thick thread
Add butter to the boiled syrup, stir and cool to 80C.
Mix spices, flour, baking powder. Pour the flour into the syrup and stir until smooth. Add the egg and the rest of the flour to the already cooled dough.
Knead the dough. Cut the dough right away, otherwise the products will turn out to be of poor quality.
I rolled out the rope, divided the dough into pieces of 26g each. Formed balls and put them in the oven at 220g for about 20 minutes, depending on the oven. Bake with steam.
Glaze:
you can bathe the gingerbreads in sugar syrup or if according to the book (sugar edition)
It is prepared from 1 tbsp sugar and 1/2 tbsp water and flavoring.
Boil the syrup until it tastes like a thick thread. Cool, add flavoring. And bathe the gingerbread cookies in the syrup. Dry for 1-2 hours.
I bathed it in white glaze:
0.5 protein,
50g.sah. powders and
1 tbsp. warm water.
Place 3-4 gingerbread cookies in a plastic container, pour 2 tablespoons of glaze, and close with a lid.
Shake for a few seconds - the gingerbreads are beautifully glazed!!
Place glazed gingerbread cookies on a sheet of parchment or silicone mat. Let dry. Since it was raining and damp, I dried the gingerbread cookies in the oven. Some turned yellow(
Gingerbread mixture (perfume)
Ingredients
Cinnamon - 1 tsp.
Coriander - 1 tsp.
Muscat - 1/4 tsp.
Cardamom - 0.5 tsp.
Allspice - 1/4 tsp.
Star anise - 1/4 tsp.
Black pepper - 1/4 tsp.
Ginger - 1/4 tsp.
1/4 tsp cloves
Grind in a mortar.
Mix well and place in a tightly sealed jar.
*deviations from the recipe are allowed:
*replace butter with fats or margarine.
*increase the number of eggs by two or replace them with yolks. Or remove them altogether.
*If you add eggs, reduce the water.
*the amount of flour varies depending on the thickness of the honey and the thickness of the syrup.
*do not knead very thick dough, otherwise it will not rise.
The gingerbreads turned out to be very aromatic and tasty, and with baked milk they were very tasty)
3.
4.
In the 60-70-80s, if you went to any “Cooking” on the territory of the Soviet Union, you would definitely see “Milk shortbread” for sale. “A high-calorie bun,” the much-loved “Kurabiye Bakinskoe” by many. And, interestingly, the taste of these wonderful products was practically indistinguishable, regardless of where you ate, in Ivanovo or Volgograd. And why? But because the recipe, appearance and process of making those same shortcakes were controlled by the great and powerful GOST.
State standards (GOSTs) appeared in the USSR in 1940. In a short time, 8600 GOST standards were developed, approved and implemented!
GOSTs also appeared in the food industry. The “Moskovsky” loaf began to be baked according to the same recipe in both Moscow and Kirov; the weight and appearance of the product were unified.
But for us, children born in the USSR, shortcakes and cakes baked according to GOST have the best, most pleasant and most unforgettable taste of childhood! And we want to feel this taste again. What is needed for this? We need to find that same GOST and do everything exactly as it tells us.
Those who decide to take up baking according to GOST should note that:
- GOST standards are designed for industrial production, and, accordingly, the product standards in them are large-scale, so it is worth correctly calculating your strengths and the desired yield of the finished product
- according to GOST, professional chefs and confectioners prepared the food, so they had specific skills, and of course, soaking, whipping, etc. they could do exceptionally well. Accordingly, the taste and appearance of the finished product for a non-professional may still differ from what was planned. But patience and work will grind everything, and it’s definitely possible to achieve the perfect taste!
Products. The products were different, the sugar was sweeter, the flour was better quality, the butter was fattier. This may not be true, but it seems so!
- products again. Fat content and other indicators in GOST do not correspond to what we have in store products. There are also products and substances in GOSTs that are not so easy to find. For example, molasses or ammonium, but it is still possible to buy them, you just have to look in online stores. As a last resort, the same molasses can be replaced with honey (dark varieties, for example, buckwheat), and ammonium can be replaced with baking powder or baking powder.
- many recipes according to GOST cannot be reproduced thoroughly at home, so every home option is still an option. And if, after you have cooked something, you feel that the taste is “not right,” you should experiment and achieve the desired taste of childhood!
To begin with, we suggest preparing “those” juicers from the school buffet according to GOST (click on the name)
or those same chureks from the nearest "Culinary"

And if you are ready for more, then prepare the “Potato” cake from the Leningrad cafe “Sever”

Our site has been enriched with baking recipes in accordance with GOST, largely thanks to Ekaterina Cherkasova, who dedicated a whole series of her recipes to it and adapted it to our reality.
And don’t be confused by the milligrams in her recipes, if you want, round up, but GOST didn’t round up...
We invite you to take a look at her collection, as well as other collections of baking recipes in accordance with GOST and treat yourself to a taste from childhood
The collection of recipes according to GOST on our website is not intended for industrial enterprises, but for home cooking. I periodically experience bouts of acute nostalgia for the gastronomic Soviet past. And that’s why I’m collecting a collection of recipes in accordance with GOST. They are also good because they not only allow you to try something that you can’t buy in any store now, but also because they are almost perfectly calibrated, and dishes prepared according to these recipes from Soviet times are almost always a success. This is especially true for baking. Cakes, cookies, bread, pastries... The “Recipes according to GOST” section is constantly updated.
Pancakes according to GOST
A classic recipe for those who are nostalgic for those pancakes that were baked for students and schoolchildren in Soviet times and which are baked according to the same recipe now.
How to prepare cheesecakes with cottage cheese according to GOST

Sweet pastries / Setting up a small bakery at home is not at all difficult. It is enough to stock up on industrial recipes for your favorite baked goods and strictly follow the technology. Then the long hours that are required to obtain a perfect, rich yeast dough will fly by unnoticed. We don't just cook, we play real bakers. And as a bonus, we receive extreme enthusiastic amazement from those who taste our products. My household does this silently and very quickly. Once - and the dish of cheesecakes is no longer there. This means there is a reason to prepare the second one :) / Recipes according to GOST / When you start baking a GOST cake, pies or buns, you wait with bated breath: will you get the same taste that you remember from childhood, or not? So these cheesecakes didn’t taste the same as they did thirty years ago. Even then they were a bit harsh with a small circle of dry grainy cottage cheese. These buns are so soft, the filling is tender and sweet. This is probably how our grandmothers remember them. / Cottage cheese dishes / This recipe is not for beginners. Rich yeast dough requires time and some baking experience. But if you’re okay with this, then be sure to try baking cheesecakes. They are fabulously delicious. Gostovsky recipe, Simple and verified down to the gram, down to the minute. Great pleasure from the cooking process and the delight of the household, ready to eat both baking sheets of cheesecakes that have not yet had time to cool. :)
The same “Flight” cake. A recipe for returning to childhood

It is quite possible to prepare this classic example of Soviet confectionery art, a cake made from crispy nut meringue with classic “Charlotte” cream, familiar from childhood, at home. Needless to say, homemade Polet cake turns out to be a hundred times tastier than store-bought... Natural vanilla gives the cake a soft, charming aroma, but if you want to get exactly the same taste as the cake had 30 years ago, then take a bag of vanillin. Then a nostalgic tea party is guaranteed.
Oryol sourdough rye bread recipe

Homemade bread / This sourdough rye bread is incredibly aromatic thanks to maltose molasses, which you can’t buy in a regular store, but can easily be ordered from any online store for lovers of homemade bread baking. It is inexpensive and has a long shelf life. It is used not only to flavor rye dough, but also for Asian sauces. For example, for teriyaki. Rich malt aroma, bright red color. This tall bread with a crispy crust will appeal to those who are partial to fragrant, slightly moist baked goods. I prefer the more modest Darnitsa bread. But it’s worth baking Orlovsky at least once to find out what the bread tasted like in the 60s of the last century, when its recipe was developed. / Recipes according to GOST / Not the most common GOST bread recipe, created during the Khrushchev “thaw”. I personally have never seen anything like this on the counter. But, tempted by the look and ingredients in the recipe, I decided to try it. I got hold of maltose molasses. Fortunately, by that time my starter had already been grown and gained strength. The bread turned out interesting. I hope you will like it too.
Oatmeal cookies at home, recipe with photo

Sweet pastries / One of the simplest recipes for oatmeal cookies, which were sold in confectionery departments in Soviet times. / Recipes according to GOST / It was a discovery for me at one time that there are a great many recipes for oatmeal cookies. Having tried different options, I came to a disappointing conclusion: this is not good for me. It’s not at all the taste I’ve been used to since childhood. Those oatmeal cookies did not taste like oatmeal at all, but they had some completely indescribable taste. When I finally found that same old Gost recipe, it turned out that it’s all about cinnamon and raisins, which are finely chopped, turning from a common baking attribute into an aromatic seasoning. Another advantage of this cookie is that it is completely low-fat and not hard at the same time. In short, the most delicious and most beloved.
Cupcake “Stolichny” according to GOST with raisins

Recipes according to GOST / Recipe for a classic cupcake from Soviet times, which could be bought at the school cafeteria. / Sweet pastries / Very tasty, dense and at the same time tender and crumbly cupcake. You've probably tried it more than once, because it is still produced by confectionery factories and can be found on store shelves.
Pastila at home
Recipes according to GOST / How to prepare apple marshmallow at home. Pastila according to GOST, the same one that was sold in stores during our childhood? Smells like real vanilla and apples, and not the chemistry of aromatic additives. It turns out to be very simple. No special devices are required. The only thing you will have to get hold of is agar-agar. But now you can order it at any confectionery store. It's very easy to work with. / Sweets / The recipe for this marshmallow is almost 100 years old. The miracle of the Soviet confectionery industry was created based on a French marshmallow recipe. But there is less sugar in our marshmallows, more apples. Fragrant, moderately sweet, tender, melting in your mouth. Adore. I hope you enjoy this simple recipe too.
Any copying, reprinting or posting copies of site materials on local or other networks without written permission is prohibited. Easy Recipes
I constantly get questions here, and very often about the cream. Unfortunately, most posts about GOSTs have 5-7 pages of comments, and I, of course, understand those who are too lazy to scroll through it all. But I strongly recommend that you scroll through it, because most of the questions are answered there more than once. But, apparently, there is still a need to somehow systematize the information to make it easier for both you and me.
Main problems:
-syrup curdles before cooking
-syrup curdles during cooking
- the syrup does not thicken
- the syrup is candied
- the cream turns out liquid
-cream is cut off
-I want less sugar!
To avoid such problems, you need to understand why the cream is made this way and not otherwise, what role the ingredients play and what the ideal cream is. And also, is it important to follow technology, and why do I write exactly what I write and not something else?
Let's start with the last one.
Any oil (in this particular case) cream is an emulsion. From oil and liquid (that is, syrup). The oil itself is also an emulsion, and the label says that it consists of approximately 20% liquid. If you melt the butter, the emulsion will disintegrate. Therefore, the most important rule is The butter for the cream should be softened, not melted. If you start pouring in warm syrup, the butter will, of course, melt. Therefore, before whipping all products must be the same room temperature- and butter (which must be taken out of the refrigerator in advance so that it warms up) and syrup (which must be cooled in the kitchen).
The emulsion is formed not just like that, but in certain proportions. Let's say, if there is too much liquid, at some stage the oil will simply stop interacting with it, and you will end up with a liquid cut-off cream - pieces of butter in syrup. It is therefore important to cook the syrup correctly - so that it is not too liquid, and there was enough oil to emulsify.
About what for a tasty cream you need to take tasty butter, I’m writing just to complete the picture, it seems to me that this is obvious. But what about the syrup?
GOST cream differs from other similar creams in that it is very sweet. It has few eggs, but a lot of sugar. This was done, apparently, for the sole purpose of increasing the shelf life of products containing cream.
Please note that butter can be stored in the refrigerator for quite a long time, and cream becomes stale after just a couple of days. What is this connected with? When whipping, we add air, which contains a huge number of microorganisms that happily multiply in a favorable environment. Sugar (like salt) is a preservative, but only when used in sufficient quantities. Thus, the more sugar there is in the cream and the fewer eggs it contains, the more convenient it is for the production of large batches of the product. There is one more point - a large amount of sugar allows the egg-milk syrup to boil, that is, heat treatment of milk and eggs. This is the most important aspect of large-scale production, when it is necessary to carefully monitor the purity and quality of the product.
If you take, for example, crème anglaise and try to heat it to a boil, it will curdle. If you prepare syrup for Charlotte cream according to GOST, it will not curdle. This is precisely due to the high amount of sugar in the syrup.
However, for some, the syrup still curdles. To prevent this from happening, don't try to reduce the amount of sugar(if you want unsweetened, just take another cream recipe, there are many of them), and most importantly - always cook (especially at the beginning!) over low, low heat.
If the syrup has curdled, it is spoiled.
If the syrup is overcooked, it will be too thick and tend to become sugary.
There is another aspect - if an egg is mixed with so much sugar, it will also curdle, so it is important to mix the egg with milk first, and then add sugar, otherwise you risk getting grains of yolk at the very beginning of cooking. There is no way to fix this.
I also read several times about attempts to boil the syrup in a water bath, “to make sure it doesn’t curdle.” Let me remind you that sugar syrups with a concentration above 50% boil at a temperature of 101C and above, while a water bath, by definition and purpose, has a temperature no higher than 100C. That's why There is no point in boiling syrups in a sauna.
The correct sequence of actions when preparing cream.
1. Remove the butter from the refrigerator an hour before cooking, transfer it to a mixing bowl, and cut into pieces.
2. Mix milk and egg (yolk) thoroughly, then add sugar.
3. Over low heat, stirring constantly, until the sugar dissolves and cook, stirring, until it boils. Boil for a minute or two.
4. Cool the syrup to room temperature.
5. Beat the butter with a mixer at maximum speed until white.
6. Add syrup in small portions, whisking thoroughly each time.
7. Finally, add alcohol and other ingredients (if indicated).
8. The finished cream is smooth, shiny, and easily slides off the whisks.
I hope I have answered most of the questions here, if you still have questions, ask them in the comments. Good luck!
Recently, the site has been gripped by a terrible infection called “Recipe according to GOST.” Apparently, the authors believe that by writing these magic words, they are literally putting a “Quality Mark” on their products. Yes, it would be okay if they just wrote according to GOST, but then they write “I took the recipe for “Shortcake according to GOST.” You start asking which GOST exactly, and in response you get round eyes - “but it’s just according to GOST and that’s all.”
So, for people who understand the essence of the issue, such phrases have the exact opposite effect. Dear authors, GOSTs are not recipes for finished products with markings and names. GOST serves completely different purposes. It determines the essence of the products being manufactured and the permissible content of certain components in this product. Here is an example of an excerpt from GOST R 53041-2008, which is called "NATIONAL STANDARD OF THE RUSSIAN FEDERATION FOR CONFECTIONERY PRODUCTS
AND SEMI-FINISHED CONFECTIONERY PRODUCTS TERMS AND DEFINITIONS" Quote: "CAKE: a volumetric flour confectionery product with or without large and (or) small additions, with or without filling, with or without surface finishing, with a mass fraction of total sugar of at least 20%, mass fraction of fat not less than 10%, mass fraction of moisture not more than 30%. If the finished product meets these conditions, then the manufacturer has the right to indicate on the packaging “manufactured according to GOST.” If anyone still has doubts, I did simple experiment, I picked up a can of condensed milk and read that it was made according to GOST R 53436-2009, and found this document on the Internet. You can repeat this experiment and read this document. You will not find either the recipe for this product or the technology there its manufacture.
And here we move on to the second part of the Marlezon Ballet. There is such a profession as “food production technologist”, which is taught at a higher educational institution for five years and improved for the rest of your life. And at large food enterprises (including catering enterprises) there is such a position as “chief technologist”. Through the efforts of these people, new recipes are created or old ones are maintained, which satisfy (must satisfy) numerous regulatory documents regulating the work of public catering establishments and the compliance of the product with regulatory documentation. The available recipes are collected in a technologist’s “bible” called “Collection of recipes for dishes and culinary products (regulatory documentation for public catering establishments). Here it lies in front of me. This is a Talmud in A4 format, 6 cm thick, and weighing about two kilograms. Everyone uses these catering technologists and calculators. At factories, of course, documentation is stored in a different form. It is from here that recipes migrated to the site under the illiterate name “according to GOST.” For some reason no one thought why the original recipes from these collections indicated such strange layouts as for example, 252 g or eggs - 143 g. Yes, simply, these collections are designed to yield 100 servings or 10 kg of finished product. Features of catering.
To be honest, my level of tolerance for recipes “according to GOST” has already reached a critical point. I will not enter into discussions in recipes or in this note on this matter with anyone else. But if I see the words “recipe according to GOST”...
I don’t know about you, but I’m pretty tired of the plastic bread that is sold in our stores. The complaints are not only about the taste of store-bought bread, I suspect that the composition of this bread is not nearly as harmless as indicated on the label. I still remember the taste of the bread that was baked at bakeries according to old GOST standards without the use of improvers and other additives.
While searching, I tried several recipes, including the one everyone liked, and found my ideal option. This tin bread according to GOST, prepared using the sponge method.

The taste and texture of the crumb are very similar, or rather, identical to classic pan bread. The only thing is that I couldn’t repeat the shape. But here everything is much more complicated. The fact is that bakeries use special cone-shaped molds to bake pan bread. This is what she looks like

I don’t have such a mold and I use a 1.5 liter non-stick rectangular mold. This size is perfect for this recipe. Since bread increases almost 3 times in the process of proofing and baking.
To find out the volume of your mold, pour water into it. The amount of water is equal to the volume of the mold.
Recipe for pan bread according to GOST
Ingredients:
For the dough:
250 ml warm water
220 g premium wheat flour
4 g yeast
For the test:
280 g flour + 50 g for kneading
100 ml warm water
For lubrication bowls 3-5 ml vegetable oil
How to prepare pan bread according to GOST photo recipe
1.Let's prepare the dough. Mix sifted flour and yeast.
Flour must be sifted, this will enrich it with oxygen and help the dough rise better; also, using sifted flour will prevent foreign particles from getting into the product.
2. Pour warm water into the bulk ingredients (water temperature 36 - 38⁰C). In order for the dough to knead without lumps, you need to add liquid to the flour, and not vice versa.

3. Knead the batter, cover with film or a towel and leave in a warm place for 3.5 -4 hours. During this time, the dough will fit and increase in size by 2-3 times.
 Ready dough
4. Making the dough. Dissolve salt and sugar in the remaining water. Add the sugar-salt solution to the fermented dough and stir. Next, add the remaining flour and knead the dough.
5. Place the dough on the table sprinkled with flour and knead it until it stops sticking to your hands. A well-kneaded dough will return to its shape when pressed lightly.

6. Grease a deep bowl with vegetable oil, place the kneaded dough there and cover with film. Leave it to rise in a warm place for 30-60 minutes. The dough proofing time depends on the room temperature. The dough will be ready to shape when it has doubled in size.
 Dough after proofing
7. Forming bread. Place the finished dough out of the bowl onto the table and let it rest a little, about 5 minutes. To prevent the dough from sticking to the table, you can grease the table with a small amount of flour.
Avoid using large amounts of flour, as this will cause the finished bread to separate when sliced.
8. Roll out the dough into a layer 2 cm thick.

Roll it up.

Place the formed dough piece in a baking dish. If you don't have a non-stick pan, grease it with a little oil.

9. Leave the bread to rise for another 30 minutes. If the room is cool, the proofing time can be increased to 60 minutes. As a result, the dough piece should almost double in size.
 Suitable test piece
When the dough rises, it will form a beautiful cap. If you cover the dough with film or a towel, the top of the dough will rest against the towel and you may not get a beautiful shape. To avoid this, I do not cover the dough, and so that its top does not get airy, I put it in the cupboard.
10. Preheat the oven to 220⁰C and place a bowl of water on the bottom. The water from the bowl will evaporate and steam will form in the oven, which will provide our bread with a crispy crust.
11. We bake bread. After the dough piece has risen, put it in the oven and bake the pan bread for the first 20 minutes at a temperature of 220⁰C. Then reduce the heat to 200⁰C, remove the bowl of water and bake for another 20-30 minutes. Baking time depends on the characteristics of your oven.

INGREDIENTS FOR CRUGS
- 5 egg whites
- 250 g sugar
- 15 g vanilla sugar
- vinegar for wiping molds
- 150 g of any nuts
- 300 g condensed milk
- 220 g butter
- 15 g vanilla sugar
- 1 yolk
- 200 g sugar
- 0.5 cups milk
- 220 g butter
- 1 tbsp. l. cognac or rum
- 15 g vanilla sugar
- 220 g butter
- 150 g of any nuts

two identical cakes
COOKING
Cake "Flight"
airy cakes
real "Flight"

You can use two types of cream for this cake. The first option is with condensed milk, the second is original, according to GOST.
INGREDIENTS FOR CRUGS
- 5 egg whites
- 250 g sugar
- 15 g vanilla sugar
- vinegar for wiping molds
You can add chopped nuts to the protein meringue - peanuts, walnuts, hazelnuts. But I like it better when they are laid on top of the cream.
INGREDIENTS FOR QUICK CREAM
- 150 g of any nuts
- 300 g condensed milk
- 220 g butter
- 15 g vanilla sugar
INGREDIENTS FOR CREAM ACCORDING TO GOST
- 1 yolk
- 200 g sugar
- 0.5 cups milk
- 220 g butter
- 1 tbsp. l. cognac or rum
- 15 g vanilla sugar
- 220 g butter
- 150 g of any nuts
In this recipe, I suggest making a cake from individual airy meringues. They bake faster and the cake looks original. If you don’t have a pastry syringe or you can’t make beautiful pyramids, make two identical cakes on parchment paper and bake for 1.5-2 hours at 100 degrees. For other details, see the preparation details.
COOKING
- To prepare a good meringue, remember two tricks: the whites must be chilled, and the form in which you will beat must be wiped with a napkin soaked in vinegar.

- Beat the whites with a mixer at maximum speed, adding sugar in small portions. Transfer the thick foam into a pastry bag.

- Line a baking sheet with parchment paper and squeeze the protein dough onto it in small portions. If you have a small oven, you may need two baking sheets.

- Bake the meringue at 100 degrees for 1.5-2 hours.
- To prepare a quick cream, mix the butter with vanilla sugar and beat with a mixer until it increases in volume. Then slowly add condensed milk, constantly whisking.

- It is more difficult to prepare cream according to GOST. Mix the yolk with milk. Add sugar, stir, place on very low heat and bring to a boil. Stir constantly! Cook for 2-3 minutes until thickened. Then remove from heat and let cool. Meanwhile, beat the butter with vanilla sugar in a mixer and slowly add the milk cream to it. At the very end, pour cognac or rum. You can add chopped nuts to the cream.

- It is better to pre-dry the nuts for the cake in the oven or fry them in a frying pan, and then chop them, but not too finely.
- You can form the cake directly on a plate, or you can use a springform pan covered with cling film.

- Place a little cream on the bottom of the mold and carefully place a layer of meringue. Grease it with half the cream and sprinkle with half the nuts. Then repeat the process: meringue, cream, nuts.

- Decorate the cake with meringue crumbs and nuts of your choice.
- Place the dessert in the refrigerator for at least 2 hours (6-8 is best). Carefully remove from pan before serving. Bon appetit!

Cake "Flight"
The title didn't really bother me. I had already mentally put a piece of cake on my plate and imagined how the spoon fell into the gentle waves of butter cream, breaking it with a crunch airy cakes and again dips into the cream... And now, the conversations are over, the tea is in the cups, I have the cake. But where are the meringue fragments, fragile and weightless, where are the thick cream and crunchy nuts? The margarine and rancid peanuts left an unpleasant aftertaste.
At home, I firmly decided that I would invite my friend to visit and show her what it should be like real "Flight", or "Senator", as she used to call him. And in order to protect you, dear reader, from tasteless store-bought sweets, I am sharing a proven recipe for an ingenious airy dessert.
You can use two types of cream for this cake. The first option is with condensed milk, the second is original, according to GOST.
INGREDIENTS FOR CRUGS
- 5 egg whites
- 250 g sugar
- 15 g vanilla sugar
- vinegar for wiping molds
You can add chopped nuts to the protein meringue - peanuts, walnuts, hazelnuts. But I like it better when they are laid on top of the cream.
INGREDIENTS FOR QUICK CREAM
- 150 g of any nuts
- 300 g condensed milk
- 220 g butter
- 15 g vanilla sugar
INGREDIENTS FOR CREAM ACCORDING TO GOST
- 1 yolk
- 200 g sugar
- 0.5 cups milk
- 220 g butter
- 1 tbsp. l. cognac or rum
- 15 g vanilla sugar
- 220 g butter
- 150 g of any nuts
In this recipe, I suggest making a cake from individual airy meringues. They bake faster and the cake looks original. If you don’t have a pastry syringe or you can’t make beautiful pyramids, make two identical cakes on parchment paper and bake for 1.5-2 hours at 100 degrees. For other details, see the preparation details.
COOKING
- To prepare a good meringue, remember two tricks: the whites must be chilled, and the form in which you will beat must be wiped with a napkin soaked in vinegar.
- Beat the whites with a mixer at maximum speed, adding sugar in small portions. Transfer the thick foam into a pastry bag.
- Line a baking sheet with parchment paper and squeeze the protein dough onto it in small portions. If you have a small oven, you may need two baking sheets.
- Bake the meringue at 100 degrees for 1.5-2 hours.
- To prepare a quick cream, mix the butter with vanilla sugar and beat with a mixer until it increases in volume. Then slowly add condensed milk, constantly whisking.
- It is more difficult to prepare cream according to GOST. Mix the yolk with milk. Add sugar, stir, place on very low heat and bring to a boil. Stir constantly! Cook for 2-3 minutes until thickened. Then remove from heat and let cool. Meanwhile, beat the butter with vanilla sugar in a mixer and slowly add the milk cream to it. At the very end, pour cognac or rum. You can add chopped nuts to the cream.
- It is better to pre-dry the nuts for the cake in the oven or fry them in a frying pan, and then chop them, but not too finely.
- You can form the cake directly on a plate, or you can use a springform pan covered with cling film.
- Place a little cream on the bottom of the mold and carefully place a layer of meringue. Grease it with half the cream and sprinkle with half the nuts. Then repeat the process: meringue, cream, nuts.
- Decorate the cake with meringue crumbs and nuts of your choice.
- Place the dessert in the refrigerator for at least 2 hours (6-8 is best). Carefully remove from pan before serving. Bon appetit!
I wonder how yours turned out Cake "Flight" at home? Share your results with us in the comments. Write what worked and what didn’t, and we’ll try to figure out the problem.
Cake "Flight"
The title didn't really bother me. I had already mentally put a piece of cake on my plate and imagined how the spoon fell into the gentle waves of butter cream, breaking it with a crunch airy cakes and again dips into the cream... And now, the conversations are over, the tea is in the cups, I have the cake. But where are the meringue fragments, fragile and weightless, where are the thick cream and crunchy nuts? The margarine and rancid peanuts left an unpleasant aftertaste.
At home, I firmly decided that I would invite my friend to visit and show her what it should be like real "Flight", or "Senator", as she used to call him. And in order to protect you, dear reader, from tasteless store-bought sweets, I am sharing a proven recipe for an ingenious airy dessert.
You can use two types of cream for this cake. The first option is with condensed milk, the second is original, according to GOST.
INGREDIENTS FOR CRUGS
- 5 egg whites
- 250 g sugar
- 15 g vanilla sugar
- vinegar for wiping molds
You can add chopped nuts to the protein meringue - peanuts, walnuts, hazelnuts. But I like it better when they are laid on top of the cream.
INGREDIENTS FOR QUICK CREAM
- 150 g of any nuts
- 300 g condensed milk
- 220 g butter
- 15 g vanilla sugar
INGREDIENTS FOR CREAM ACCORDING TO GOST
- 1 yolk
- 200 g sugar
- 0.5 cups milk
- 220 g butter
- 1 tbsp. l. cognac or rum
- 15 g vanilla sugar
- 220 g butter
- 150 g of any nuts
In this recipe, I suggest making a cake from individual airy meringues. They bake faster and the cake looks original. If you don't have a
Appeared in 1940. In a fairly short period of time, specialists developed, approved and implemented more than 8,500 of them! State standards have also appeared in the food industry. Despite the fact that quite a few years have passed, completely new confectionery and culinary products have been created, the best, most delicious and unforgettable are the dishes from our childhood. In this material we will present an overview of the best recipes of the USSR.
How to cook according to GOST
If you again want to remember the real taste of dishes familiar from childhood, you can try cooking them yourself. Let's look at what is needed for this. First of all, you need to find the required GOST and carry out all the actions strictly according to the description. Please note: all state standards are designed for industrial production, so the product standards in them are large-scale. Before preparing a particular recipe according to USSR GOST, it is necessary to correctly calculate the ratio of products.
Salad Recipes
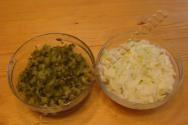
Salads were extremely popular in the Soviet Union. Not a single holiday table would be complete without them. One of the classic Soviet recipes, according to GOST USSR, was a salad that didn’t even have a name. It was prepared from Druzhba processed cheese, garlic and mayonnaise. It was used both as a snack and as a breakfast. You can prepare it as follows:
- 3 cloves of garlic:
- 300 g processed cheese;
- 3 boiled eggs;
- spices;
- mayonnaise.
The cheeses should be put in the freezer for a while, then grated on a coarse grater, mixed with garlic (chopped), finely chopped eggs, mayonnaise, pepper and salt.
The vinaigrette
In cookbooks of the 19th century there was a recipe for a very original vinaigrette. It included the following components:
- veal;
- plums;
- olives;
- soaked apples;
- mushrooms.
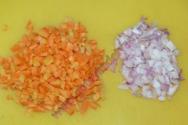
It was not always possible to find such products, so the salad recipe began to be gradually simplified, as a result, Soviet citizens received a completely new dish, which is still popular today. Vinaigrette is extremely easy to prepare; you should take boiled vegetables: 600 g of potatoes, 400 g of carrots, beets, sauerkraut, 200 g of cucumbers (pickled), salt, pepper, sunflower oil. It should be said that at the enterprises it was carried out strictly according to state standards. All vegetables intended for salad are cut into large cubes, combined and seasoned with oil and spices. Sour cabbage, cucumbers and sweet beets result in an incredibly tasty dish.
"Olivie"
Speaking about recipes for USSR dishes, one cannot fail to mention the well-known Olivier salad. Now it is radically different from the classic creation of a chef of French origin - Lucien Olivier. According to the author's recipe, the salad initially consisted of hazel grouse meat, truffles, olives, crayfish necks, fresh cucumbers and various gherkins. The consumer was faced with the question: “Where can I get such products?” Over time, most of the components were replaced with others. For example, instead of crayfish necks and hazel grouse, they began to add boiled sausage, and instead of fresh cucumbers, put salted ones. To make the dish even more nutritious, potatoes were added.

Thanks to the combination of excellent taste and high nutritional value, Olivier has become a desirable attribute of almost every holiday. Surely everyone knows his recipe, and if suddenly someone has forgotten, let’s remember. The vegetables indicated in the recipe (carrots and potatoes) must be boiled. Needed:
- 500-600 g potatoes;
- 300 g sausage (boiled);
- can of peas (canned);
- medium carrot;
- 4 pickled cucumbers;
- mayonnaise;
- pepper, salt.
The cutting form for the salad is cubes. All components are chopped and mixed, after which they are seasoned with mayonnaise and spices. By the way, in the classic version, Olivier was flaky, but gradually the salad changed in this too.
First meal
Soups are frequent guests on our table; their range is quite wide. The first courses are delicious and help the body feel full quickly. They can be cooked in any meat broth or made dietary.
Rassolnik "Leningradsky"
An extremely popular type of soup in the USSR. The recipe presented in this material is considered a classic, it was compiled according to the state standard. The dish turns out incredibly tasty and satisfying. To work we will need:
- 2 liters of meat broth;
- 100 g pearl barley;
- 250 g potatoes;
- 2 pcs. pickled cucumbers;
- 70 g carrots;
- 60 g onion;
- cucumber pickle;
- 2 tbsp. l. paste (tomato);
- laurel;
- salt pepper.
Cooking technology
We sort out the grains, rinse them thoroughly, put them in a saucepan, pour boiling water over them and put them on the stove so that they steam well. At this time, let's prepare the broth. After the meat is cooked, remove it from the pan and strain the broth. Drain the water from the cereal, rinse it again and add it to the soup. Separate the meat from the bones and cut into not too large pieces. For the pickle, cut the potatoes into cubes. Peel and chop onions and carrots. Place the paste in a container, dilute it with a small amount of water and mix. Cut the pickled cucumbers into small pieces. In a saucepan in vegetable oil, fry the onions and carrots for 4-5 minutes. As soon as they are ready, transfer them to another cup. In the same container where the vegetables were sautéed, place the pickled cucumbers and fill with tomato paste.

Add potatoes, sautéed vegetables into the broth with pearl barley (ready) and simmer for 10 minutes. Add the stewed cucumbers and meat, cook for about 5 more minutes. After this, to give the soup a more spicy taste, add cucumber pickle and bay leaf. Let it simmer for another five minutes and turn it off. Infuse the soup for a quarter of an hour and serve with sour cream.
Daily allowance for cabbage soup according to GOST
We suggest preparing one more dish according to the USSR recipe - daily cabbage soup. You need to take the following components:
- 50 g pork ribs;
- 250 g sauerkraut;
- 40 g each of carrots and onions;
- 10 g parsley root;
- 30 g cooking fat;
- 50 g vol. pastes;
- 200 g flour;
- 800 ml broth or water;
- 3 g garlic.
Heat the fat in a saucepan with a thick bottom, put sauerkraut and ribs in it, simmer over low heat for about 2 hours. Place the resulting mass in clay pots, fill it with broth (350 g per serving) and place in the oven for 25-30 minutes. Chop the vegetables and fry until golden brown, add tomato paste and parsley root, warm them up a little and remove from the heat. The flour should be sautéed in a dry frying pan, then diluted with broth until smooth. Add the resulting vegetable dressing and flour to the sauerkraut and put the cabbage soup back for 20 minutes. Pour the soup into portions and season with crushed garlic.
Main dishes
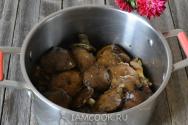
In this part of the article we will present to your attention homemade recipes for dishes popular in the USSR. Throughout the post-Soviet space, potatoes and stew were incredibly popular. Unfortunately, nowadays it is almost impossible to prepare exactly the same dish to taste. It's all about that stew, which, like all products in the Soviet Union, was natural. When purchasing this product, look for only the highest quality products.
The technology for preparing such potatoes is extremely simple. Pour water into a saucepan and place on the stove. Cut the potatoes into large pieces and throw them into boiling water. When it is almost ready, put the stew into it straight from the jar. Many housewives added vegetable dressing or green peas to the stewed potatoes to improve the taste.
The Kiev's cutlets
What could be tastier than chicken stuffed with butter and herbs? The prototype of this dish was cutlets of French origin “de-volaille”. These two meat dishes differ only slightly from each other: in the French version, the filling consists of a creamy sauce with mushrooms; a piece of bread is wrapped in a Kiev cutlet. oils and herbs. Let us present to your attention this very tasty and tender dish according to a USSR recipe (pictured below). By the way, only foreigners could try such cutlets in Intourist restaurants. But very quickly this luxurious dish moved into the kitchens of Soviet citizens.

Kiev cutlet is prepared not from minced meat, but from well-pounded chicken fillet. The filling is frozen butter, which is cut into cubes, and chopped herbs. The filling is placed on the cue ball and carefully rolled into the shape of an oval patty. After this, the semi-finished product is put into a lezon, breaded in breadcrumbs and fried in a heated frying pan until golden brown. At the final stage, the Kiev cutlet is placed in the oven for 10 minutes.
Bread is the head of everything
Without exaggeration, we can say that this is the most popular proverb about bread. In the Union, at every public catering establishment, in school canteens, and in bread stores, there were posters with this proverb. It should be noted that the importance of bread in the life of Soviet people was somewhat different than it is today. We will tell you how to prepare bread according to the USSR GOST recipe. In order to get a truly tasty product, you need to set the dough, and only then make the dough. First you need to prepare the ingredients for kneading the dough:
- 250 g flour;
- 10 g pressed yeast;
- 250 g of water.
For the test:
- 250 g flour;
- 5 g sugar;
- 80 g water;
- 6 g salt.
We start the dough and leave it to ferment. Depending on the room temperature, this process takes from 3 to 4 hours. During fermentation, the dough should be knocked several times. Add flour to the prepared dough and knead the dough into a thick but not too stiff dough. We leave it for an hour and a half so that it fits. During this time, the dough must be kneaded a couple of times. It should increase in volume several times and become porous. We take a piece of dough of the required weight, roll it sides inward, put it in the mold and put it to proof. On average, the process lasts about an hour. You can find out if the dough is ready for baking as follows: gently press the surface of the dough with your finger. If the depression straightens out quickly, it’s time to put the bread in the oven. Please note: bread pans should only be placed in a preheated oven. Its walls should be sprayed with water from a sprayer and the products should be baked for the first 15 minutes at a temperature of 250 °C, then the temperature should be lowered to 200 °C.

Cake recipe according to USSR GOST
Soviet cakes were baked by professional confectioners, strictly based on state standards. At home, housewives most often take ingredients by eye, so very often they fail to get desserts in full accordance with the recipe. It must be remembered that strict adherence to technical conditions and precisely specified ingredients helps to obtain the desired result.
Kyiv cake
The recipe for this unusually tender and tasty dessert was created in 1956, and has remained unchanged for many decades. Few today will remember the taste of this amazing delicacy. We offer you a recipe for Kyiv cake created in the USSR, which you can prepare yourself. We will need:
- sugar - 250 g;
- whites from 6 eggs;
- flour - 50 g;
- nuts (cashews or hazelnuts) - 150 g.
For cream:
- milk - 150 ml;
- sl. oil - 250;
- cocoa - 1 tbsp. l.;
- sugar - 200 g;
- cognac - 1 tbsp. l.;
- a bag of vanilla sugar.
A distinctive feature of this cake is that before making the dough, the egg whites must be fermented: they should be left warm for 12 hours. After that, they are turned into a thick foam, vanilla and regular sugar are added, and beaten again. The nuts are fried a little, then crushed and mixed with flour and 190 g of sugar. Gently pour the mixture into the protein foam and mix gently. Divide the resulting mass into 2 baking dishes, which are pre-lined with baking paper. It’s good if their diameter is 20 and 23 cm, respectively. The height of each cake should be about 2 cm. Please note that the cake blanks should be baked for 2 hours at a temperature of 150 °C. After baking, they should never be removed from the baking paper, otherwise they will break. It is best to leave them in the mold for one day, and only then separate them from the base.

Let's prepare the cream for the cake according to the USSR recipe. Softened butter is better suited for it. In a separate container, mix the milk with the egg and mix well. Add granulated sugar and place the container on the fire. Let the mixture boil and cook for five to six minutes. After this, pour the syrup into another cup and cool under natural conditions.
At the next stage, add vanilla sugar, butter and beat. The butter mass should be added to the cooled syrup one spoon at a time, after each new portion the cream must be whipped. Separate 200 g of the resulting mixture from the total mass and pour cocoa into it. Beat with a mixer.
Pour cognac into the light cream, whisk, and then begin to form the cake. Take a large cake layer, place it on baking paper or a plate, coat it with white cream (1/3 of the total mass) and place a small cake layer on top.
Coat the top and sides of the cake with cocoa cream. Place the remaining light cream in a pastry syringe and decorate the product; it is recommended to use candied fruits for decoration.
USSR cakes: recipes. Lemon cake
Confectionery products bearing this name were presented in a huge range in the USSR. They were distinguished by excellent quality and natural ingredients. We offer recipes for the most famous desserts.
One of the favorite delicacies in Soviet times was prepared from biscuit dough and layered with delicious lemon mousse. Let's prepare the following components:
- 6 eggs;
- 2/3 tbsp. Sahara;
- 1 tsp. vanillin;
- ¼ tbsp. starch;
- 100 g chocolate;
- 2/3 tbsp. flour.
For the lemon mousse:
- a pair of eggs;
- 4 tbsp. l. starch and sugar;
- 350 ml milk;
- 1 tbsp. l. lemon zest;
- 500 ml cream (33%);
- 2.5 tsp. gelatin.
For cakes according to the USSR recipe, you need to prepare kurd (lemon custard), for which you should stock up in advance:
- lemon juice - ½ tbsp.;
- sugar - 2/3 tbsp.;
- lemon zest - 1 tbsp. l.;
- eggs - 3 pieces.

The preparation of lemon cakes according to the recipe can be divided into four stages: baking the sponge cake, preparing the curd, mousse, and assembling the product.
- For the biscuit, beat the whites until foam forms at low speed, gradually add half of the total amount of sugar and increase the speed.
- In another bowl, combine the remaining sugar with the yolks and grind until yellow and add vanillin.
- Add liquid starch and a third of the whipped whites, mix carefully.
- Bake in the oven at 170 degrees for an average of 10-15 minutes.
Prepare as follows: combine sugar, starch, eggs, grind until smooth. Boil the milk and pour it in a thin stream into the egg-starch mixture, stirring constantly. Pour into a small saucepan and cook over low heat for several minutes, without bringing to a boil. The consistency of the cream should be thick. Remove from heat, pour into a deep bowl and cover with film. Make sure that the film touches the surface of the cream, this is necessary so that a crust does not form. After this, we send the lemon mousse to cool in a cool place. At this time, dissolve the gelatin in lemon juice and leave for exactly one minute to swell. Then heat the mixture slightly until the gelatin is completely dissolved. Beat the mousse with a mixer and gradually pour the juice and gelatin into it. We carry out the same procedure with cream and add it to the cream in three steps.
We will prepare the curd as follows: combine sugar, lemon juice, zest and bring to a boil. Beat the eggs and pour more hot juice into them. Place all the ingredients in a small container and place on low heat, stirring constantly, and bring to a boil. Warm up the curd for about 5 more minutes, as a result the cream should have a thick consistency. It should also be covered with film.
Let's start assembling the cake. To do this, cut the biscuit into 3 equal layers. Cover one of them with melted chocolate and let the glaze harden. Turn the cake over with the chocolate side down and place a third of the lemon mousse on it, then cover with the next layer of sponge cake.

We put a layer of mousse on it. We close the cake with the last sponge cake at the top and apply the remaining mousse on it, put it in the freezer for an hour. After this, take out the dessert and cut it into rectangular strips.
Classic waffles
With the advent of electric waffle irons on sale, a huge number of housewives began baking this incredibly tasty product. To prepare waffles according to the USSR recipe, you should take:
- 3 eggs;
- 200 g margarine;
- 300 ml milk;
- a glass of sugar;
- soda on the tip of a knife;
- a little vanillin;
- salt;
- 2 cups of flour.
Let's prepare a container in which we plan to make the dough, melt the margarine in it. Add eggs, sugar and mix. Add milk, flour, soda, vanillin and salt. The consistency of the dough should be thin enough to spread well. Beat the resulting mixture with a mixer.
Heat an electric waffle iron (or a simple one) and bake the waffles until golden brown. If desired, the finished product can be rolled into a tube or horn and filled with boiled condensed milk. The confectionery product must be rolled immediately after baking, otherwise it will harden very quickly and begin to break.

Please note: this must be done with caution as the waffles will be very hot. A waffle cake turns out delicious if you stack the cakes one on top of the other, after coating them with cream or honey.