Rice balls. Onigiri or Japanese rice balls Prepare the rice balls
Rice balls, or onigiri, are a common Japanese dish. You may have even seen how characters in Japanese films or anime feast on them, exchanging onigiri with various fillings with each other. You can try to touch the culture of the mysterious eastern country and prepare one of the rice balls.
Cooking rice balls: video recipe
Photo by Shutterstock
Ingredients for rice balls
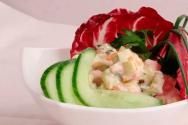
There are many options for preparing rice balls, because you can use anything as a filling: fish, meat, cucumber, avocado, pickled vegetables and fruits. The main thing is that the filling is not sweet. Try this traditional Japanese recipe with salmon and pickled umeboshi plums. This dish can be great for use in Japanese diets.
For this you will need:
- 7 cups sushi rice;
- 4 pickled plums;
- a piece of grilled salmon (you can use any other red fish, tuna and even canned fish, the main thing is not to get carried away with raw seafood);
- a tablespoon of salt; - nori seaweed;
- sesame.
If you can't find pickled plums, use any other filling: cucumber, shrimp, canned corn.
How to cook rice for Japanese balls
First, prepare the rice, from which you will later create balls. First, soak the rice in cold water for 15–20 minutes, then rinse it thoroughly, add water in a ratio of one to two and put on fire. Cook the rice over low heat until tender (usually this takes 10-15 minutes after the water boils). Remove the pan from the stove and let the rice cool. To cook onigiri, it must be hot, but not burn your hands.
If you wish, you can add the spices you have to the rice to give the dish a more piquant taste.
How to make onigiri
Pour a tablespoon of salt into a shallow cup, bowl, or simply onto a separate plate. Separate one eighth of the rice and transfer it to another container. Make a hole in the center of this pile of rice, insert the plum (or whatever filling you decide to use instead of umeboshi) and then cover it with rice on top. Wet your hands with water, take a small amount of salt and rub it in your palms. Take out the rice with the plum and form it into a ball. It should be quite dense and hold its shape well. Make four onigiri with pickled plums. Take a sheet of nori, cut it into four strips and wrap them around the balls.
Onigiri is a very common Japanese dish that looks like balls or voluminous triangles of rice with various fillings. Most often, onigiri is additionally wrapped in dried seaweed, lettuce, and sometimes in an omelette or thinly sliced ham.
A little history
Onigiri was originally exclusively a peasant food that commoners took to work in the fields. Since old Japan was an exclusively agricultural country, this type of food became widespread. Even aristocrats began to take the prototype of onigiri - tonjiki - when going on a picnic or hunting. In our time of blurring borders and increased interest in national characteristics, art and cuisine of different nations, onigiri, as well as sushi, pizza or pancakes, are known in almost every corner of the world.
By the way, these rice balls are in no way related to sushi, since only unleavened rice is used for its preparation (unlike sushi).

Common to all recipes
Before you cook the rice balls, you need to prepare the rice properly. The cereal is thoroughly washed under running cold water until the flowing liquid is clear. Washed rice is boiled in salted water. It should become soft, but not boiled. When ready, drain the water, transfer the rice to a colander and let it cool slightly.
Most times when rice balls are made, the recipe calls for dried seaweed. They can be replaced with more accessible greens: parsley, arugula, mint or sorrel. Many recipes and tips on how to make rice balls use one or another filling that is not mixed with the rice, but placed inside. This is done simply: a deep hole is made in a ball formed from rice, where the desired mixture is carefully placed with a teaspoon. After this, the hole with minced meat needs to be sealed. The ball is slightly kneaded and rolled in your hands to compact the finished onigiri.

The simplest onigiri
Even a person who is very far from cooking can prepare such rice balls. Pot with freshly cooked rice for 15 minutes. wrap it in something warm (plaid, blanket, terry towel), finely chop the greens, heat the sesame seeds for 5 minutes in the oven. Add greens to the steamed rice, and salt if necessary. Form balls, roll in sesame seeds, serve with any sauce.
Onigiri and vegetable sauce
Here are the other rice balls, Japanese ones. Their recipe is as simple as the previous one, and the highlight is the sauce.
Form the cooked rice into balls, roll them in flour and fry them evenly in oil. For the sauce, cut hot red pepper, zucchini, bell pepper, leek into strips and fry them in vegetable oil. After this, pour in a quarter cup of classic soy sauce, add salt, add spices to taste, squeeze out the garlic - a couple of cloves - and simmer for 5-7 minutes. Place the onigiri into the vegetable sauce and simmer for 5 minutes, stirring gently.

Rice balls with cheese
Let's move on to the next dish. These original Japanese rice balls (a recipe in which rice is successfully combined with cheese and capers) will demonstrate the features of Far Eastern cuisine and will become a table decoration.
For 300 g of rice you will need 100 g of cheese, 1 clove of garlic, 3 lemons, black pepper, vegetable (preferably olive) oil, capers, parsley. Add the zest and juice of one lemon, finely chopped parsley, crushed garlic, pepper, salt to taste, grated cheese and pre-cooked rice to the olive oil. Mix everything very thoroughly, form balls, place them on thin lemon slices, garnish with capers on top.

Free balls
Carefully beat the egg, two tablespoons of sugar, salt to taste and a pinch of cinnamon, add about 100 g of flour, mix thoroughly. Add previously cooked rice and knead the dough. Roll the rice into balls and deep fry, turning regularly and carefully. Place the finished onigiri on paper napkins and sprinkle with powdered sugar.
Onigiri with minced meat
Chop one small or half a medium onion and fry in olive oil, then add 200 g of minced meat (preferably mixed, such as pork and beef) and a quarter glass of wine (dry white). With regular stirring, wait for the wine to evaporate, add a tablespoon of tomato paste and water so that the liquid covers the entire minced meat. Salt, pepper, add basil or oregano.

Simmer over low heat for about 40 minutes, then remove with a slotted spoon and transfer the minced meat into one container and pour the sauce into another. Pour some of the sauce into the prepared rice, making sure that the mixture does not turn out to be too liquid, add a couple of tbsp. spoons of grated Parmesan and egg, mix thoroughly. Form rice balls, putting a little minced meat and a small piece of cheese in the middle, dip them in a beaten egg, roll generously in breadcrumbs and fry in olive oil until golden brown.
Such balls are also made with liver (chicken, turkey, rabbit, beef). The recipe is similar, except that the selected liver is fried in sour cream sauce. Then the liquid is decanted, and the liver is passed through a meat grinder.
You can prepare balls with minced meat using a simpler recipe. In this case, minced chicken is taken: the fillet is passed through a meat grinder, salted and fried in vegetable oil. When ready, add cheese to the minced meat and mix everything until smooth. The prepared rice porridge is made into balls, into which the resulting minced meat is placed. The balls are also dipped in egg, rolled in breadcrumbs and fried, or even deep-fried.
Onigiri with umeboshi
Umeboshi - the so-called dried Japanese plums, are actually salted (pickled) Japanese apricot fruits. This is a recipe in which rice balls are filled with two types of filling: salmon and umeboshi.
Already cooked and slightly cooled rice is divided into two parts. Triangular onigiri with umeboshi are formed from one half. These products are wrapped in one strip of nori seaweed. Grilled salmon, peeled from skin and bones, is kneaded until smooth and mixed with the second part of the rice. Onigiri of the same triangular shape are created from the resulting substance, but they are not wrapped in seaweed, but sprinkled with sesame seeds. Usually 2 balls are placed per serving - with salmon and with umeboshi.
It should be noted that onigiri made according to this recipe are formed quite large, for example, for 4 servings, i.e., 8 units of balls equal a kilogram and a quarter of rice and 200 g of salmon. They turn out to be relatively large and differ from ordinary products in their shape. But essentially it’s the same thing.
I would like to add at the end: Japanese cuisine is quite simple to execute, the products (even seaweed) are available and inexpensive. So don't be afraid to experiment and have an unforgettable Japanese evening.
A popular dish of Japanese cuisine, onigiri is a miniature snack in the form of small balls of rice with a variety of fillings.
Onigiri is often mistaken for a type of sushi, but this is a misconception. Onigiri is made from plain boiled rice, without adding a vinegar dressing, as is used to make sushi.
The filling, as a rule, includes only 1-2 components. The filling can be absolutely anything, but the traditional ones are: lightly salted salmon, salted pollock or cod roe, pickled plums, tuna flakes (bonito), salted kombu seaweed.
Initially, such rice balls were a way to preserve the remains of “yesterday’s” rice for later use - the salty or sour filling acted as a natural preservative and increased the shelf life of rice in those days when they had not yet heard of refrigerators.
Onigiri is a healthy and tasty alternative to pies and sandwiches; they are great for breakfast or a light and healthy full meal during the day, a picnic and an outing.
Thanks to the stickiness of rice, onigiri holds its shape perfectly, which allows the cook to give free rein to his imagination in decorating the dish. Just a few pieces of nori and a snow-white rice ball comes to life, turning into a panda, a bird, a fish, a house or a funny weirdo. Needless to say, such a “bun” instantly arouses children’s interest?!
Making onigiri at home is very simple.
Cover the rice with cold water. Massage the rice with your fingers and rinse thoroughly. Change the water several times until the water becomes clear. Add 450 ml of cold water to the washed rice. Bring the rice to a boil and cook for 13–14 minutes without opening the lid or stirring.
You can use sushi rice or other short-grain glutinous rice to make onigiri.

For the filling, cut the fillet of lightly salted salmon or salmon into small pieces.

Add 3-4 tablespoons of cream cheese and stir until the cheese is evenly distributed.

Leave the finished rice covered for 10–15 minutes, it will steep and cool slightly. Cool the rice to a temperature that allows you to hold the rice in your palms without burning it.
Before you start shaping the onigiri, you need to salt the rice. The traditional way to do this is to wet your hands with water and rub a pinch of salt in your palms or dip your hands in salt water. This method is suitable if you also sculpt and shape onigiri in the traditional way - with your hands.
To make your life easier and simplify this process as much as possible, you can also use special molds or cling film, in this case salt is added to the hot rice; additionally, you can add a little sesame oil as a flavoring and mix everything lightly.

When all the components are ready, you can begin assembling the onigiri. Place 1-2 tbsp on a piece of cling film. rice

Place some filling in the center.

Lift the cling film by the edges and, wrapping it, form a ball of rice around the filling. Shape the onigiri into the desired shape. It can be a ball, an oval or a traditional triangle.

Onigiri or Japanese rice balls are ready.
Ready-made onigiri are traditionally decorated with a wide strip of nori at the base of the triangle. Onigiri is eaten with your hands and a strip of nori has practical significance in this case - the rice will not stick to your hands while eating.
You can also additionally decorate the onigiri with pieces of nori, fish, tuna shavings, salted caviar, sesame seeds, depending on your taste and mood. You can serve onigiri on its own or with soy or other sauces.

Filled with a variety of fillings, these rice balls are the perfect quick snack and a great alternative to sandwiches. In this article you will learn how to make onigiri using ingredients familiar to the Japanese.
How is onigiri different from sushi?
If a person is not familiar with Japanese cuisine, then he could easily mistake onigiri for one of the types of sushi, but this is not so. One of the key differences between the two is that onigiri is made with plain cooked rice, while sushi is made with steamed rice seasoned with vinegar, salt and sugar.
Filling options for onigiri
Due to its popularity in Japan, onigiri fillings can be purchased at a variety of stores. There are even specialized points where the range of fillings is amazing.
At the time when onigiri was invented, refrigerators did not yet exist. So the Japanese came up with a method to keep rice fresh longer by adding salty or sour ingredients as natural preservatives. This is why salt is rubbed into your hands when you make onigiri, so that the rice stays fresh for a longer time.

The most common fillings for onigiri in Japan are:
- sha-ke (salted salmon);
- umeboshi (Japanese pickled plum);
- okaka (bonito flakes dipped in soy sauce);
- kombu (boiled kombu seaweed);
- tuna mayo (canned tuna with Japanese mayonnaise);
- tarako (salted cod).
These days, onigiri fillings are more creative. You can use any leftovers from a previous meal, such as chicken or shrimp. You can also try making onigiri with mixed rice instead of plain white rice.
Thanks to their convenient compact shape, these small rice balls are easy to transport and eat with your hands. You can enjoy onigiri as a quick snack, or a school/work lunch, or a picnic. Very often they are an integral part of bento boxes.

1. Use freshly cooked rice. Let the cooked rice cool slightly before cooking. When you make onigiri, it should be warm.
2. Wet hands. It is important to wet your hands with water to prevent the rice from sticking. To do this, place a bowl of water next to you.
3. Salt your hands. Salt both hands and rub them together before you start cooking. This will help the onigiri last longer.
4. Make enough effort. When you shape the onigiri, use enough force to prevent the rice from falling apart later.
5. Use a kitchen towel to preserve onigiri for the next day.. If you want to make onigiri for breakfast the next day but don't want to get up early, here's my advice. Wrap the finished onigiri (previously placed in a plastic container) with a thick kitchen towel to protect the balls from the cold in the refrigerator. Rice will freeze in the refrigerator, but this easy trick will keep your onigiri cool enough to avoid spoiling.
Like everything else, making onigiri correctly comes with practice. To make it better for you, use the step-by-step instructions and/or watch the cooking video that will be added at the end of the article.
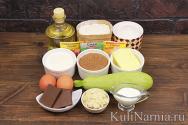
Ingredients
For rice
- 2 cups uncooked Japanese short grain rice;
- 2.5 cups of water.
For onigiri
- kosher salt;
- 4 sheets of nori (seaweed);
- salted salmon;
- okaka;
- tuna mayo;
- 3 umeboshi (Japanese pickled plum);
- seasoned with kombu;
- sesame seeds.
For salted salmon
- 1 salmon fillet;
- kosher salt.
For okaka
- 2 packs Katsuobushi (dried bonita flakes) (2 packs = 6g);
- 2 tbsp. soy sauce.
For the tuna mayo
- 1 canned tuna (70 g);
- Japanese mayonnaise 2 tbsp;
- half tbsp. soy sauce.
Recipe
Prepare all ingredients.

1. Cooking rice
Place the rice in a large bowl, rinse gently in a circular motion and drain. Repeat this process about 3-4 times.

Let the rice sit in the water for 30 minutes. After this, place the contents of the bowl into a sieve for 15 minutes to allow the remaining water to drain.


When the water boils, reduce the heat to the lowest setting and continue cooking for 12-13 minutes or until the water is completely absorbed. After this time, look into the pan and if you see any water remaining, close the lid and continue cooking for another minute or so.

Remove the pan (with lid) from the heat and let the rice sit, covered, for about 10 minutes. Then place the rice on a large plate. Let the cooked rice cool slightly so that you can handle it without burning yourself. However, do not let the rice cool completely.

2. Preparing the filling
While the rice is cooking, you can make the fillings.
Salted salmon: Sprinkle kosher salt on both sides of salmon fillets. Bake at 200 ºC degrees in the oven for 25 minutes.

Remove the skin and divide the meat into small pieces.

Umeboshi: Place umeboshi (Japanese pickled plums) on a 10cm x 10cm piece of plastic wrap. Fold in half and squeeze out the seeds from each umeboshi. Discard the seeds and save the pulp.

Okaka: Place katsuobushi (dry bonita flakes) in a bowl and add 2 tbsp. soy sauce. Mix thoroughly so that the soy sauce does not remain at the bottom of the bowl.

Tuna mayo: Place canned tuna in a bowl and add 2 tbsp. Japanese mayonnaise and half a tbsp. soy sauce. Mix.

Kombu: Place purchased seasoned kombu in a bowl for easy access.

3. Making onigiri
Cut the nori sheets by a third.

Wet both hands in water.

Then put some salt in your palms and rub them together. How much salt? I dip 3 fingertips in the kosher salt shown in the picture below. If you use table salt, use half as much as it is saltier than kosher salt.

Take a handful of warm rice in your palm. Create a small indentation in the center. Place some filling in it (any of your choice). Then fill the filling with rice.

Gently shape the rice into a triangle. For this I use three fingers (thumb, index finger, middle finger). Use enough force so that the onigiri doesn't fall apart, but don't overdo it.

Wrap the ball in nori (seaweed).

Place some filling on top so you know what the onigiri comes with.

An Alternative Method for Making Onigiri
If you don't want to touch the rice at all, you can place plastic wrap in a bowl and place the rice on top. Sprinkle with some kosher salt (remember, salt is used to preserve the rice for a long time).

Pull the edges of the cling film and twist it several times.

Form a triangle shape as described above.

Once the onigiri are ready, sprinkle them with sesame seeds and serve. Bon appetit.
Onigiri are rice balls that are popular in Japan.
Onigiri is made from glutinous rice and then decorated with seaweed and other ingredients.)


Onigiri is a very common Japanese dish that looks like balls or voluminous triangles of rice with various fillings. Most often, onigiri is additionally wrapped in dried seaweed, lettuce, and sometimes in an omelette or thinly sliced ham. 
Recipe
Rinse the rice under running water until the water runs clear. Place the rice in a saucepan and add 4.5 cups of water. Bring to a boil over high heat, stirring occasionally. Reduce heat to low and cover with lid. Simmer until all liquid is absorbed, 15-20 minutes. Let the rice stand covered for another 15 minutes until it swells and softens properly. Then cool completely.
In a bowl, mix 1 glass of water with salt. Dip your hands in the solution before handling the rice. Divide the rice into 8 pieces - you will get 8 onigiri.
Divide each portion of rice into 2 parts. Make a neat indentation in one half
and put 1 teaspoon of filling (bonito) in it. Cover with the other half of the rice and squeeze lightly to seal the filling inside. Gently shape the rice into a triangle (traditional shape). You can also make oval or round (balls). Wrap the onigiri in a strip of nori and sprinkle with sesame seeds.

Rice balls "Onigiri" according to the recipe from Scott Jurek's book Eat&Run + raw version with chiya
The recipe for onigiri “rice balls” in Scott Jurek’s book Eat and Run at first seemed too simple and even boring to me. But just today, on the day when I make preparations for cooking for the week, it came in handy: rice balls are convenient to take with you as a snack. For myself, I used soaked chiya seeds instead of rice.So, in the original, in Scott Jurek's book, the recipe was like this:
Rice balls (Onigiri)
The first time I saw these seaweed-wrapped rice cakes was when I asked a Japanese runner what he was bringing for the race. I'm glad I asked because rice is a wonderful food for lowering body temperature, especially in an environment like Death Valley. The rice is carb, the onigiri is not too sweet and it is soft and easy to digest. A great source of electrolytes and salt (from seaweed), rice balls have always been a convenient snack in Japan. And now they can be found in any Asian supermarkets.