Drying vegetables for the winter. How to dry fruits and vegetables in a dryer correctly? And also several other ways
By the end of summer, it becomes a pity that it is impossible to preserve the food delight that eating fresh fruits and vegetables brings for a long time. But people have come up with an ingenious way to keep summer produce fresh.
General concepts
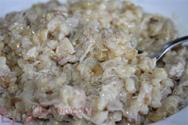
Dried and are not only a pleasant reminder of summer in winter, but also provide the human body with vitamins throughout the year. It is known that when fruits and vegetables are dried, they do not lose their vitamin properties and retain their aroma and natural freshness as much as possible. There are several types of drying summer products. The natural way is to expose fresh fruits and vegetables to sunlight, which carries out the drying process. In addition, humanity has found another convenient way, based on drying fruits and vegetables using an ordinary stove oven. This method is very relevant if the weather has been rainy for several days. In the modern world, people use electric dryers, which significantly reduce the drying time for fruits and vegetables. Dried summer foods should be stored in bags, boxes or jars, ensuring constant ventilation to avoid the appearance of mold, rot and small insects. Dried products must be periodically inspected and refilled. An important aspect in this procedure is to ensure that fruits and vegetables do not dry out. This can significantly spoil the pleasure of chewing.
How to dry fruits
First of all, it is necessary to prepare the fruits for drying by thoroughly washing them and sorting them, excluding damaged fruits. Place a dry cloth or parchment paper on a flat surface. Place the fruit, previously cut into small slices, about 3 cm in an even layer, so that one piece does not overlap another. Position the surface so as to provide direct exposure to sunlight. The ideal place for drying fruit is the roof of a house. At night, fruits should be placed in a covered, ventilated area, covering the fruits with gauze. The optimal time for properly drying fruits naturally is 2-3 days. You can also dry the fruit in the oven. To do this, you need to preheat the oven to 70º, place the fruits on a baking sheet covered with parchment paper and dry them for 7-12 hours. In electric dryers, the drying process is much simplified. Evenly cut fruits are placed on special trays and subjected to forced drying. The duration of this procedure is 10 hours. Dried fruits are placed in plastic bags or plastic and glass jars, placing them in a dry, ventilated place.
How to dry vegetables
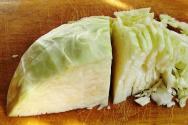
The process of drying vegetables requires more preparation than drying fruits. Some vegetables must be pre-cooked so that the color of the vegetables does not change and the shelf life is long enough. Many people use dried vegetables when camping, as they do not require special storage conditions. Vegetables, as well as fruits, should be thoroughly washed, choosing whole, undamaged fruits for drying. There are several ways to cut vegetables for drying. Some people prefer to grate their vegetables, choosing different blade sizes. Carrots can be dried raw by placing the grated mass in an even layer on a surface covered with parchment paper. Beets can be boiled, but drying will be the same as carrots. But potatoes must undergo processing methods, as they are prone to blackening and rotting. Lightly boiled potatoes are dried on nets, cut into square slices. Cabbage is a vegetable that takes a very long time to dry. Drying onions takes a lot of effort. Having cut it, it must be placed in a room that will provide minimal access to people, since when drying, the onion emits a specific odor, causing excessive tearing. Sometimes vegetables are strung on a thread and suspended from the ceiling, explaining that the optimal temperature for drying has been changed above. In this case, the room should be well ventilated. You can also dry vegetables in the oven or in an electric dryer. The process in this case is similar to drying fruit. Such vegetables can be stored in cardboard boxes or in linen bags. Vegetables must be washed before use.
Or food preservation. Therefore, they had to dry food supplies in order to preserve them for future use. Ancient writings mention dried fruits, vegetables, various herbs, their preparation (drying) recipe is not much different from our days. How to dry vegetables and fruits, herbs and mushrooms at home? It's really simple and useful!
Many modern people strive for healthy, proper nutrition, use dried fruits, herb seasonings, dried vegetables and mushrooms in the diet. However, when purchasing such products in stores, you need to clearly understand how properly they are dried; moreover, they are often treated with preservatives to give them an attractive appearance and longer shelf life. Isn't it easier to master home drying methods?
Harvesting herbs, fruits, vegetables and mushrooms by drying significantly reduces the time spent in the kitchen for a business woman busy at work or a mother of a newborn baby who has no free time at all! WITH abalone - a modern way to prepare without the hassle!
How to properly dry greens?

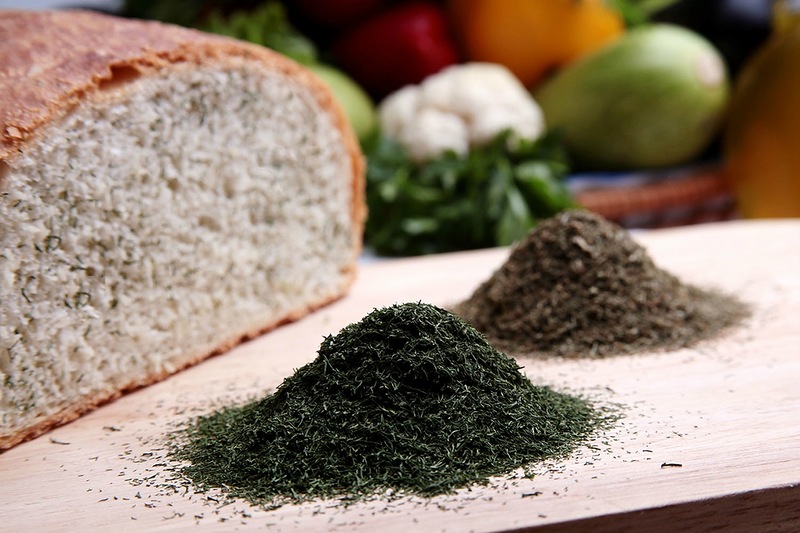
Greens are an essential ingredient in almost any dish. Save beneficial features it is the task of any woman who cares about health. Dill, parsley, basil, marjoram, mint and many other herbs - spices are used in cooking to add piquancy to dishes. Properly dried greens retain almost the full range of taste and nutrients (vitamins and microelements).
Step-by-step instructions for drying herbs:
- Rinse the greens under running water cold water, shake to remove moisture. This procedure can be replaced by filling a large container with cold water and placing the greens there, stirring it occasionally with your hands. We take out the stems or bunches of greenery and shake them well from the water.
- Arrange the greens in one layer onto a clean, dry cotton cloth or paper kitchen towels. Do not use terry or artificial fabrics. After a couple of hours, when the greens have dried slightly and excess moisture has been absorbed into the fabric - the backing - replace it with a dry one. And put a layer of gauze on top of the greens; it will protect your greens from dust particles and possible insects. Place the drying area in a well-ventilated area, be sure to avoid direct sunlight - this will cause greens change color and lose their beneficial properties.
- Gently shake occasionally stir the greens while drying. The total drying time is about a week. A sign that your greens are dry is that they become brittle when pressed with your fingers. Pay attention to these factors, as well as the fragility of the stems (they take longer to dry). Properly dried greens have an almost natural color, which guarantees the preservation of beneficial properties.
How to dry fruit correctly?
What do we usually need for winter? Dried fruits! Apples, grapes, plums, apricots, peaches, pears perfectly retain their beneficial properties and taste when properly dried. To dry fruits, I recommend using a combined method.. First, dry the fruit in the oven, and then air dry it for about 2 days.

Step-by-step instructions for drying fruits:
- For drying, use undamaged, fresh and attractive fruits. Wash the fruit thoroughly under running cold water. Remove pits from apricots, plums, peaches and core apples and pears. Apricots and plums can be dried in halves. Depending on size, cut peaches, apples and pears into slices for drying. The grapes can be dried whole.
- To prevent fruit from darkening during preparation for drying, prepare vinegar solution: for 1 liter of water - 1 tablespoon of vinegar. As you cut, dip fruit slices into the solution, then place them on a thin cloth or paper kitchen towels to remove excess moisture.
- Preheat the oven to 120 degrees, Place the fruit on a baking sheet covered with parchment paper in one layer. Dry for 4-6 hours, opening the oven door slightly (moisture gradually escapes through it during the drying process).
- When the fruit has significantly reduced in size, arrange them and add the next batch of fruit to the baking sheet, not forgetting to time the new drying. Once the drying time has passed, use tongs or a fork to place the fruit on a surface to cool, then arrange it in one layer onto paper towels, a natural, dry, clean cloth or a wire rack for further drying. room temperature. The drying place may well be in the fresh air, but under a canopy, in the shade. The main thing is good air circulation and prevent moisture from entering. Cover the fruit with gauze to protect it from dust and insects. Periodically turning the fruit slices over, dry them for about 2 days, depending on the thinness of the slices.

How to dry vegetables correctly?
At first glance, why dry vegetables, since they are available on store shelves and on the market almost all year round? However, there is a benefit to this. In the autumn, many people try to stock up on vegetables for the winter - they buy in bulk (it’s cheaper), and then think about how to store them correctly? For example, root vegetables such as carrots and celery are usually stored in boxes with sand. In an ordinary apartment, we cannot afford this, so economical and thrifty people are engaged in freezing, drying and drying vegetables for the winter.
What vegetables can be dried? It is not customary to dry vegetables that have an excess of moisture - for example, cucumbers or potatoes become very small when dried. You can dry tomatoes, but it is better to dry them. Carrots, beets, celery, parsnips, onions, peas, beans, beans, eggplants - they can be dried and placed compactly (the dried vegetable becomes approximately 10 times smaller!), and have a great time eating healthy foods all winter long.
Step-by-step instructions for drying vegetables:
- Sort through the vegetables, selecting only ripe and undamaged ones. Wash them in cool water, cut off the stalks, peel the root vegetables, and husk the beans or peas. If desired, leave eggplants and zucchini in their skins.
- Cut the vegetables into slices no more than 5 mm thick. If the diameter is large (for example, beets), cut the circles into smaller segments. Methods for cutting vegetables may be different, but I do not recommend leaving them thicker; drying will take much longer.
- Vegetables (except celery and other white roots) need to be blanched for 1 minute before drying. in boiling salted water (1 tablespoon of salt per 1 liter of water), place in a sieve and rinse with cold water. This will preserve vitamins and color. Place the vegetables on a surface covered with a cotton cloth or kitchen towel to drain excess moisture for a couple of hours.
- Place the dried vegetables in one layer on the surface, lined with clean paper (do not use newspaper, it is harmful!), or kitchen towels, or clean cotton cloth, and cover them with a layer of gauze to protect against dust and insects. Turn the vegetable pieces over every day, stack them closer as they dry out, and add a new batch of vegetables. Drying time depends on the thickness of the cut and ventilation of the room, about 10 days in total.

How to dry mushrooms correctly?
During the picking period, passionate mushroom pickers collect a whole bunch of mushrooms, and their wives have to process and prepare these gifts of nature! Mushrooms are pickled, and, of course, most easy way blanks - they are dried. Any edible mushrooms are suitable for drying, but white ones, collected with your own hands in an ecologically clean area, are especially good!

Step-by-step instructions for drying mushrooms:
- For drying, select fresh, healthy mushrooms that are not spoiled by worms. Carefully remove any remaining moss, soil or pine needles with a knife. Wipe the mushrooms with a damp kitchen towel; washing them before drying is not recommended because they absorb moisture very well due to their structure.
- Sort the mushrooms by variety and then by size. Large mushrooms need to be cut, separating the stem and cap, into several parts. Small mushrooms can be dried whole.
- For drying mushrooms in a natural, natural way m you will need a long thick needle and strong thread. Thread the mushrooms onto a thread, piercing the middle of the cap or stem with a needle. The mushrooms should not be close together; leave a distance of approximately 1 cm between them. During the drying process, the mushrooms will wrinkle and they can be placed closer for more compact storage.
- Hang the threads with mushrooms in a well-ventilated warm place and leave until they dry and wrinkle. Typically, the drying time for mushrooms (it depends on the size) is about a week. Properly dried mushrooms bend a little, and with force they break, but do not crumble.
Modern man strives for a correct, healthy lifestyle, and absolutely does not accept various preservatives and harmful flavorings in your family's diet. We began to read labels on purchased food products more closely, and, if financially possible, buy environmentally friendly products.
It is the financial component (and you yourself know that the price of such products is many times more expensive!) that makes us think about ways to prepare at home, in which we do not spend a lot of money and a lot of time. Drying is one of the ways to properly prepare for the winter!
Autumn is the season of vegetables, when they contain the highest amount of useful and nutritious substances. Drying vegetables is a harvesting process in which all moisture is removed, while nutrients, vitamins and microelements remain almost unchanged. Dry vegetables Can be used like chips, some can be added to soups and main courses as seasonings, and some can be used to prepare full-fledged dishes, having first restored them to their normal state.
Preparing borscht from dried vegetables:
Advantages and disadvantages
Advantages of drying:
- Dehydrated vegetables take up little space;
- No useful substances are lost during drying;
- You can even dry foods that are not suitable for pickling and salting.
Disadvantages of drying:
- Products have to be restored and this takes time;
- At high temperatures, a lot of vitamin C is lost;
- Dried vegetables must be stored properly.
Preparing vegetables for drying
Before drying food, you need to wash it well so that there is no dirt and dust left, and remove dark spots and rotten areas, if any, with a knife. Let the water drain and dry with a towel. Wet products are not recommended to be placed in the dryer. Then the vegetables need to be cut, making sure that the pieces are the same in thickness, then they will dry at about the same time and you will not need to constantly monitor each individual piece.
Blanching and steaming
Blanching is necessary for some types of vegetables, but you just need to be careful not to overcook them. It is enough to lower the vegetables into boiling water using a sieve for 3-4 minutes, no more.
Instead of blanching, you can use a double boiler; steaming is also effective, but you need to keep the vegetables in the unit for 5-7 minutes.
Blanching and steaming are necessary for vegetables such as:
- Potato;
- Green beans;
- Green peas;
- Cauliflower;
- Beans;
- Beet.
Methods for drying fruits and vegetables
There are several popular drying methods.
On open air
Our grandparents dried summer fruits in the open air. When applied to vegetables, this method is less popular, because often leads to moldy foods, especially if they are cut too thick and placed too close together. This way you can dry eggplants that do not contain much moisture and greens.
The temperature indoors or outdoors should be more than 27 degrees.
Vegetables should be cut very thin, placed on a tray and covered with gauze, which will protect the food from flies and other insects.
In the oven
You need to be careful when removing moisture from vegetables using the oven, as there is a risk of drying them out too much. If the oven does not have a thermostat, the oven opens when drying, but still, in most cases, baked and dried vegetables are obtained, which already have other qualities and taste.
Pieces of food need to be turned over every hour.
In the microwave
Newly invented drying method. The food is exposed to microwaves, which heat them from the inside, the temperature rises and moisture is removed. The smaller the pieces of vegetables, the faster and more evenly the processing occurs. For drying in the microwave, you need to cut them into uniform thin pieces, which need to be rearranged from time to time, swapping those in the center of the round plate and those on the outside, because. the impact of microwaves outside will be stronger and everything will dry faster there.
In an electric dryer
 If you decide to get serious about preparing vegetables by drying them, it is recommended to get a special electric dryer. Electric dryers operate on the principle of heating air and constantly blowing products. By following a few rules, you can dehydrate almost all types of vegetables and not only them in an electric dryer.
More expensive dryer models have several temperature and airflow modes and the ability to additionally add sections. These are important details, and by comparing vegetables processed in a cheap and expensive dryer, one can come to the conclusion that the uniformity of drying in expensive models is much higher.
In cheap electric dryers, thinly sliced tomatoes and peppers sometimes burn black, especially if you don’t watch the time and change trays in time, which can be problematic to do, for example, at night.
IMPORTANT: Products that become moldy during drying and emit an unpleasant sour smell must be thrown away. They already contain fungi and substances that should not be eaten.
Almost all vegetables can be dried, but some should be processed before drying. For example, potatoes will darken due to the presence of starch if they are not first blanched for five minutes. Green beans and peas should be steamed before dehydration, otherwise the finished product will be difficult to use.
Tomatoes and other vegetables with high water content should not be dried in the sun; they will certainly become moldy.
Drying zucchini, eggplant and cucumbers for the winter:
There are nuances in the preparation of each vegetable:
- Tomatoes. Choose dense tomatoes; they should not leak too much. Cut into rings or half rings, centimeter thick;
- Eggplant. Be sure to peel the eggplants before storing. Cut into centimeter circles;
- Carrot. There are two ways to dry carrots: in pieces or grated on a coarse grater. The second option uses a fine sieve or cheesecloth to prevent the carrots from falling through during drying;
- Beet. Before harvesting, the beets can be cut and blanched for a minute. There is also the option of drying baked beets;
- Potato. Cut the potatoes and be sure to rinse them in cold water and only then blanch them for at least three minutes. Then dry it in an electric dryer or oven;
- Onion. When drying, onions have a strong smell, especially in the first two hours. At this time, you can take the electric dryer out onto the balcony or open the windows so that the smell is not so strong. Dried onions are good as a seasoning;
- Mushrooms. Dried mushrooms add excellent taste and aroma to dishes, more refined than fresh mushrooms. To properly dry the mushrooms, they need to be cut into slices and placed close to each other. Porcini mushrooms, aspen mushrooms, Polish mushrooms and chanterelles lend themselves well to this method of processing.
How to properly store dried vegetables at home?
 When storing dried vegetables, it is important to prevent moisture from entering. Also, all kinds of pests, such as bugs and moths, love to eat dried foods.
Dried foods can be store in tightly closed jars or vacuum bags, also for not too long-term storage, zip bags are suitable. The shelf life in this form is 1-2 years from the date of preparation. Dried products stored in vacuum packaging last for 3 years and do not spoil during this time.
Reconstruction of dried products
When you need to use a dried product, soak it in cold water for 2-3 hours. After this time, the product will acquire almost its original shape and will be saturated with moisture. After this, heat treatment or use in salads without any processing is possible.
REFERENCE: Vegetables that have been stored incorrectly and have become saturated with moisture can be put in order by drying them again for 2 hours in an electric dryer.
Vegetable chips
Everyone loves fruit chips, you can buy apple and pear eco chips in supermarkets. Vegetables also make delicious crispy chips, and most importantly very healthy.
Vegetables suitable for cooking include: 
- Tomatoes;
- Beet;
- Potato;
- Carrot;
- Pumpkin;
- Zucchini;
- Spinach;
- Eggplant.
You can prepare these healthy delicacies in an electric dryer or in the oven. The main trick is to cut the vegetables into very thin slices so that they show through.
The delicacy can be served with sour cream or without any dressing.
Dried vegetables are healthy, quick and tasty. Use as seasonings, snacks or for cooking whole dishes. For example, when hiking, many tourists cook only from dehydrated vegetables, thus saving space in their backpack. By preparing vegetables using an electric dryer, oven or microwave, you will always have tasty and healthy foods, which are easy to cook.
Zucchini for the winter:
Drying vegetables at home is an excellent way to obtain a vitamin-rich and aromatic product for the winter. There are much more useful substances here, and in the first courses the aroma is stronger and brighter. 
And it’s more convenient to store the dryer. Freezing no longer holds the entire harvest. A dry vegetables for the winter- this is a very necessary thing.
How to dry carrots and beets for the winter
You can dry both carrots and beets. Without them, borscht will not work. So is the stew. If raw fruits are not available, you don’t have time to go to the market for them, or dried ones will come in handy.
The carrots are small. What to do? Grating and freezing is troublesome. There is no point in keeping it in the basement. So, I decided to wash it thoroughly, dry it and cut it into slices. Then I dried my harvest on a sunny windowsill and poured it into a paper bag. I put it in the spice cabinet and calmed down. And in winter I was making soup and remembered dried carrots. I just threw the zhmenka into the broth. The aroma spread throughout the kitchen. And small lumps of carrots blossomed into orange flowers. Since then I have been drying beets. As soon as a small fruit is dug up, I deal with it. I have time, I’m preparing canned borscht dressings. Sirina S.
They have vinegar, which not everyone likes these days. Dried root vegetables are a win-win option. Without cans, sterilization and worries.
How to dry vegetables

First, vegetables must be thoroughly washed and damaged areas removed.
Let the root vegetables dry from the water.
Using a shredder, grate the vegetables or cut them into thin slices. Can be rubbed on coarse grater or cut into cubes.
Pour it onto paper in a thin layer and place it in the shade where the breeze blows. You cannot expose baking sheets or cardboard boxes with vegetables to the sun's rays; the pigment will fade. We stir from time to time.
Some chopped root vegetables are blanched in boiling water for a couple of minutes before drying, and only then the vegetables are dried in an electric dryer or oven. Good way stop fermentation and preserve their color.
Store dried vegetables
Make your own paper bags and pour the dry stuff into them. Glass containers with lids are also suitable for storing dry preparations. Add dry herbs there too.
Cooking borscht from dried root vegetables

After the broth and potatoes are cooked, add dried beets (2 tbsp.) and carrots (1 tbsp.) per 1 liter of liquid. Prepare the onion and tomato mixture separately and add it before adding the cabbage.
What vegetables can be dried for the winter?
For the winter you can prepare:
- green and onions;
- Bulgarian pepper;
- parsley and celery roots.
Let's not ignore zucchini. Like eggplants, we cut them into circles and dry them strung on a strong thread. We hang vegetable “beads” on the balcony with good ventilation of the room.
How to dry vegetables in electric dryers
We wash the products and cut them.
- Garlic – large cubes.
- Onions and potatoes - in regular cubes.
- Carrots - into strips.
- Roots - in small cubes (circles).
- To prevent vegetable slices from falling through the electric dryer, we line each tier with a thin natural fabric.
You can dry vegetables in an electric dryer all at once. But keep in mind that drying speeds vary. Therefore, we take out the finished drying and put in a new portion. To do this, periodically turn off the device every hour. At this time, we check the readiness, stir, and change places. Since the dryer gets very hot, it is better to install it on a wooden surface or plank.
Drying vegetables at home is not difficult if you do it gradually throughout the season.
Find out . Everyone will like this vitamin paste.
Pro100garden is preparing for winter with its friends.
Drying vegetables and fruits is an old way of preserving them. Previously, to preserve food, they used a lot of salt and dried it in the sun or on gas burners.
Now there are special dryers that help in this process.
Drying vegetables and fruits, as well as berries, is a safe method of preserving them because the water is removed from them. And since there is no water, mold and bacteria will not appear on them, and thus they will not spoil.
Choosing the right drying method
Sun drying
This is quite difficult to do because it requires 3 consecutive sunny days with at least 37°C.
Oven drying
Oven drying is a suitable method, but it does not save energy and results in food losing flavor. If your oven does not heat up to 93°C, you can try another drying method. The oven door should be kept slightly open to allow air circulation throughout the process.
Electric drying
This is the best method for drying food. Electric drying is quite energy efficient and can operate at the low temperatures necessary to preserve the nutritional value of food. An electric food dryer should have heat control and a fan to create air circulation.
Drying process of fruits and vegetables
When drying food, do not keep the temperature too high or too low. Low temperatures can cause bacteria to grow on food. Too high a temperature will bake the food instead of drying it out.
Under-dried foods will spoil, and over-dried foods will lose their flavor and nutritional value. Products must be dried at a temperature of 49–60 °C. You can start drying at high temperature, and after an hour reduce it. During the last hour of drying, the temperature should be set to minimum. Products should be turned over and trays rotated throughout the entire process.
You can tell when drying is complete by touching the food; it should be firm and without pockets of moisture. When testing fruit, you can break a piece in half. Streaks of moisture along the break will indicate that the fruit is not yet dried. The pulp should be dense and should not crunch. Vegetables may be tough and crunchy.
When storing dried foods, remember to keep moisture out of the containers.
Dried foods absorb moisture from the air, so storage containers must be airtight. Some suitable storage containers are jars and plastic freezer bags.
Fruit marshmallow Place in cling film and store in an airtight container.
Store containers of dried food in a cool, dark and dry place, preferably at 16°C.
Guide to Drying Vegetables
All vegetables except onions, peppers and mushrooms need to be washed, cut into slices and placed in water for a while. Vegetables are placed on a tray in one layer and dried. Depending on conditions, drying time may take longer. Vegetables are dried at a temperature of 55 °C.
Green beans
Peel and chop the beans into 2.5 cm pieces. Place in hot water. Dry for 6-12 hours until they become brittle.
Beet
Boil and peel the beets. Cut into 6mm pieces. Dry for 3-10 hours until they become stiff. Broccoli. Cut and dry for 4–10 hours.
Carrot
Peel, slice or chop. Dry for 6-12 hours until brittle.
Cauliflower
Cut and dry for 6–14 hours. Corn. Clean the kernels from the cob after blanching and dry for 6-12 hours until brittle.
Mushrooms
Brush but do not wash. Dry at 32°C for 3 hours and then at 52°C for the remaining time. Dry for 4-10 hours until brittle.
Onion
Slice the onion into 1-inch thick rings. Dry for 6 to 12 hours until crisp.
Peas
Dry for 5-14 hours until brittle.
Bell pepper
Remove seeds and cut into pieces. Dry for 5-12 hours until hard.
Potato
Cut into circles 3 mm thick. Dry for 6-12 hours until crisp.
Tomatoes
Place in boiling water to separate the skin, peel, cut into circles or divide into 4 parts. Dry for 6-12 hours until crispy.
Zucchini
Cut into 3mm thick circles and dry for 5-10 hours until brittle.
Guide to Drying Fruits

All fruits should be washed, pitted and cut into circles or slices. Place in a single layer on pallets. Dry fruit at 57°C. Fruit can be pre-treated lemon juice or ascorbic acid. They will not darken while you are preparing them to dry. Cut the fruit into slices or circles and soak in water for 5 minutes.
Apples
Peel, remove the seed and cut into 9mm rounds or 6mm slices. Pre-treat and dry for 6-12 hours until soft and pliable.
Apricots
Cut in half and turn inside out. Pre-treat and dry for 8-20 hours until soft and pliable.
Bananas
Peel, cut into 6mm thick slices and pre-process. Dry for 8-16 hours until soft and pliable or almost crisp.
Blueberry
Dry for 10-20 hours until hard. Cherry. Cut in half and dry for 18-26 hours until stiff and slightly sticky.
Peaches
Peel the skin and cut in half or quarters. Pre-treat and dry for 6-20 hours until soft and pliable.
Pears
Peel, cut into 6mm thick pieces and pre-cook. Dry for 6-20 hours until hard.
A pineapple
Remove the core and cut into 6mm thick rounds. Dry for 6-16 hours until stiff and non-sticky.
Strawberry
Cut in half or into 6mm thick slices. Dry for 6-16 hours until soft and pliable or almost crisp.
More details about drying some vegetables, fruits and apples:

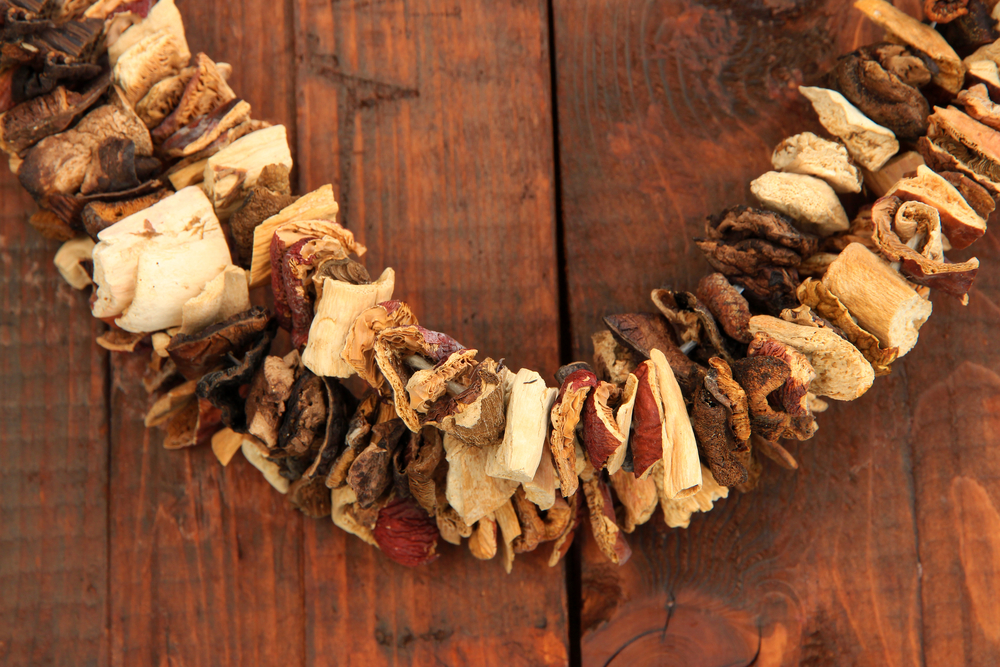
Dried eggplant
In August, during the season of ripening vegetables, in Eastern countries almost everywhere you can find hanging garlands of eggplants and peppers, which are dried so that in winter you can cook a lot of tasty and healthy dishes without buying tasteless and expensive winter vegetables.
Depending on what the housewife plans to cook, the eggplants are cut into halves for dolma, strips or cubes for soups, stews and pilaf.
In Eastern countries, as already written above, vegetables are dried in the sun, because... firstly, gas or coal for stoves are not cheap, secondly, it’s too hot outside to still heat the kitchen with gas or light the stove. Thirdly, with such heat and sun, it’s somehow stupid to waste resources and create unnecessary complications for yourself .
And so, for drying, the eggplants are washed and the stalks are removed.
For dolma, this is the most popular type of cutting.
The eggplants are cut in half, then the pulp is carefully cut out of them; the walls of the resulting “cup” should not become thinner than 0.5 cm.
Then, using a gypsy needle and a thick thread, the eggplant halves are strung on a thread at a short distance from each other; if you string it too tightly, the eggplants will begin to rot.
Dry eggplants either in a dry, ventilated room, or outside under a canopy, or on a balcony, so that they are not exposed to direct sunlight.
Otherwise, in the sun, the eggplants will burn out and lose their taste.
In rainy weather and at night, garlands with eggplants are put away in the house.
If there are a lot of flies, cover the eggplants with gauze.
Eggplants are dried for about 3 weeks. And then stored in a dry place.
Nowadays eggplants do not taste bitter and almost no one bothers with pre-processing eggplants.
In addition, before use, dried eggplants are brewed in boiling water, so preliminary heat treatment, in my opinion, is not necessary.
Sometimes, after drying, the finished eggplants are placed in a large saucepan or tank, or bucket and covered with a lid, it is believed that in this way the moisture of the dried and under-dried vegetables is distributed evenly.
In our conditions, you can dry eggplants in the same way - on the balcony or on the street, or in the oven (gas is not so expensive here). To do this, eggplants are cut into halves, strips or small pieces.
Then they are laid out on a baking sheet in one layer. The baking sheet is placed in the oven for 3-4 hours. Preheat the oven to 100 C and no higher than 150. The door should be ajar about 5-10 cm.
During drying, the pieces must be turned over or mixed to ensure uniform drying.
Sometimes they are dried in several stages.
Dry for an hour, then cool. Drying hour - cool until the eggplants are as dry as mushrooms.
Store in boxes or jars. And the garlands are hung in a dry room, or stored in a bag.
Apples
The best fruits for drying are considered to be the fruits of the varieties Naliv white, Breading, Borovinka pineapple, Melba, Autumn striped, Pepin saffron. Of the new varieties, those immune to scab, obtained at the All-Russian Research Institute of Fruit Crop Breeding, are recommended, since almost all of them have a high content of dry matter: Bolotovskoe, Solnyshko, Stroevskoe, Venyaminovskoe, Start, etc.
Apples should have dense flesh that does not darken much in the air, and thin skin.
The fruits are sorted, washed, allowed to drain, cut Apples into circles 0.5-0.6 cm thick, removing damaged areas and the seed chamber, and immediately immerse for 3-5 minutes in a solution of citric acid (2 g per 1 liter water) or table salt (1 tsp per 1 liter of water) so as not to darken (do the same with pears). Then the water is drained, the apple circles are air-dried for 2-3 minutes, placed in one layer on a sieve or baking sheet covered with white paper, or strung on twine. The initial temperature in the dryer should be 70-85°C.
To speed up drying, apple mugs (if the apples are small, cut them into halves, quarters, or use whole) are turned over after 2-3 hours.
When the fruits lose about 2/3 of their moisture, the temperature is reduced to 50-55°C. The entire drying process lasts approximately 5-6 hours and is considered complete if the mugs or slices are not crushed under strong finger pressure. Undrained apples are removed from the baking sheet or sieve and dried again. Ready apples are kept in a box or crate for a week to equalize humidity. Well-dried apples should be supple and light cream to light brown in color.
Pears
Summer and autumn varieties containing at least 12% dry matter are suitable for drying. The fruits should be ripe, with a small content of stony cells. It is recommended to use Bessemyanka, Tonkovetka, Autumn Bergamot, Summer William and others, as well as wild pears.
The fruits, depending on their size, are cut into halves or quarters (small ones are dried whole) and dipped in acidified or salted water. After the water has drained, the slices are placed on sieves or baking sheets and dried for 10-12 hours, first at 70-80°C, and finally at 50-55°C. Ready pears are kept in a box or box for 5-6 days to equalize humidity.
Plums
The best varieties for drying are Hungarian and other large-fruited dark purple plums. It is from them that prunes are obtained. In the middle zone, unfortunately, there are no such varieties. However, you can dry plums of other varieties.
Plum fruits, like cherries, should be large, fleshy, with a small pit that can be easily separated from the pulp. Fruits damaged by the codling moth are not suitable for drying. Before drying, plums are sorted by size, the stalks are removed, then they are washed and always blanched by dipping them into a boiling solution of baking soda for a few seconds (5-8 g per 1 liter of water). After this, the plums are immediately cooled in water and washed under running water. Thanks to these actions, the waxy coating is removed, and a mesh appears on the plum skin, which speeds up drying.
Blanched plums are placed in one layer on a baking sheet and dried in three steps. First, 3-4 hours at 40-45°C, after which they are removed from the dryer or oven and kept for 4-6 hours. The second drying at a temperature of 60-65°C lasts 6-8 hours, the plums are turned over on a baking sheet and cooled again for 4- 5 hours. The third, final drying lasts 4-5 hours (until ready) at a temperature of 70-75°C. Ready plums do not release juice when pressed and have dry pulp near the seeds. Dried plums are also kept in a box for 5-6 days to equalize the humidity.
Cherry
The best varieties for drying are Vladimirskaya, Griot Ostgeimsky, Black Consumer Goods, Zhukovskaya, Turgenevka, etc. The fruits must be fully ripe and dark red in color. They are sorted out, damaged or diseased ones are removed, as well as the stalks, washed, placed in one layer on baking sheets and dried in one step for 10-12 hours, first at 50-55°C, then at 70-75°C. Cherries, like plums, can be blanched.
Rose hip
Ripe, hard to the touch, bright red rose hips are suitable for drying. It is sorted, overripe, damaged and soft fruits, stalks and inflorescences are removed, washed, allowed to drain, placed on a baking sheet and placed in an oven heated to 100°C for 8-10 minutes. Then they are poured onto another baking sheet or sieve and dried at 65-70°C. Rose hips dried in this way contain a large amount of vitamin C.
Various berries
Raspberries, blackberries, blueberries, lingonberries, cranberries, black currants and other berries are also dried. They are sorted out, rotten and damaged ones are removed, and cleaned of twigs, leaves, and stalks. Berries with thick, dense skin (cranberries, black currants) are blanched before drying. The prepared berries are laid out on sieves in a thin layer and dried in the sun for one day, then 2-4 hours in a drying oven, depending on the type and size of the berries. The temperature in the drying cabinet is 45-50°C. The dried berries are placed in an open box and kept for two days.
Preparing dried foods for meals

Dried foods must be soaked or cooked before they can be used in recipes. Some foods need to be soaked and cooked. Vegetables are usually soaked for ½–1 ½ hours and then poached. Some vegetables can be reconstituted during cooking.
The fruits are soaked and then boiled in the same water. Do not add additional sugar until the fruit is cooked, otherwise it will be tough. The fruit is sometimes consumed dried as a snack. It must be remembered that after the products are reconstituted, they quickly deteriorate, so they need to be consumed quickly.
To prepare dried foods, use the following information and simmer until softened.
Apples: add 1 ½ cups warm water per 1 cup apples and soak for ½ hour.
Green beans: 2 ¼ cups boiling water to 1 cup beans and soak 1 ½ hours.
Beet: 2 ¾ cups boiling water to 1 cup beets and soak 1 ½ hours.
Carrot: add 2 ¼ cups boiling water to 1 cup carrots and soak for 1 hour.
Corn: Add 2 ¼ cups boiling water to 1 cup carrots and soak for ½ hour.
Onion: Add 2 cups boiling water to 1 cup onion and soak for 1 hour.
Peaches: Add 2 cups warm water to 1 cup peaches and soak for 1 ¼ hours.
Pears: Add 1 ¾ cups warm water to 1 cup pears and soak for 1 hour.
Peas: Add 2 ½ cups boiling water to 1 cup peas and soak for ½ hour.
Potato: Add 1 ½ cups boiling water to 1 cup potatoes and soak for ½ hour.
RECIPES:

Sun-dried tomatoes are something unimaginable: inconspicuous at first glance, they perfectly retain the concentrated taste and aroma of summer tomatoes, simultaneously acquiring new, unexpected and slightly piquant notes.
In Italy, whose San Marzano tomatoes are considered perhaps the best in the world, tomatoes are dried in the summer, under the scorching Mediterranean sun. However, in the absence of the Mediterranean sun, the most ordinary oven can come to the rescue - well Sun-dried tomatoes, which will be stored for at least a year without problems, can be used in dozens of ways: added to bread, salads, pasta, sauces, and just eaten as much as possible. delicious snack, remembering the summer.
Ingredients:
1 kg. plum tomatoes; olive oil; garlic; dried herbs; hot pepper; salt
Wash the tomatoes thoroughly and cut each of them lengthwise. You can remove the seeds and all the liquid so that the tomatoes dry faster and more evenly, but you don't have to do this to preserve the maximum flavor of summer tomatoes (however, it is better to remove the place where the tomato is attached to the branch and the white pulp around it anyway ). Line a large baking sheet with parchment paper and arrange the tomatoes cut side up so they are not touching.
In order not to wait for the tomatoes to be ready, you can dry them with the oven open. (See “drying eggplant” above). Then dry it in the sun, perhaps on a towel, covered with gauze.
Please note that the time indicated above is a guideline, and readiness must be determined by the appearance of the tomatoes. If the tomatoes have shriveled, acquired a darker shade, and the moisture has “gone away,” it means they are ready. In order not to miss this moment, you need to periodically look into the oven, and some time before the end, turn the baking sheet 360 degrees so that all the tomatoes dry evenly.
Now a few words about storing sun-dried tomatoes. Traditionally, tomatoes are placed in a jar and poured with olive oil. You can add a little finely chopped garlic, dried herbs, hot chili, wine vinegar, salt, pepper and other spices to the oil so that the sun-dried tomatoes gradually acquire an additional dimension of taste and aroma during storage. On the other hand, you can do it simpler - put the tomatoes in a container with a lid (or the same jar) and close it tightly: this way they are also stored well, and, importantly, retain their original taste.
On a note! In the East, tomatoes are dried in the sun and stored on strings.on oiled string (like garlands) hanging in the pantry or in a paper bag. So, if you don’t want to store it in oil, then choose this method. Before use, dried tomatoes should be kept in warm water and cut into a dish as you like. It is better to put tomatoes on shurpa (oriental soup with potatoes and vegetables) or roast without cutting them.

The meat is dried at a temperature of 63–66 °C. The meat is dried for 6–20 hours until it becomes soft and pliable. It shouldn't be brittle. Remove the layer of fat from jerky during drying. Jerky should not be stored as long as fruits and vegetables. For long-term storage (more than a month), it should be stored in freezer or refrigerator.
To age the jerky, it can be marinated with salt and spices. Previously, they used 1 ½ cups of marinade salt per 4 liters of water and soaked strips of meat in it for two days.
An alternative to soaking was also to rub the meat with salt and spices (garlic and pepper) before drying.
You can use one of the following marinade recipes: Leave the strips of meat in the marinade overnight.
Drying marinade No. 1: 2 tbsp Worcestershire sauce ¼ cup soy sauce½ tsp ground garlic ½ tsp pepper 1 tsp salt 1 tsp liquid smoke
Marinade for drying No. 2: 1 tsp pepper 4 tsp salt 1 tsp ground garlic 1 tsp chili powder ½ cup water 1 tsp liquid smoke Curing Marinade No. 3 ½ cup vinegar 1 cup ketchup 3 tbsp Worcestershire sauce ¼ cup brown sugar 1 tsp salt 2 tsp dry mustard ½ tsp pepper.
Recipes for dried fruits and vegetables
Apple pie
Ingredients: 3 ½ cups dried apples; 2 cups of water; ¾ cup sugar; 1 tsp cinnamon
Boil the apples until softened. The apples will recover as they cook and bake. Add sugar and cinnamon. Fill out the pan, cover the top of the pie and bake for 30 minutes at 177°C.
Cherry pie
Ingredients: 3 cups dried cherries; 3 cups boiling water; ½ cup flour; 1 cup sugar.
Pour water over the cherries and soak for 30 minutes. Simmer and add sugar and flour to thicken. Pour into pan and bake until crust forms. Bake at 204°C for 35 minutes.
Peach Pie
Ingredients: 3 cups dried peaches; 3 cups boiling water; 2/3 cup flour; 1 cup sugar; 2 tsp cinnamon; ¼ tsp nutmeg
Pour water over the fruit and soak for 30 minutes. Simmer and add sugar and flour to thicken. Pour into a greased baking dish and garnish on top. Bake at 204°C for 30 minutes.
Corn puree
Ingredients: 1 cup dried corn; 4 cups boiling water; 2 tsp sugar; ½ cup milk; 1 tbsp flour; 1 tbsp margarine; Salt and pepper to taste
Place the corn in water and leave for 30 minutes. Simmer until the corn is soft. This may take 1 hour. Drain and add remaining ingredients. Cook for another 5 minutes, stirring frequently to prevent burning.
Cream of mushroom soup with green beans
2 cups boiling water; 1 cup dried beans; 1 can canned cream of mushroom soup
Place the beans in water and cook until softened. Add the puree soup and simmer.
Tomato puree soup
Ingredients: 1 tsp dried crushed tomatoes; ½ cup boiling water; 1 tbsp flour; ½ cup milk
Grind the dried tomatoes in a blender or food processor. Add this powder to water and simmer. Combine flour with milk and mix. Add this mixture to the water with tomatoes. Simmer, stirring to prevent burning.
Boiled fruits
3 cups dried fruit of your choice; 2 cups boiling water; 1 tsp cinnamon; Sugar to taste
Soak the fruit in boiling water for 20 minutes. Simmer for 20 minutes, then add cinnamon and sugar. Stir until the sugar dissolves and serve.
Vegetable soup
1 cup cooked meat, cut into cubes; 3 cups mixed dried vegetables; Salt and pepper
Pour boiling water over the dried vegetables and soak for 1 hour, then simmer for 2 hours until they are soft. Can add fresh vegetables, if you don't have the ones you need.
Apple dessert: marshmallow

- this is not a plasticine mass packaged in cardboard boxes, but a delicate, soft ancient Russian dessert that our ancestors owned back in the 15th century. Marshmallow was common wherever sour varieties of apples were found. “Branded” cities: Rzhev, Tula, Belev, but the best was produced in the city of Kolomna. At least that's what the residents of this city, where the marshmallow museum is located, think. As part of the excursion, they not only tell you about the peculiarities of its preparation, generously flavoring the story with legends, but also give you a taste different kinds marshmallows. So if you are a true fan, then it is worth visiting the sweet Mecca.
Don’t think that marshmallows were kneaded in every yard. It was a very complex and labor-intensive process: pastil workers in artels whipped it for two or three days without stopping in several shifts. And it was very expensive: about 1.50 rubles per 1 kg. For comparison: a loaf weighing 400 g cost 4 kopecks, and a kilogram of chicken cost 80 kopecks (average prices in the country).
The basis of the marshmallow is sour apples: Antonovka, Titovka, wild varieties. They were poorly distributed in the warm climate of Western Europe, so there was no marshmallow there. The idea of the recipe is based on the fact that fruit raw materials, rich in natural pectins, which have the ability to gel quickly and efficiently, are brewed until a puree is formed, and then honey is added to it. This ingredient was replaced with sugar in the 19th century, and therefore marshmallow became much more accessible, and it even began to be exported to the West. An important component of marshmallow is egg whites, which give the sweetness its white color. The classic marshmallow was red, so when Kolomna confectioners received white marshmallow, it remained a curiosity for some time.
To prepare the marshmallow, mix all these ingredients and beat until the mass doubles in volume. Then it is poured into a mold, but in the old days it was simply spread in a thin layer on a fabric stretched over a wooden frame like a hoop. That is why it was called “postila” - something that needs to be “bedded”. The pastila needs to be dried for two days at a low temperature. Of course, this was much easier to do in a Russian oven than in a modern apartment, but there are housewives who still prepare marshmallows at home today, although more often the choice is made in favor of the factory-made version. The last stage is to cut the marshmallow into even pieces and sprinkle with powdered sugar.
Apple marshmallow without sugar

Peel apples of any degree of ripeness, cut into slices, place in a saucepan, add a little water to the bottom, cover with a lid and boil over low heat, then cool and rub through a colander. Grease the surface of the kitchen board vegetable oil a very thin layer and rub it in thoroughly with a dry gauze swab. Spread the applesauce on the board in an even layer (no thicker than 0.8 mm - otherwise it will take a long time to dry) and place it in the sun or draft. On the second day, when the puree dries a little, the board can be placed at an angle.
After three days, pry the dry marshmallow with a knife and remove it from the board. This “apple napkin” then needs to be hung on a rope for 2 days. For long-term storage, fold the marshmallows into a stack, sprinkle them lightly with powdered sugar, roll them tightly into a roll, put them in a plastic bag and place them in the refrigerator.
(in the oven)

For 1 kg of apples - 200 g of sugar.
Wash the apples, remove the core and seeds, cut into small pieces, mix with granulated sugar, and place in a thick layer on a baking sheet. Do not add water. Place the baking tray in hot oven. After boiling, reduce the oven temperature. To prevent the mass from burning, stir it periodically with a spoon or spatula and cook until the mass becomes elastic and does not stick to the spoon. This usually takes 20 minutes after boiling.
Place the boiled mass on a sheet of foil or on a cold baking sheet sprinkled with granulated sugar, dry it at room temperature, sprinkle with granulated sugar and store in ordinary cardboard candy boxes in a cool, dry place.

For 1 kg of apple mass - 100 g of sugar.
Wash the apples, remove the core with seeds, cut into slices or circles, sprinkle with sugar, mix, place in an enamel pan, cover with a clean cloth, set pressure and let stand until the juice is released. Drain the resulting juice, place the slices on a baking sheet and place in the oven to dry. The oven should be heated to 65°C. Cured apple slices transfer to dry glass jars or linen bags. Store them in a dry place at room temperature. Separated Apple juice can be used to prepare compotes, or preserved by boiling them first. While boiling, pour the juice into jars and roll up the lids. Dried apples can be served with tea, used as a filling for pies, or made into compote.

Everyone knows what candied fruits are. They are a pleasure to prepare and then store, like jewelry, in boxes and jars.
Today, candied vegetables and fruits are used everywhere: they are added to baked goods, jelly, ice cream and other dairy desserts, including cottage cheese, they decorate various confectionery products, in addition, slices of fruit boiled in syrup are sometimes served as an independent sweet dish for tea or coffee instead of sweets. Candied fruits serve great filling for cupcakes, rolls, puff pastries.
In Rus', candied fruits have also been loved for a long time. Only they were called Kyiv dry jam or “balabushki”. The first mention of Kiev dry jam dates back to the 14th century. It was brought from Kyiv and served at the wedding feast of the Lithuanian prince Jagiello. In 1777, Catherine II issued a decree according to which dry jam Apricots, wild strawberries, strawberries, pears, dogwoods, cherries, Hungarian plums, rose hips and pink flowers, so beloved by her, were supplied to the court. Every autumn, stagecoaches with boxes and boxes of Russian candied fruits departed from Kyiv to St. Petersburg. In the middle of the 18th century there was even a separate position - “candy apprentice of the Kyiv imperial court.”
The process of making candied fruits has not changed significantly since then. The fruits are thoroughly washed and dried beforehand. They are then dipped in rich sugar syrup and cooked for a long time. At the next stage, the fruits, thoroughly soaked in syrup, are dried, after which they become similar to what we can see in the store. There is nothing difficult about making candied fruits yourself. Any fruit, berries, citrus peel with zest, as well as some vegetables, such as pumpkin, carrots and zucchini, are suitable for this.
It is worth noting that candied vegetables and fruits also have a number of useful properties that many others do not have. confectionery.
Candied oranges and watermelons are very tasty, or rather, from their peels, which we usually throw away.
Candied watermelon rinds
Ingredients:
1 kg of watermelon rinds, 1 kg of sugar, 200 ml of water, 5 g of citric acid, orange zest, almonds, lemon zest, vanilla - to taste.
Preparation:
To prepare candied fruits, use watermelons with a thick rind, as well as unripe melons, which are usually thrown away as inedible products; in this case, they will be very useful to you. Peel the watermelon rinds from the thick rind and soft part, cut into pieces of the same size, keeping in mind that they will boil down later, add water and cook for 3 minutes. Then drain the water, rinse the boiled pieces with cold water, pour boiling syrup made from sugar, water and citric acid. You can also add lemon or orange zest for flavoring. almond. Boil the watermelon rinds until transparent, remove with a slotted spoon, dry and roll in powdered sugar.
Candied zucchini with honey and lemon
Ingredients:
1 kg of zucchini, 200 g of honey, 1 lemon, 500 g of sugar.
Preparation:
Wash the zucchini, remove the peel and seeds, cut into rectangular pieces or cubes, sprinkle with sugar (200 g), refrigerate until the juice releases, then drain the juice. Wash the lemon, pour boiling water over it, cut into small pieces along with the peel, remove the seeds, pour in a glass of zucchini juice, heat and cook for 10 minutes, then pour in the remaining sugar (300 g), cook the syrup over low heat (until the sugar is completely dissolved ). Pour boiling syrup over the zucchini, add honey, put on low heat and cook until tender (until the zucchini becomes transparent and the syrup is thick like honey). Remove the zucchini from the syrup, dry and roll in powdered sugar. Place the finished candied fruits in candy boxes for storage, and use the remaining syrup with lemon slices as regular jam.
Candied plums
Ingredients:
1 kg plums, 1 kg sugar, 1 g ascorbic acid.
Preparation:
To prepare candied fruits, the seeds do not need to be removed. If you are preparing candied fruits from seedless plums, cut the fruits crosswise and not lengthwise - in this case, the skin will not curl during cooking. Place the prepared plums in a wide-bottomed pan, sprinkle with sugar and leave to separate the juice. After this, boil the fruits until the juice turns into thick syrup. Remove the plums from the syrup and place them on foil or parchment paper to dry. If you dip dried plums in hot syrup two or three more times, drying them each time, you will get very delicious plum in caramel.
Candied sugar beet
Ingredients:
1 kg of sugar beets, 3 g of citric acid, 100 g of sugar, 500 ml of water, lemon zest, vanillin or other flavoring of your choice.
Preparation:
Wash the beets, peel and cut into pieces of the same size (cubes or slices), add water, add sugar, citric acid and simmer over low heat until all the liquid has evaporated. For flavoring, beets can be boiled together with lemon or orange zest, honey, cardamom or vanillin. Just like in previous recipes, dry the beets and roll in powdered sugar.
Candied pumpkin with orange
Ingredients:
1 kg pumpkin, 1 orange, 200 ml water, 800 g sugar.
Preparation:
Wash the pumpkin, peel and remove seeds, cut into cubes or cubes, sprinkle with a small amount of sugar. When the juice comes out of the pumpkin, drain it. Wash the orange, pour boiling water over it, cut into small pieces along with the peel, remove the seeds, pour boiling water over it and cook for 10 minutes.
Pour the orange broth (along with orange slices) over the sugar, place on low heat and cook until the sugar is completely dissolved.
Pour boiling syrup over the prepared pumpkin pieces. Place the cooled mass on low heat and cook until tender (the pumpkin pieces are transparent and the syrup is thick). Remove the boiled pumpkin pieces from the syrup, dry them, roll in powdered sugar and place in a pastry box.
Use the remaining syrup with orange slices as jam, and the remaining fresh pumpkin juice can be brought to a boil, immediately poured into sterilized jars and rolled up. This juice will be especially useful for children, and adults are unlikely to refuse it once they try it.
It’s not for nothing that they say that “carrots polish the blood.” This is a very healthy and valuable vegetable containing many useful substances. If you want to eat not only tasty, but also healthy sweets, prepare candied carrots. To prepare this delicacy, it is better to choose young, fresh carrots - they will provide the most pleasant taste and benefits.
Candied carrots
Ingredients:
1 kg carrots, 1.2 kg sugar, 1.5 cups. water, citric acid (on the tip of a knife).
Preparation:
Wash and peel the carrots. Cut into medium-sized pieces or thin strips. Boil water and boil the carrots in it for 10 minutes, after which, after cutting, cool them in cold water. Cook the syrup: add sugar to water, boil and wait until the sugar has completely melted. Place carrot pieces in boiling syrup and boil for 15 minutes.
After this, leave the carrots to infuse in the syrup for 10 hours. Repeat this procedure 3 times. At the end of cooking, add citric acid and cool. Strain the carrot pieces through a colander and place them on parchment-lined plates or baking sheets.
The syrup can be sealed in sterile jars - it will be useful for soaking or preparing glaze for baking.
Dry the carrots in the oven on low or with the door open until tender, or for several days at room temperature in a well-ventilated area. You can use an electric dryer.
Dip candied fruits in powdered sugar and place in jars with airtight lids.
You can make very tasty aromatic candied fruits from any berries. For example, take strawberries, raspberries, blackberries, gooseberries, red and black currants, cherries and place them on a clean baking sheet in one row, sprinkle with sugar (1 kg of berries requires 200 g of sugar) and place in the oven preheated to 200°C, for about 20 minutes. As soon as the berries boil over the entire surface, watch carefully so that they do not burn and warm up evenly. Then pour the hot berries onto foil and dry them, and pour the thick juice remaining on the baking sheet into a jar and use, for example, as sweet sauce or an additive to jelly and compotes.
When serving, add any nuts to the candied berry mixture.
Candied orange peels
Ingredients:
1 kg orange peels, 1 kg sugar, 200 ml water, 5 g citric acid.
Preparation:
Wash the orange peels, cut into cubes, add water until they are completely covered, and cook for 5 minutes, then pour out the broth. Make syrup from sugar and water, adding citric acid. Dip the boiled ones into syrup orange peels and simmer them over low heat until they become translucent. Remove them from the syrup with a slotted spoon and dry them on parchment paper or foil.
Roll the dried candied fruits in powdered sugar and place them in a box (can be used for candies or cookies). Store at room temperature. Use the remaining syrup to flavor confectionery products or for further preparation of candied fruits.
Take in your palm some of the multi-colored candied fruits you have prepared and admire: the scattering of sunny, like amber, and transparent candied fruits in the palm of your hand is like precious stones - it’s as if a sunbeam is caught in each of them.
It’s impossible to resist trying at least a small piece - feel the sweetness and aroma, reminiscent of honey and flower nectar, melting and taking you to the world of dreams and hot summer.
Candied apples
The process of making candied apples is not at all complicated. By preparing these candied fruits, you will stock up on tasty and healthy delicacies for the whole winter.
Ingredients: 1 kg. apples; 1.2 kg. Sahara; 2 glasses of water
Preparing candied fruits:
* Cut apples into slices or halves, depending on size. Small apples can be cooked whole by piercing them on several sides with a pin.
* Boil water in a large saucepan and place apples in it for 5-7 minutes.
* Take out the apples and immediately put them in cold water and cool them.
* Add sugar to the water where the apples were boiled and, stirring constantly, wait until it dissolves, forming syrup.
* Remove the apples from cold water, place them in a bowl and pour hot syrup over them.
* Leave for 6 hours, then boil again and cool. In general, the procedure must be repeated 2-3 times - the apples should become transparent.
* After this, place the apples in a colander and let as much of the syrup drain off as possible.
* Place the apples on a sheet lined with parchment and dry in the oven or in the open air.
* Sprinkle dried candied fruits with granulated sugar or powder and store in a tightly sealed container in a dark place. The syrup can be sealed in sterile jars and used for baking and sweet desserts.
Candied apples can be stored for a year, until the next harvest, while retaining all the beneficial properties of the fruit. After all, apples are a real storehouse of vitamins and minerals. They contain a lot of iron and pectin substances, which slow down the aging process, remove cholesterol, improve stomach function and prevent the formation of tumors.
By eating 2 apples a day, preferably on an empty stomach or separately from other food, you bring great benefits to your body. Thanks to the large amount of iron contained in apples, they help strengthen the immune system and help with anemia and ailments. Apples are good for digestive disorders and stomach upsets as a mild fixative. Fresh apples They are recommended as the first complementary foods for children, because they absolutely do not cause allergic reactions.
Candied apples undergo minimal heat treatment and therefore retain everything valuable properties apples Candied apples can be served as a separate delicacy, or used as a filling for cakes, pies, pancakes, casseroles and other dishes.
Candied pears
For them, it is best to choose hard winter varieties; you can also use unripe pears or fruits that have lost their “marketable appearance.” Properly prepared candied pears will retain all the beneficial properties of these fruits and their magnificent aroma and taste.
Candied pears can be prepared by cutting the pears into slices and removing the middle, or you can prepare candied fruits from whole pears. After all, it is believed that the dense center and seeds of pears contain the greatest amount of useful substances and it is recommended to eat the pear “to the tail”. So let's get started.
Ingredients: 1.5kg. pears; 3 glasses of water; 0.5-0.7kg. Sahara; powdered sugar or sand for sprinkling
Preparing candied fruits:
* Wash the pears, pierce them in several places with a pin (if you are making candied fruits from whole fruits), or remove seeds, cut into small pieces of any shape.
*Place in a large saucepan and add boiling water.
* Strain, pouring the water into a separate pan.
* Boil syrup with this water: add sugar, boil and wait until the sugar has completely melted.
* Dip pear pieces into boiling syrup, boil for 5 minutes, remove from heat and cool at room temperature. Repeat this procedure 4 times.
* After the 4th cooking, the pears will become glassy-transparent. They are filtered, allowing the syrup to drain completely.
* Place the pears on parchment paper and dry for several days.
On the 2nd day, you can sprinkle them with powdered sugar and, if necessary, repeat this procedure several more times during the drying process.
Candied pumpkin
It turns out that candied fruits can be prepared not only from fruits, but also from vegetables. Delicious candied fruits can be obtained from pumpkin. For them, you need to choose sweet varieties of pumpkin for making porridges.
Pumpkin is a very healthy vegetable, indispensable in the cold season. It pleases us with its magnificent taste and aroma, when many other fruits have already withered. Candied pumpkin makes a wonderful treat that can be eaten alone or used for baking or sweet desserts.
The procedure for preparing candied fruits is somewhat reminiscent of making jam, but with some features and subtleties. So let's get started...
Ingredients: 1 kg. pumpkins; 400 g sugar; 200 ml. water; 1 lemon or orange; a little ground cinnamon; powdered sugar
Preparing candied fruits:
* Wash the pumpkin, remove the peel and seeds and cut into small cubes or stripes. Cut the lemon or orange into slices.
* Pour water into a saucepan and bring to a boil over medium heat, stirring constantly. When the sugar is completely dissolved in boiling water, the syrup is ready.
* Place chopped pumpkin and lemon (orange) into the syrup. Cook for about 5 minutes, cool and boil again for 5 minutes. The pumpkin should become soft.
* Drain the pumpkin in a colander and place on a baking sheet lined with parchment.
* Dry for about 1 hour in the oven at 130 degrees, or in the open air for 2-3 days.
* Roll the finished candied fruits in powdered sugar mixed with cinnamon.
ABOUT CANDIFIED CUTS
It is best to store candied fruits in glass, tightly closed. There is another way of storage: do not dry them, and do not cover the candied fruits with sugar, but place them hot, together with the syrup, in sterile jars and hermetically seal them, like regular jam.
In the future, they can be used to layer cake layers, decorate cakes and add to baked goods.
The name of this delicious delicacy comes from the Latin “sucus” - “juice”. In Italian it sounds like “sucada”, in German it sounds like “zukkade”, and the Russians simply borrowed it, replacing the voiced “d” with a soft “t”.
This event took place in the 14th century, when “dry jam”, as candied fruits were then called, was first brewed in Kyiv, and brought to the wedding feast of the Lithuanian prince Jagiello in 1386. But candied fruits gained wide popularity and fame in Russia much later. In the 18th century, Catherine II, who was very fond of candied fruits, issued a decree on the supply of candied fruits to the court.
At the same time, the first dry jam store appeared in Kyiv, opened by the merchant S.S. Balabukha. His products subsequently received many awards.
Nowadays there are a huge number of different sweets on the market, but not all of them are healthy. Candied fruits are made from natural raw materials and are a very good solution for a holiday or an occasion when you just want to eat something sweet. The best candied fruits are candied fruits homemade. But if you still decide to buy candied fruits in a store, you should pay attention to some features.
On the shelves you can see a large number of candied fruits, which are full of all the colors of the rainbow. They attract attention and you immediately want to buy them. But don’t rush to do this - most likely, these colorful candied fruits contain dyes. Checking for the presence of dye is simple: you need to put a piece of candied fruit in boiling water - if the water turns coloured, then there is definitely a dye.
Natural candied fruits, without any additives, look very unattractive compared to their “chemical neighbors”, but these are the sweets that are worth buying if you care about your healthy eating. Often sellers can convince you, for example, that bright red candied fruits are dried pieces of mango or other exotic fruits. But most often these are just dyed pineapples that are boiled in sugar syrup with dye. In this way, you can prepare candied fruits of different colors and, supposedly, from different tropical fruits.
Good, high-quality candied fruits should not be too wet and stick together, but at the same time they should not be too hard. This is easy to check - just press your fingers on the candied fruit in plastic packaging - it should be moderately elastic and should not release juice when pressed.