Jelly cake with fruits - the most delicious and quick dessert recipes without baking. Jelly cake with yogurt Yogurt jellied cake recipe
Yogurt cake has a very delicate texture, has a spectacular appearance and can easily decorate any festive table. The dessert is very easy to prepare. The only thing that needs to be taken into account is the time for the jelly layer to harden, so you need to start shaping the cake at least 6-7 hours before the planned feast.
The top layer of peaches in this recipe can be replaced with cherries, strawberries, blueberries and any other berries or pieces of fruit. Whatever the design, the yogurt cake turns out beautiful and delicious!
Ingredients: 
For the biscuit:
- eggs - 2 pcs.;
- sugar - 75 g;
- vanillin - a pinch;
- butter- 10 g;
- flour - 50 g.
For the yogurt filling:
- thick natural yogurt(without additives) - 700 g;
- powdered sugar - 170 g (or to taste);
- vanillin - a pinch;
- instant gelatin - 25 g.
For registration:
- canned peaches - 5-6 halves;
- jelly for cake - 1-2 sachets.
Yogurt cake recipe with step by step photos
How to make yogurt cake at home
- We are preparing a biscuit. Pour the eggs with sugar and beat for about 5-7 minutes. As a result, the egg mass should thicken and “grow” noticeably.

- Add a pinch of vanillin and sift the flour into the beaten eggs in small portions, knead from bottom to top until a homogeneous texture is obtained.

- Melt the butter, cool and then pour it down the side of the bowl into the dough. Stir.

- Bake the sponge cake in a mold with a diameter of 22 cm. Temperature - 180 degrees, cooking time - approximately 20 minutes. Cool the finished cake. Line the springform pan with parchment. Place a thin sponge cake on the bottom and lightly pour syrup from canned peaches to soak it.

- Combine yogurt with powder and a pinch of vanillin. Stir thoroughly. In our example, we use natural yogurt without additives (you can also use sweet yogurt, but in this case the portion of powdered sugar must be significantly reduced or completely eliminated).

- Pour instant gelatin into 100 ml of hot water (not boiling water), stir vigorously until the powder dissolves. Let cool, stirring occasionally.

- Add the dissolved gelatin to the yogurt, stirring continuously. Pour the jelly mixture into the sponge cake and put the mold in the refrigerator for 2-4 hours (until the yogurt layer hardens).

- Cut the peaches into thin slices and place them in a circle on the frozen yogurt.

- Prepare the jelly according to the instructions and pour over the cake. Place in the refrigerator again until the surface hardens. Ready dessert release from the mold, carefully remove the paper.

- Cut the delicate yoghurt cake with peaches into portions and serve. We store the dessert in the refrigerator (if left at room temperature for a long time, the jelly layer may begin to melt).

Enjoy your tea!
Light cake:- 1 egg
- 60 g flour (about 2 ⁄ 3 cups)
- 70 g sugar (just under 1 ⁄ 2 cups)
- 2 tbsp. sour cream
- 1 tsp baking powder (or 1 ⁄ 2 tsp slaked soda)
- The same as for light + 2 tbsp. cocoa powder
- 700 g plain yogurt (or cherry yogurt)
- 6 tbsp. Sahara
- 25 g instant gelatin (2 1 ⁄ 2 heaped tablespoons)
- 200 g cherries
- 3 tbsp. Sahara
- 15 g instant gelatin (1 1 ⁄ 2 heaped tablespoons)
- 50 g blackcurrants (or any other berries for decoration)

Preparation:
Preparing a light cake.
Beat the egg a little with sugar.

Add sour cream, mix. Add flour, baking powder (or slaked soda), beat until smooth.

Line the springform pan with baking paper.
Pour the dough into the mold and spread it evenly with a spoon.
Place in an oven preheated to 200 degrees. Bake for 15 minutes.

Preparing the dark crust.
Prepare in the same way as light cake, just add cocoa at the time of adding flour.

Distribute the dough evenly and bake in the same way.

Carefully separate the finished cakes from the paper and cool on a wire rack.

Pour gelatin into a glass, pour half a glass of hot water (not boiling water) and stir thoroughly for about 3-5 minutes until the gelatin is completely dissolved. Cool until warm, stirring occasionally.

Add sugar to the yogurt (if the yogurt is already sweet, then there is no need to add sugar).
Add dissolved gelatin to yogurt ( room temperature) and mix thoroughly (if the gelatin is too hot, and the yogurt is too cold, the gelatin may curdle).

Place dark cake layer on the bottom of the springform pan. Pour in half the yogurt.

Place light cake on top. Pour in the second half of the yogurt and smooth the surface.
Place in the refrigerator for at least 2 hours.

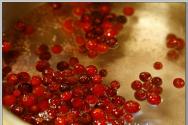
Add 300 ml of water to the cherries (leave a few cherries to decorate the top of the cake), bring to a boil and simmer for a couple of minutes.

Remove the cherries with a slotted spoon or strain. Add sugar, mix.
The most delicate, very tasty yogurt cake will not harm your figure, it is very light: with fruits or berries, sponge cake or without baking. Choose the best recipe!
This recipe uses gelatin to thicken the mixture. Instead of gelatin, you can use other thickeners, for example, agar-agar, which is made from brown seaweed.
If you want to make dessert faster and not waste time on baking, then you can save time on preparing the crust. That is, you can buy any cookie instead of a biscuit and use it.
For the soufflé
- 1 liter yogurt
- 100 grams of sugar
- 20 grams of gelatin
- 250 ml. cream
- Any fruit -200 grams
- Vanillin - to taste
For the test
- 230 grams flour
- 120 grams of kefir (can be replaced with yogurt)
- Soda – 1 tsp.
- 100 grams of butter
- 1 tbsp. Sahara
- A pinch of salt

Pour cream over gelatin and leave to swell.

While the gelatin swells, in a separate container mix the dry products - flour, salt, sugar, soda.

Add butter to the dry mixture and mix thoroughly until smooth.
To make the dough easier to knead, you need to remove the butter from the refrigerator in advance so that it becomes soft.

Transfer the resulting dough into a baking dish and place it in an oven preheated to 180C and bake until golden brown.

Place the fruits in a bowl and pour over the yogurt. I really love peaches, so I cut a couple of peaches into small pieces. You can add any fruit, banana, kiwi, strawberries, raspberries or even nuts. By the way, yogurt cake turns out very tasty with blueberries.

Add sugar to yogurt with fruit.

If you have the opportunity to replace sugar powdered sugar, then take advantage of this opportunity. You can grind the sugar in a coffee grinder.
The cream in which you soaked the gelatin must be placed in a water bath so that the gelatin is completely dissolved. However, do not allow the mixture to boil.
Pour the cream with gelatin into the yogurt with fruit and mix everything thoroughly.

Line the bottom of the springform pan with parchment paper and place the crust. Pour the liquid mixture on top of the cake and place our yogurt cake in the refrigerator for 4-6 hours.

Instead of parchment paper, you can take regular cellophane and line the bottom of the pan with it.
When our yogurt cake has cooled, carefully remove it from the mold and transfer it to a large flat plate.
Decorate the cake to your taste. You can sprinkle grated chocolate and coconut on top.
Recipe 2, step by step: yogurt cake with pineapples
The cake turns out wonderful, the tender and fairly low-calorie mousse goes well with pineapples.
If you wish, you can make a cake with other fruits or berries, but I recommend trying it with pineapple at least once. This is not difficult, because the cream with gelatin does not require effort, and anyone can bake a sponge cake.
- Wheat flour – 50 gr.
- Starch (potato or corn) – 20 gr.
- Chicken eggs – 2 pcs.
- Sugar – 50 gr.
- Vanillin – 10 gr.
- Baking powder – 1 tsp.
for cream:
- Natural yogurt – 600 gr.
- Heavy cream – 400 gr.
- Vanillin – 10 gr.
- Sugar – 130 gr.
- Gelatin – 25 gr.
- Pineapple rings – 1 jar
- Pineapple pieces - 1 can
for jelly:
- Pineapple syrup – 300 gr.
- Water 50 gr.
- Gelatin – 10 gr.

Pour gelatin with cold boiled water and stir. Leave to swell.

Mix the sifted flour with starch and baking powder.

In another bowl, combine eggs at room temperature with vanilla, sugar and beat with a mixer for 5 minutes.

Now carefully, in several stages, pour the flour mixture into them, stirring constantly.

Line the bottom of the pan with baking paper, without greasing the sides. Distribute the dough evenly.

Place the pan in an oven preheated to 190 degrees for 15 minutes.

Cool the biscuit to room temperature.

Remove the biscuit from the mold.

We wrap the sides of the springform pan with cling film. Place the biscuit there.

Cut the pineapples in half and leave them alone for now, mix the yogurt with sugar and vanilla, and beat.
Heat the gelatin in a water bath and carefully pour it into the yogurt.

Whisk the cooled cream until it becomes thick. Carefully, preferably smoothly and in several steps, pour the yogurt mixture into it.

We grease the top of the sponge cake with yogurt mixture (this will be cream), and place half rings of pineapples on the sides.

They also need to be thoroughly coated with cream so that it covers the cake and put in the refrigerator for 2-3 hours.

Pour gelatin cold water, let it swell. Then we heat it again and melt it completely in a water bath. Mix with pineapple juice and cool slightly.

Take the cake out of the refrigerator and place pineapple pieces on it.

Pour over the jelly, distributing it evenly.

Place in the refrigerator for 5-7 hours. We remove it, free it from the film and form.

Cut it into nice pieces and try it. Bon appetit!
Recipe 3: Delicate yogurt cake with berry jelly
We all think about healthy and low-calorie nutrition, which is why today we will prepare a light cake for homemade yogurt. It is very simple to make, and how beautiful it turns out is a sight for sore eyes.
- Milk 1 liter + 300 ml
- Yogurt starter 1 sachet (Oursson company)
- Gelatin 30 grams
- Tangerine juice 2 tablespoons
- Sugar 5 tablespoons
- Cocoa 1 tbsp
- Jelly 1 sachet
- Water 200 ml
- Berries for decoration
- Pineapple 0.5 cans (canned)

First of all, let's make yogurt at home. We will need 1 liter of pasteurized milk and 1 sachet of yogurt starter. We dilute the starter in milk and cover it overnight in a warm place. In the morning we have thick and delicious natural yogurt ready.


Mix yogurt with sugar and tangerine juice mixer. If you like sourness, you can use lemon juice.


Take ¼ of the yoghurt-milk base and add cocoa and mix.


At this time, you can make the top berry layer. We will need 200 ml of boiling water, some berries, I took black currants and 1 bag of berry jelly.


Fill the cake with a layer of berry jelly and put it away freezer for 10 minutes. All is ready.

The cake turns out to be very light and tender, it is a pleasure to prepare, and it turns out so beautiful and bright. Choose jelly of any taste and color, berries are also at your discretion. Bon appetit.

Recipe 4: Homemade Yogurt Spinach Cake
This dessert is very pleasant and delicate taste. It is moderately sweet, and the taste of spinach is not felt in it at all!
- spinach – 500 gr
- vegetable oil - 200 gr
- sugar - 200 gr
- chicken egg - 4 pcs
- flour - 400 gr
- baking powder - 15 g
- vanilla sugar - 15 g
- natural yogurt – 500 gr
- powdered sugar - 150 g
- cream 35% fat - 300 ml
- canned pineapples - 1 can
- gelatin - 10 g

Let's prepare the cream for the cake. Take a deep glass container and place thick natural yogurt in it. It must be absolutely pure, without dyes or various flavoring additives.

Sift the powdered sugar through a sieve and add to the yogurt. This will make the cream more airy and light.

Take a mixer, set the speed to medium (no longer necessary) and thoroughly beat the yogurt with powder for 7-10 minutes.

Pour 150 ml of cream into a separate container. Add gelatin to them and mix well. Let them sit like this for a few minutes. Then make a water bath and heat the cream in it. Let the gelatin dissolve completely (remember to stir constantly). After the gelatin has dissolved in the cream, cool it completely.

Add the remaining 150 ml of cream to the cooled cream mass and continue whipping with a mixer. This time beat until a thick, thick foam forms.

Gradually add whipped cream to the yogurt mixture. First add one third part and mix everything thoroughly with a spatula. After this, add the remaining cream in two more stages. Mix the future cream thoroughly, cover with cling film and place in the refrigerator.

In the meantime, we will prepare our healthy sponge cake. In a separate container, mix eggs with sugar.

Mix them well and let sit for a few minutes until the sugar is completely dissolved. Then take the mixer, set the speed to maximum and beat until the volume increases 4-5 times.

Now let's get to the most interesting ingredient of the yogurt cake. If you have frozen spinach, remove it and defrost it. Spinach must be rid of excess liquid by gently squeezing. Add vegetable oil to the spinach and blend in a blender until smooth, so that there are no whole particles of spinach leaves.

Add beaten eggs with sugar to chopped spinach. Beat well with a mixer. Meanwhile, sift wheat flour with baking powder for dough. Gradually add flour to spinach and mix thoroughly. You shouldn’t pour out all the flour at once, because if you added small eggs, you will need a little less flour. The spinach dough should be dense in consistency, but quite elastic. Thanks to the vegetable oil that we added to the dough, it will be smooth and soft.

Take a round baking dish. Cover the bottom with parchment paper and grease the sides with refined vegetable oil. Place spinach batter into pan. Preheat the oven to 180 degrees and bake for 40 minutes. It is advisable to take a mold with a diameter of 25-27 centimeters. You can bake spinach cake in a slow cooker (this is the option shown in the photo); the time and temperature must be set to the same as for the oven, or select the “Baking” mode (in this case, the cake will bake longer: 55-60 minutes).

After the biscuit is baked, let it cool slightly, only then you can remove it from the mold or multicooker. While it is cooling, remove the cream from the refrigerator and let it warm up a little - this will make it easier to apply it to the baked sponge cake.

Cut the completely cooled biscuit into three pieces crosswise. Make the top cake a little smaller, as it will be used to decorate the cake. You can only cut a completely cold sponge cake, otherwise you will damage its integrity and cut it into uneven cakes. When cut, the spinach sponge cake looks even brighter and juicier!

Open the can of pineapple and pour the syrup into a separate container. Take a silicone brush and brush the first and second cake layers with pineapple syrup: this will make the yoghurt cake juicier and more moist.

Let's start assembling our cake. Place the first layer of the future cake on a plate and generously coat it with cream. Place canned pineapples on top. If you don't want to stack whole rings, you can cut them into small cubes.

Place the second cake layer behind the pineapples and spread the rest of the yogurt cream. Gently spread the cream over the sides of the cake.

Break the top layer of the biscuit into pieces and grind in a blender until smooth crumbs.

Take the crumbs into your hand and sprinkle generously on all sides of the yoghurt cake, paying special attention to the sides. Make sure that no white cream is visible through the green crumbs. Due to the crushed crumbs, it looks like it's fluffy.

Place the yogurt cake in the refrigerator for several hours until it is completely soaked. You can decorate it with whatever you want. However, red berries on a green background will look very colorful and contrasting (you can add strawberries or raspberries).

After a night in the refrigerator, you can cut an unusually beautiful yogurt cake.

Recipe 5: how to make a delicious yogurt cake (step by step)
Light, tender and airy yogurt cake. An excellent treat for guests and children. It’s not for nothing that French pastry chefs came up with this incredible cake.
- Sour cream 200 gr
- Wheat flour premium 150 gr
- Chicken egg 3 pcs
- Sugar 100 gr
- Soda 1 tsp
- Gelatin 15 gr
- Yogurt 300 ml
- Vanilla sugar 1 g
- Cream 50 ml

Beat the egg with sugar until white.

Add slaked soda and sour cream, mix.

Now add flour. Mix everything until smooth so that there are no lumps.

Grease the pan or line it with parchment. Pour out half the dough. Bake in a preheated oven for 30 minutes at 180 degrees.

While the cake is baking, prepare the cream. Soak gelatin in cold water. When it swells, melt it over the fire until it boils.

Mix yogurt with powdered sugar, vanilla and cream. Mix. Add melted gelatin and refrigerate for an hour. After a while, take it out and beat it well with a blender. You will get a cream mousse.

Cool the finished cake. You can leave large cakes, or you can make mini cakes. Using a glass, cut out identical circles using notches.

Then we put the cake layer, pour it with cream, again cake layer with cream and secure it with cake layer.

At the end, the top can be sprinkled with powder, cocoa or decorated with fruit. Bon appetit.

Recipe 6, simple: delicious yogurt cake with jelly
- 3 eggs
- 150 gr. flour
- 150 gr. Sahara
- 1 liter yogurt
- 2 packs of gelatin (30 g)
To prepare the sponge cake, take eggs and separate the whites from the yolks.
Lightly beat the yolks with a mixer, add half the sugar and beat well again. The yolks should lighten a little.
Then beat the whites separately until foam forms.
Add the remaining sugar to the whites and beat well again.
Add the resulting mixture to the whites whipped with sugar and mix well again until smooth.
Place the resulting dough in a mold and place it in the oven, preheated to 180 degrees for 25-30 minutes.
Meanwhile, pour the gelatin out of the pack and dissolve it in 50 ml of hot boiled water, leave for 10-15 minutes so that the gelatin completely dissolves and swells.
Pour the dissolved gelatin into the yogurt and mix well
When the sponge cake is cooked, you need to place it in a tall container, with a diameter slightly smaller than the diameter of the sponge cake itself, so that it lies tightly on the bottom. Pour yoghurt with gelatin on top of the sponge cake and put it in the refrigerator to harden.
When the cake has hardened, remove it from the container.
To make it easier to remove the cake from the mold, you can run a hot knife along its edges. Place the cake on a plate and decorate as desired.
Recipe 7: No-Bake Fruit Yogurt Cake (with photo)
- any fruit yogurt – 800 grams,
- gelatin – 15 grams,
- cookies – 300 grams,
- butter – 150 grams,
- peaches – 2 pcs.,
- bananas – 2 pcs.,
- lemon juice - 1 table. l.,
- sugar – 150 grams,
- water – 250 grams.

Pour gelatin with warm water, squeeze out lemon juice and stir. Leave to swell for 20 minutes.

In the meantime, other processes await us. Grind the cookies into fine crumbs.

Melt the butter and pour it over the cookie crumbs. Stir and we have a base for the cake.

Line a springform pan with baking paper and place cookie crumbs on the bottom, placing them evenly, without gaps along the bottom.

Cut fruits: bananas into slices, and peaches into slices.

Place a layer of bananas on the cookie crust.

Pour sugar into the fruit yoghurt and mix the mixture. To make the cake sweet and tasty, it is better to add sugar to the yogurt, because sugar will dissolve better in liquid.

Pour the swollen gelatin into the yogurt and stir the mixture. Gelatin is unsweetened, so you need to add sugar. Some may think that yogurt is already sweet, but do not forget that we diluted gelatin in a whole glass of water and this mass is all unsweetened.

Slowly pour jelly yogurt over the cake. Why slowly? To avoid knocking the bananas out of place.

Place the peach slices on the jelly and place the cake in the refrigerator to set. The cake will harden for about 2 hours.

Serve this wonderful frozen yogurt cake.

Recipe 8: Blueberry Yogurt Cake with Berries
Amazing a delicious cake With the most delicate cream yogurt based. Ideal for sweet lovers who have to limit calories: vanilla sponge cake without oil, yogurt cream without oil.
- Cream 33% 400 ml
- Medium egg 3 pcs.
- Blueberries (can be frozen) 400 g
- Vanilla sugar 40 g
- Sugar 200 g
- Sugar 50 g
- Gelatin 25 g
- Flour 70 g
- Water 70 ml
- Starch 40 g
- Baking powder 1 tsp.
- Fresh blueberries or raspberries 100 g
- Powdered sugar
- Yogurt without additives 400 g
First, prepare the vanilla sponge cake. Separate the whites from the yolks of 2 eggs. Mix the remaining egg and 2 yolks with sugar and vanilla sugar.
Grind the mixture well, preferably with a mixer.
Add sifted flour, starch and baking powder to the dough.
Stir.
Beat the whites into a stiff foam. The whites should be at room temperature, then it will be easier to beat. I also recommend adding a pinch of salt.
Mix in spoon by spoon egg whites into the dough and stir. Stir from top to bottom using folding movements.
Take a springform pan with a diameter of 26-28 cm and line the bottom with baking parchment. Grease the paper with oil.
Pour the dough and bake in the oven at 180 C for 20 minutes.
Prepare blueberry-yogurt filling. Add sugar to blueberries and set to heat. Bring to a boil.
Boil for 2-3 minutes over low heat. Then beat with a blender and cool.
Meanwhile, the biscuit was baked. Remove it from the springform pan.
Carefully cut off the crust from the edges (the biscuit is fried there). If you have a mold with a diameter of 22-24 cm, then it is better to assemble the cake in it; the cut cake will be just the right size. But you can do it in the same form in which the base was baked, the cake will just be lower. Cover the entire mold with cling film. Both the bottom and the sides.
Let's get back to the filling. The blueberry mixture has cooled to a manageable temperature.
Add yogurt to the cooled berry mixture. I had homemade natural yogurt, but you can use store-bought natural yogurt without additives. Just not for long-term storage, there is little useful in it. Stir.
Now strain the blueberry-yogurt mixture through a sieve.
At this time, soak the gelatin in 70 ml of water, heat to 60 C, stirring constantly so that all the crystals dissolve. Do not let it boil! Cool.
Pour the gelatin into the filling, whisking.
Lightly whip the cream and add to the filling. Whisk everything together again. And pour it onto the biscuit base.
Place the cake in the refrigerator for 2 hours until the filling has completely hardened.
For decoration, I recommend laying out strong fresh berries, sprinkle them with powdered sugar. You can also decorate the cake with fresh mint leaves and almond petals.
Almost everyone loves sweets, pastries, and cakes. However, not every person can afford to pamper themselves with them every day, and what can we say when there is already a problem with excess body weight? This is why many people have to give up sweets. However, today, culinary experts, taking care of the beauty of the body, have tried to create desserts that, when enjoyed, will not put on weight, of course, if you eat them within reason.
These figure-safe treats include:
- Yogurt;
- Jelly-fruit;
- Curd cakes.

For those who did not know about the existence of curd cake in nature, here is a recipe: an unusually tender, airy and beautiful cake with fruit will be the most desired dessert on your table! You will have to work a little, however, the result will make you so happy that you will lick your fingers!
The cake does not contain flour; it is prepared with the addition of cream, strawberry syrup, and a curd dessert served with fruit. Plus cheese cake with gelatin eliminates baking, the oven will rest.
Ingredients (for 8 persons):
- cottage cheese with zero fat content - 500 g;
- drinking cream 10 percent - 1 glass;
- sugar - 150 g;
- vanillin - 1 packet;
- strawberry syrup - 2 tablespoons;
- gelatin - 50 g;
- assorted fruits - 250 g;
- confectionery gel - 100 g (can be replaced with gelatin).
Prepare dishes with removable sides. Cooking steps:
- First, soak and mix the gelatin in cold boiled water. When it swells, it can be used further.
- Froth the cream with sugar using a whisk or blender, add cottage cheese, granulated sugar and vanillin, stir until the consistency of sour cream.
- The gelatinous mass must be heated on the stove or in microwave oven, avoiding boiling. Cool to room temperature.
- Combine the two resulting compositions and mix thoroughly.
- Cake with curd cream will be flaky. Pour the first level into the dish.
- Make fruit slices and place them on the first layer.
- The third layer is again dedicated to the main “test”.
- Fourth - fruit.
- The final filling is made with curd mass. We aesthetically place the fruits prepared for the top layer on it.
- If you have pastry gel in your kitchen, you should pour it over the cake for the finishing touch. The gel is replaced with ordinary gelatin, which is kept in cool water, then heated, and cooled again. You don’t have to use this point and finish with assorted fruits.
- Place the sweet in the refrigerator for 8 hours.
- Carefully separate the removable form and place the treat on a plate.
The dessert is worth all the effort, it’s a pity to cut it, you just want to take pictures and enjoy the aesthetic view. Tip: keep the signature recipe for a delicate curd cake a secret and surprise your guests again and again. The husband, losing weight girlfriends, and children will enjoy the treat.
In addition to its external beauty, cottage cheese cake is also very healthy, cottage cheese contains calcium, assorted fruit contains vitamins, gelatin contains collagen, which has a beneficial effect on joints.

He is the king of the holiday, the freshness of summer, the lightness of the morning! This No-Bake Yogurt Cake with Cookies deserves the highest praise and the title “Protector of Slimness.” Everyone will look forward to the tea party; the hostess will amaze the guests with the lightness of the treat. Low-calorie cake melts in your mouth!
It is prepared without baking, with cookies at the base. Yogurt cream for cake will amaze unusual taste. Being a diet cake is no guarantee that you will lose weight, however, compared to some fatty confectionery products, hard to digest, this yogurt cake is simply delicious.
Ingredients (for 8 persons):
- shortbread cookies - 250 g;
- granulated sugar - 6 tablespoons;
- butter - 100 g;
- classic yogurt - 500 g (use non-sweet yogurts);
- low-fat cream - 200 g;
- gelatin - 20 g;
- berries (strawberries, raspberries, blueberries - to choose from);
- boiled water - half a glass;
- milk - 6 tablespoons.
How to cook:
- Use a blender to turn 250g of biscuits into crumbs.
- Mix the melted butter with the resulting mass and two tablespoons of sand. The result is a base for the dish; without baking, the cake should be placed in a springform pan so as not to damage the integrity before serving. If there are no dishes, cling film, previously spread on the bottom and walls of any deep container, will come in handy.
- This is a recipe with several layers, a yogurt cake that does not involve the use of an oven, the base is a cookie “dough”. Pack the first layer tightly with a homogeneous mixture of cookies. You can mold the sides. Place the container with the base in the cold for several hours.
- Soak gelatin in warm milk and cool.
- While the base and gelatin are cooling, start making the yogurt cream for the cake. You should thoroughly froth the cream with a mixer.
- Mix yogurt, cream foam and granulated sugar. Combine the mixture with gelatin and mix thoroughly.
- Slowly pour yoghurt cream for the cake into the first layer of cookies. Place the dishes back in the refrigerator.
- Yogurt cake involves a final layer of berries, recipe: water, two tablespoons of sand, soaked gelatin, mix and heat, add berries, grind everything with a blender. Once the berry layer has cooled, place it as a third layer on top of the yoghurt cream for the cake.
- Place the resulting beauty in the cold, then decorate with berries. Yogurt cake made from cookies, soft cream and yogurt itself - airy and healthy dish, which will be eaten in a matter of minutes.

This treat can be made quickly; it is made without baking with gelatin - you don’t have to fuss with dough and shortcakes. The base consists of milk jelly: A diet cake with delicious jelly will appeal to guests who will eat it on both cheeks. Below is step by step recipe with a photo that will reveal this culinary secret.
- low-fat cottage cheese – 500 g;
- sugar – 100 g;
- eggs – 3 pieces;
- butter – 100 g;
- gelatin – 20 g;
- milk – 300 ml;
- fruits – 150 g;
Cooking technology:
- Jelly for the cake: pour two tablespoons of hot water over the gelatin, break up all the lumps and dissolve it.
- Heat half a glass of milk in the microwave and mix with gelatin liquid.
- Pour our jelly into a removable cake pan and refrigerate.
- The cake will be made with curd cream; to do this, grind and foam the butter with granulated sugar and egg yolks, form a second layer of the dish, repeat the manipulation in the refrigerator and let the jelly delicacy harden.
- Decorate your masterpiece with fresh fruit. Recipe low calorie cake It’s extremely simple, cook it more often and enjoy the weightlessness of its soufflé.

Delicious curd cake with cookies is a wonderful breakfast and afternoon snack that your family members will love. Diet cake does not contain many calories, so do not deny yourself this indulgence.
- 3 packages of cookies – approximately 300 g;
- low-fat cottage cheese – 200 g;
- yogurt – 250 ml;
- gelatin – 10 g;
- sugar – 2-3 tablespoons;
- black tea.
How to cook:
- Brew tea, strain, add a teaspoon of sugar.
- Soak gelatin in cold water, then heat.
- Make a homogeneous mass from the dairy products indicated in the composition, mix with the gelatin mixture.
- It is best to place a cake with curd cream in a glass container, having previously laid a film in it.
- Dip a third of the cookies into the tea leaves for half a second, place a thick layer on the bottom of the container, spread part of the milk layer on the second floor, alternate in this way twice.
- Sprinkle the curd-yogurt cake with crumbled cookies, set to cool, then carefully pull out the film and serve.
A no-bake cake is faster and easier to prepare, and can be given to children without fear of burns from oven. The cake is curd and yogurt; its content of natural fermented milk products and protein benefits the body. The prepared cake with curd cream has a soft consistency and interesting taste. The cake recipe can be diluted by adding fruits and berries.
Ingredients:
4 oranges
750 g yogurt (8 95 g serving cups)
2-3 bananas
30 g gelatin
250 ml orange juice
Sponge cakes
You will also need food-grade polyethylene, approximately 50 by 50 cm. Cheese and other products in stores are usually wrapped in such polyethylene.
The first thing we did was pour in gelatin. orange juice to swell and dissolve.

This will take 30-40 minutes, so you can start cutting fruit and sponge cakes. The cakes were cut into cubes. There are three of them in the standard package, two were enough for us.

We do the same with bananas - only smaller cubes.

Oranges were cut into slices. And then they peeled the zest from them.

And at this stage the question arose: what are we going to lay and fill all this splendor with? Initially it was assumed that our jelly cake would be spherical. It is advisable to have special molds. But since we were not able to purchase them on time, a large deep frying pan came to the rescue, exactly the shape from the inside that was required.

Line the bottom of the pan with polyethylene. Polyethylene is needed solely to make it easier to get the finished jelly cake out of the mold (in case it sticks!), so it should extend beyond the edges.
The orange slices go first - we line the bottom of the pan with them as tightly as possible.

Then came the biscuit squares.

Next are bananas.

If there is space left, then oranges, biscuit and bananas again - until they have filled the entire space of the form.
By that time, gelatin had already “made friends” with the juice. To make this friendship stronger, we put them on the stove and heat them up, but not to a boil. Stir without leaving lumps and let cool to the same temperature. Now we add yogurt to this company.